Nintex Community Menu Bar

NWC currently does not have the feature to insert a Repeating Section into a Task Assign Form.

The workaround is to generate a HTML Table using loops 


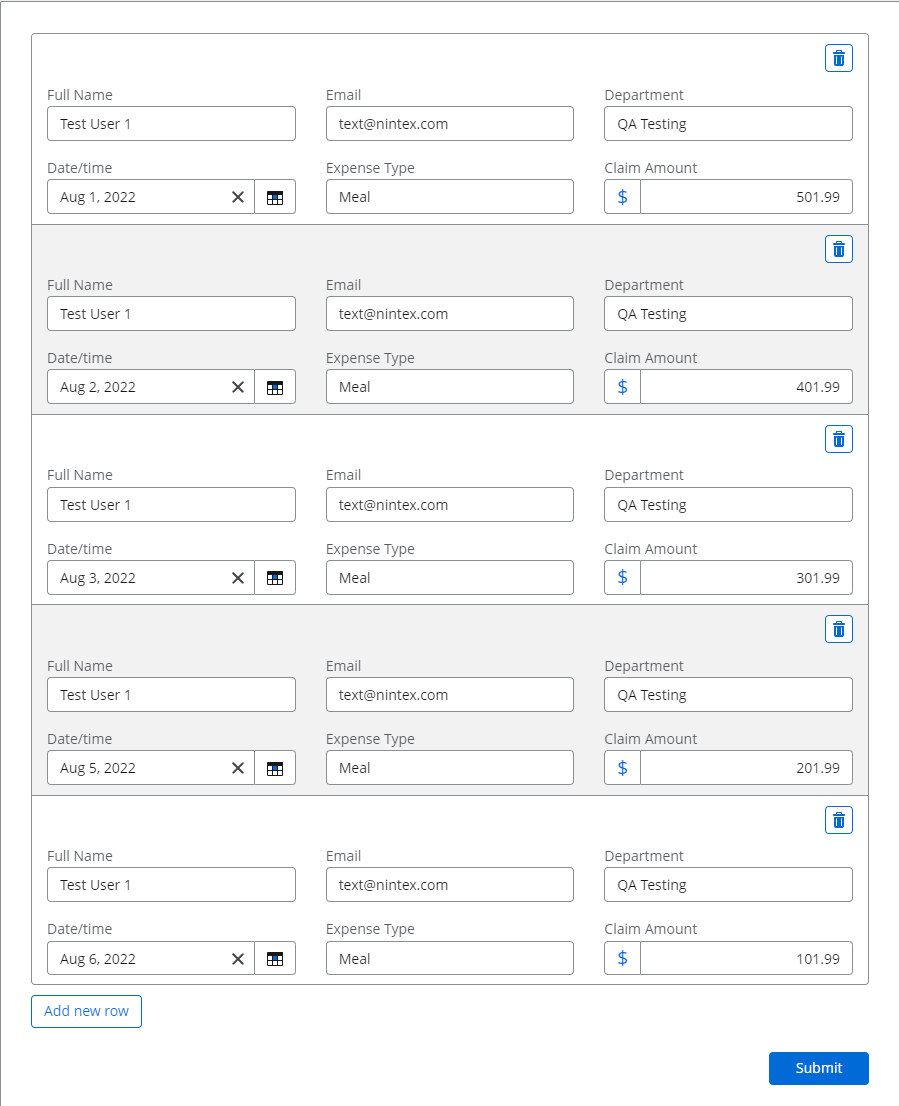
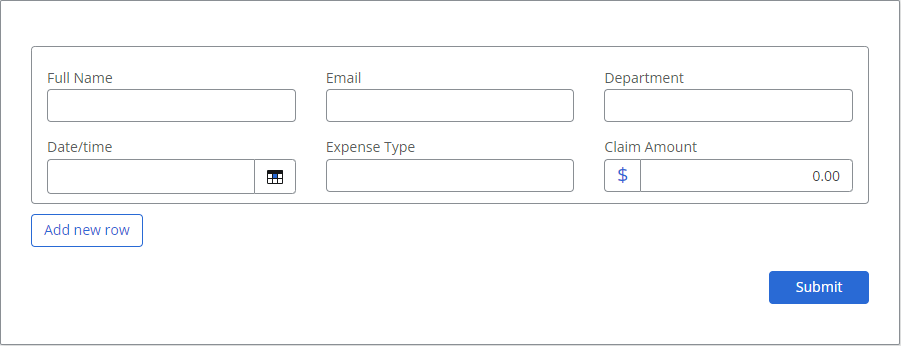
Form with Repeating Section

Add a Repeating Section.

Add some controls into the Repeating Section
25825iB2E3E0D04C144D09.png


Filling out the form

25826i0C743955FEBE4CFF.png


Creating HTML Table - Method 1

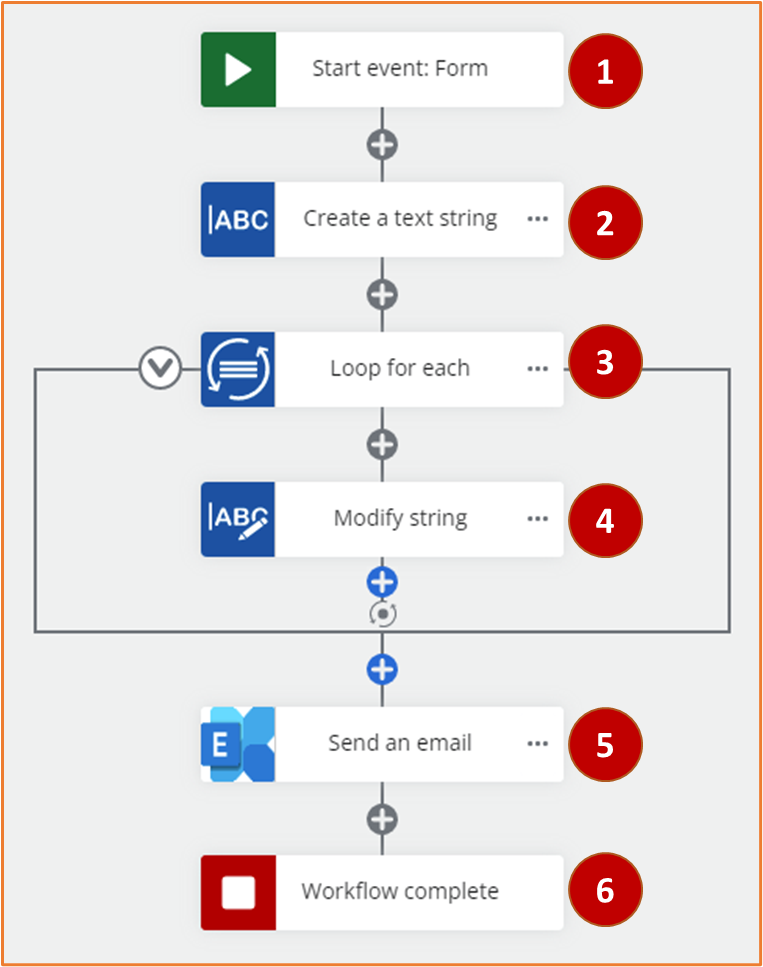
This is one possible route.
25828iDF3BDF2339852F79.png


1. Start Event: Form

Build the form with a Repeating Section that contains other controls.

25825iB2E3E0D04C144D09.png


2.  Create Text String

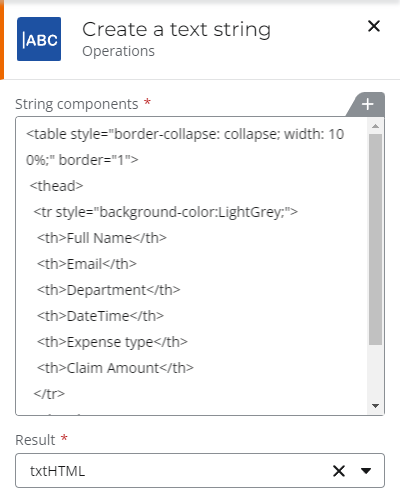
This is the HTML Table Header. 
25829i83B9BA39E4592448.png

The full content is shown below

<table style="border-collapse: collapse; width: 100%;" border="1"> <thead> <tr style="background-color:LightGrey;"> <th>Full Name</th> <th>Email</th> <th>Department</th> <th>DateTime</th> <th>Expense type</th> <th>Claim Amount</th> </tr> </thead> <tbody> </tbody></table>


3. Loop For-Each

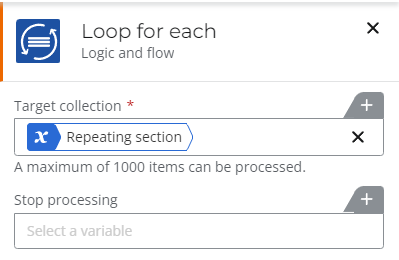
The For-Each loops against the "Repeating Section" collection variable.
25830iF9B7FC11883382D0.png


4. Modify String

This is where the magic happens. We insert the new row data.

We retrieve the value for each field using the "Loop for Each" - "Current Item" - <field>
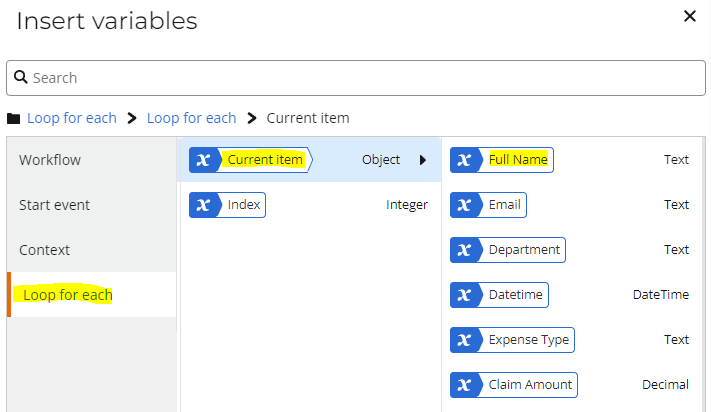
25833i781419AC3BA70AED.png

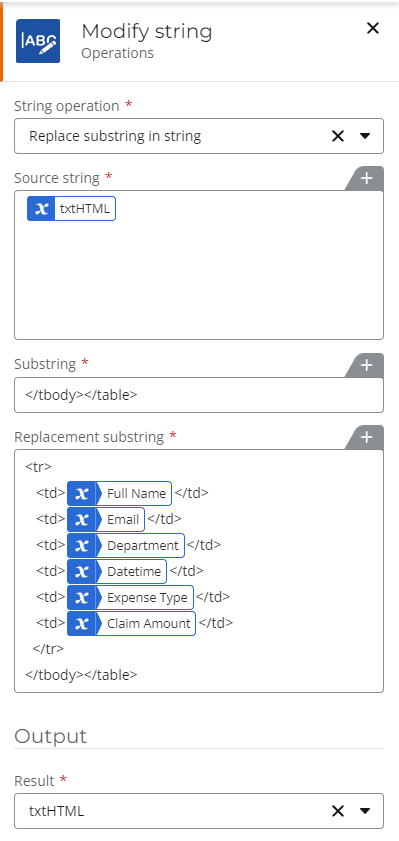
We use the Modify String - Replace function to build our table.

Source: txtHTML

Search substring: </tbody></table>

Replacement substring: New row. Refer to image

Output: txtHTML

Most important, we save back the new value into txtHTML

The For-Each loop will process all the repeating Section rows.
25831i906D5E1BA8F3E3EE.png


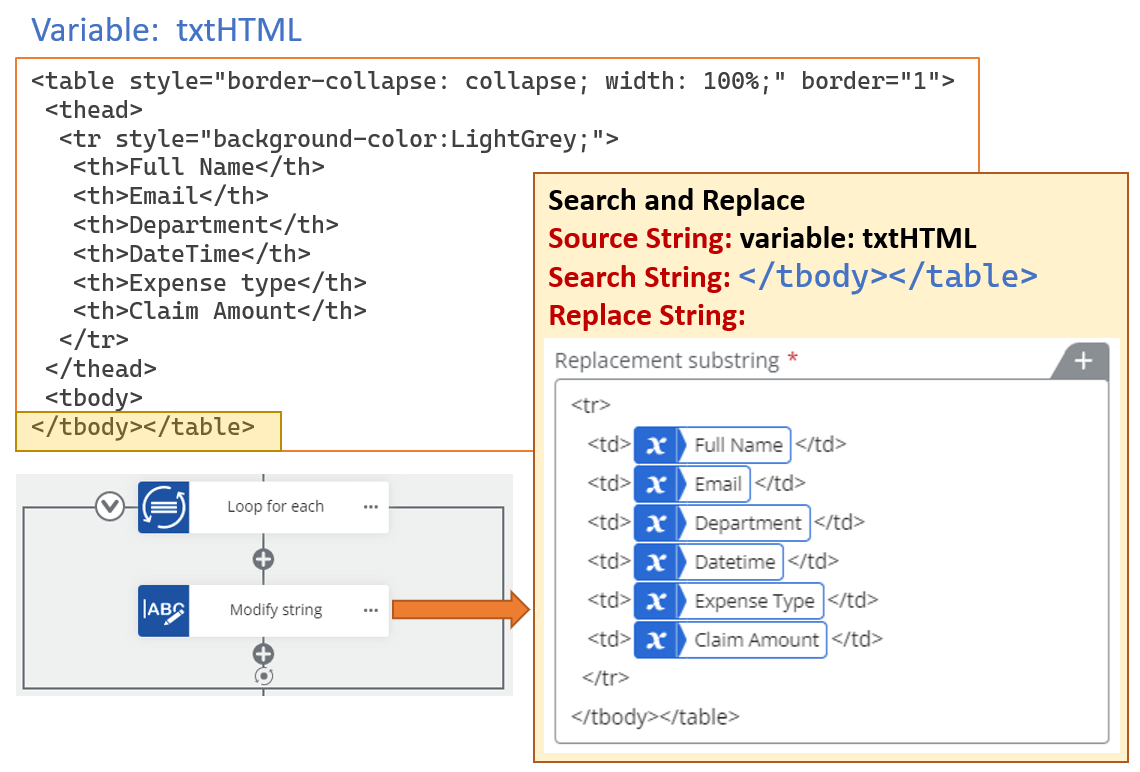
Detail Explanation

We have the initial txtHTML variable which contains the Table Header.

The For-each loop process each row of the Repeating section.

We append new rows into txtHTML variable using the Modify String - Search and Replace feature.

We search for "</tbody></table>" string. Then replace it with the new Row data.

Then we save back the value into the txtHTML variable. 
25832iC22640941A685DDD.png


5. Send an Email

We insert the txtHTML variable into the body of the Email.


6. Workflow complete

The workflow ends.


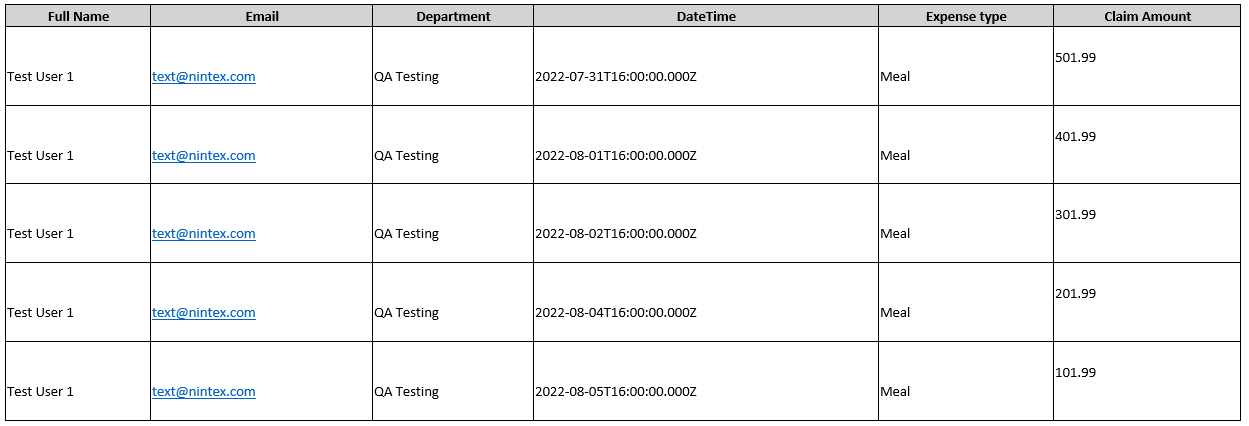
The Final Result

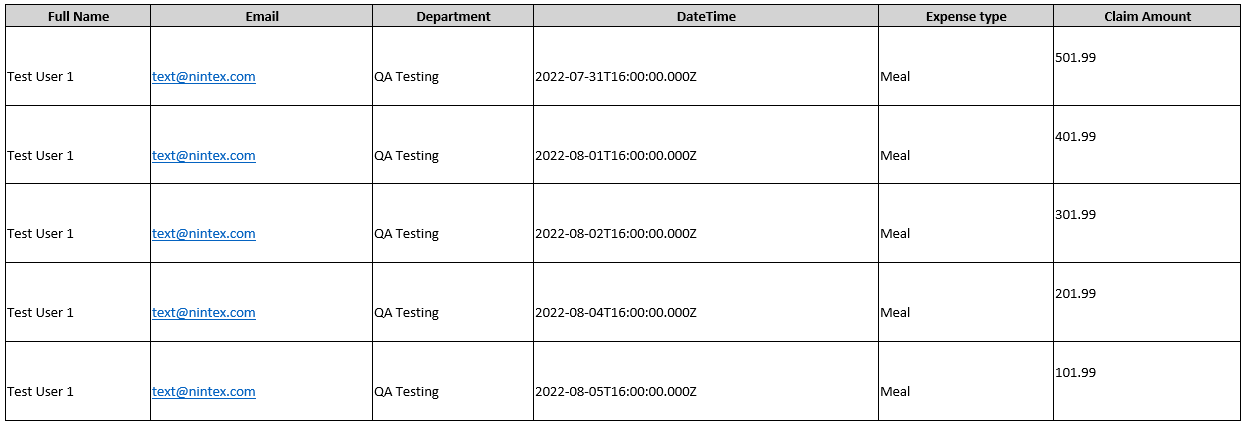
The content of the Email - The HTML Table
25834i3785A1D01884FE51.png


The End  - Part 1


Yeah! we manage to insert the Repeating Section as a HTML table into the email.


However, what you may have notice is that the HTML table has introduce artifacts into the html.


I don't have an explanation how the artifacts  are introduced - perhaps a Nintex Engineer can look into this.


The codes that we use to build the HTML table should make the table look like below


Let's see how we can build HTML Table codes without artifacts.


Form with Repeating Section


Same as previous


Filling out the form


Same as previous


Creating HTML Table - Method 2


Here is another possible route.


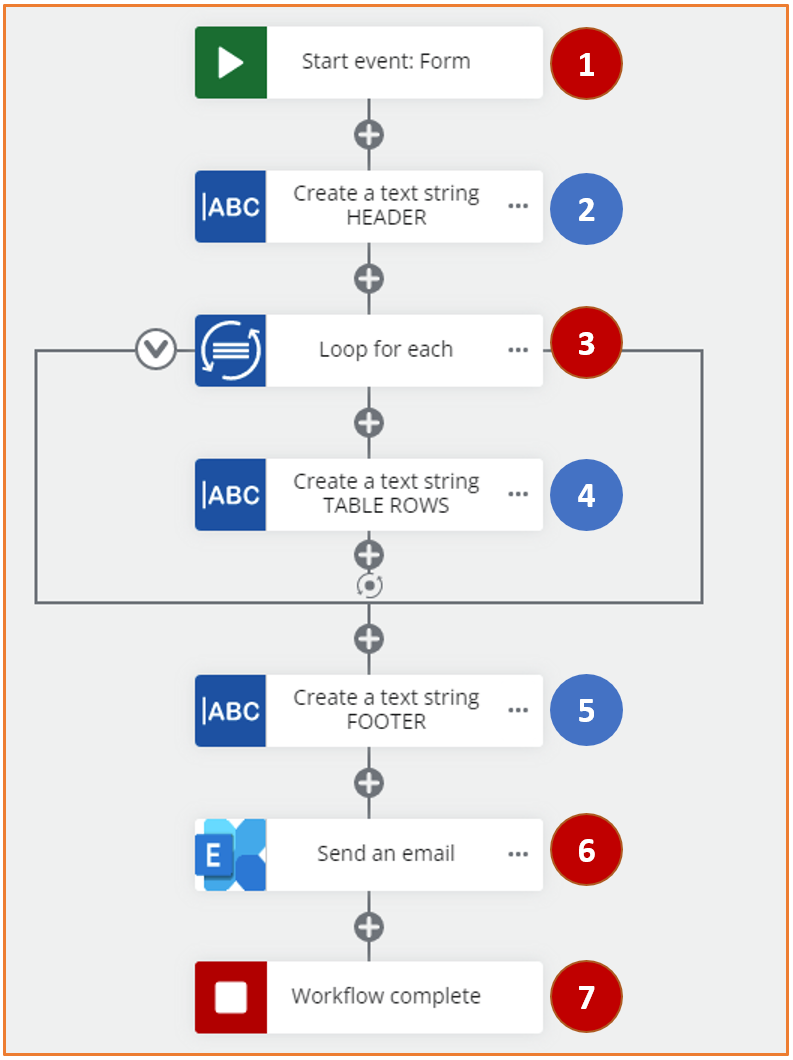
1. Start Event: Form


Same as previous


2.  Create a Text String - HEADER


This is the HTML Table Header. 


The difference this time is that, we omit the last line.


<table style="border-collapse: collapse; width: 100%;" border="1">

<thead>

<tr style="background-color:LightGrey;">

<th>Full Name</th>

<th>Email</th>

<th>Department</th>

<th>DateTime</th>

<th>Expense type</th>

<th>Claim Amount</th>

</tr>

</thead>

<tbody>


The last line has been remove


</tbody></table>


3. Loop For-Each


The For-Each loops against the "Repeating Section" collection variable. Same as previous


4.  Create a Text String - TABLE ROWS


This is where the magic happens. We insert the new row data.


We retrieve the value for each field using the "Loop for Each" - "Current Item" - <field>


Key Difference: We are using "Create a Text String" instead of "Modify String" - "Search and Replace"


We take txtHTML, add the new table row and save back into txtHTML


Notice that we don't have the closing table body and closing table tag "</tbody></table>"


We will need another "Create a Text String" after the loop.


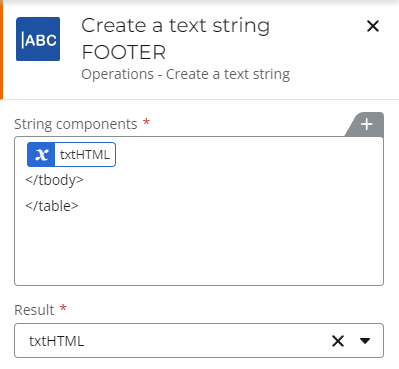
5.  Create a Text String - FOOTER


Here is where we put the closing table tags. "</tbody></table>"


6. Send an Email


We insert the txtHTML variable into the body of the Email.


7. Workflow complete


The workflow ends.


The Final Result


The content of the Email - The HTML Table


The HTML Table is much nicer compared to Method1 table


The End  - Part 2/2


Reply