

Topic
K2 Workflow REST API uses Basic authentication by default. If you have requirements to use the API with OAuth, then additional configurations will be required. Please note that this article only applies to scenario where you want AAD users to have access to the Workflow REST API via OAuth.
You may have come across this article (Configure K2 for Inbound OAuth) which demonstrates what you need to configure to allow the Workflow REST API to use OAuth. That article states you have to add the permission from the "K2 API" app your AAD app.
However, you may not be able to find this "K2 API" app when you try to search for it. This article will guide you through on how to create your own "K2 API" app.
Pre-requisites
Your K2 environment needs to be configured to allow AAD users to login to K2. Please refer to this document (Manually Configure K2 for Azure Active Directory) if you have not done so.
Instructions
- Go to https://portal.azure.com and select Azure Active Directory.
- From the left menu, select App Registration.
- If you have previously manually configured your K2 to use AAD for authentication, you should find the AAD app that you have created previously here.
- Click on New Registration to create a new app.
- Give the app a name, and enter https://api.k2.com for the Redirect URI.
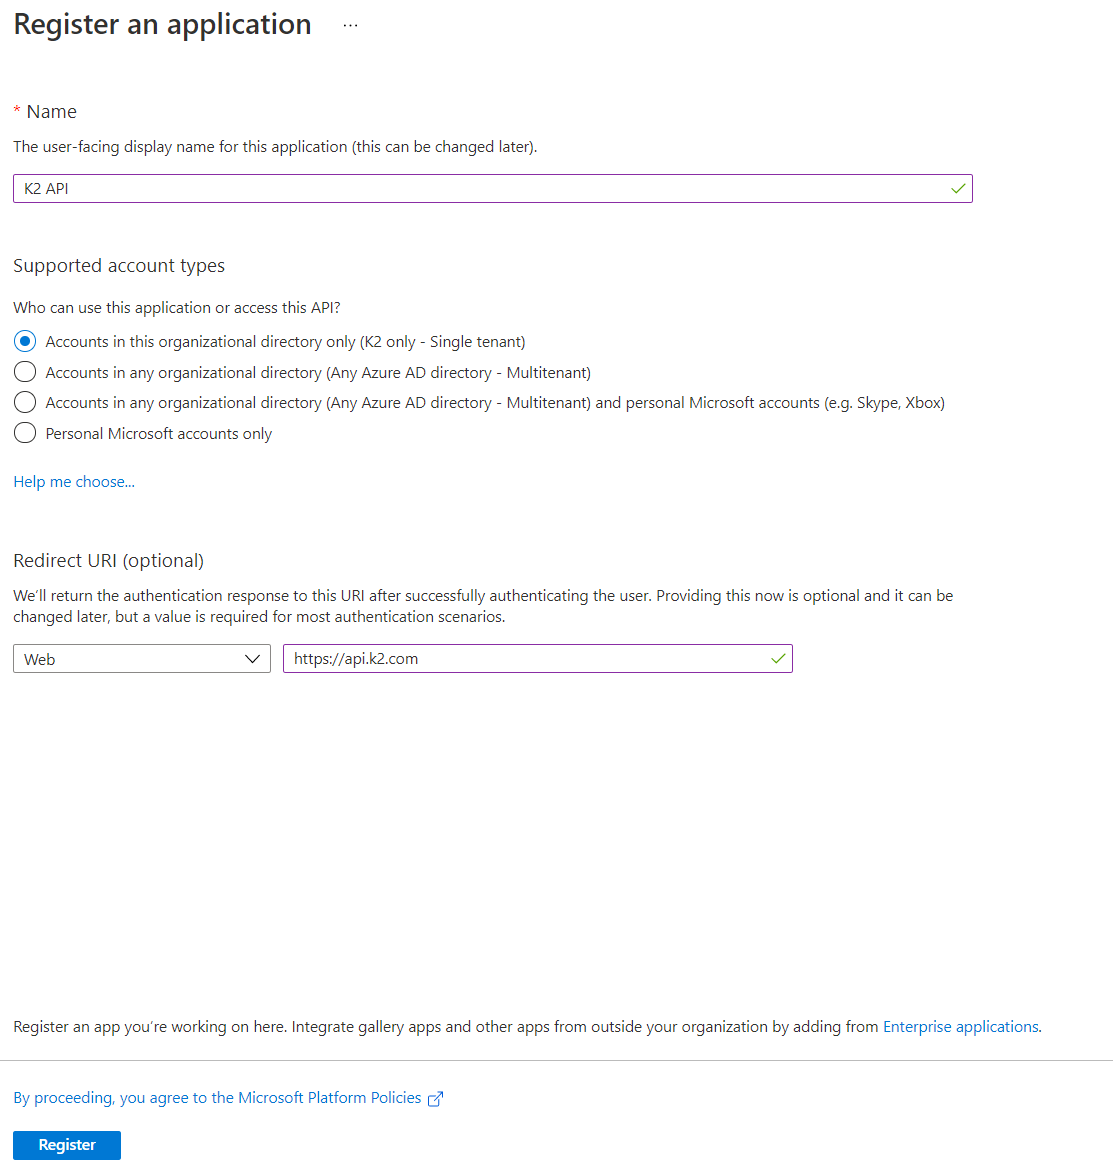
- Click on Register to create the app.
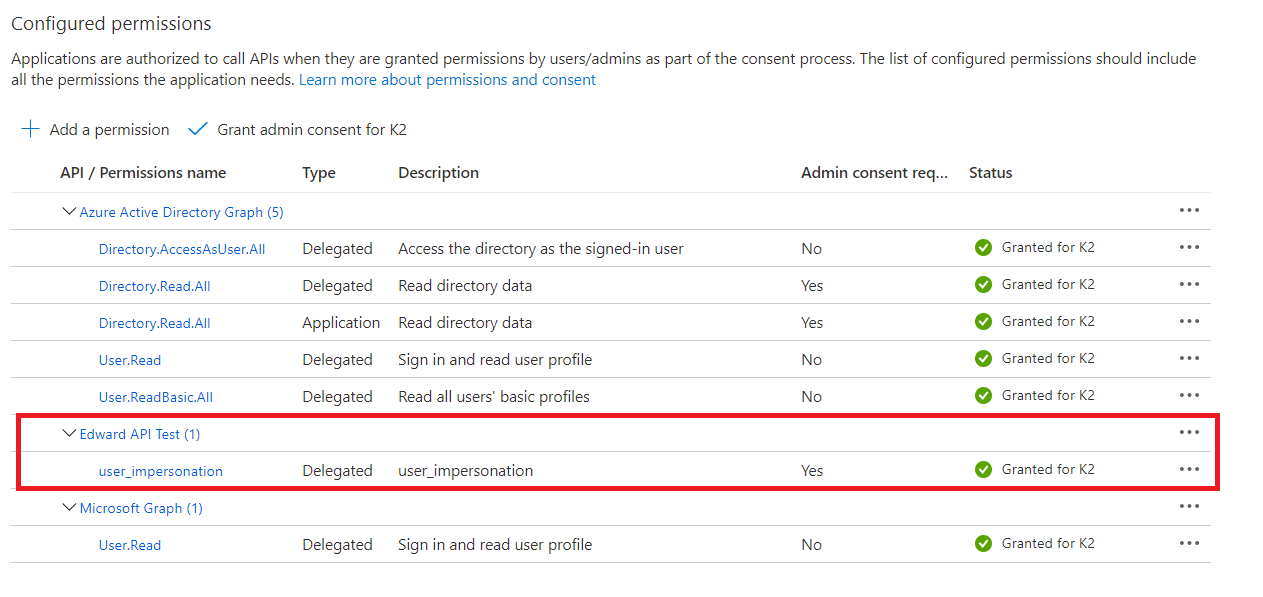
- Once you have created the app, click on it, then go to API permissions.
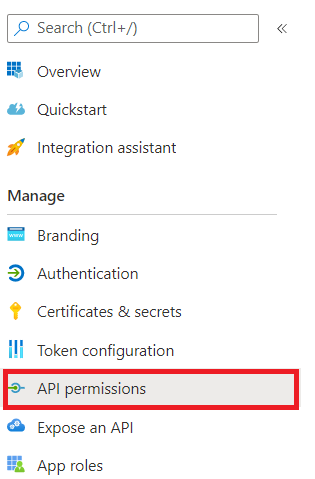
- Add the highlighted permissions shown in the screenshot below:

- Click on Grant admin consent.
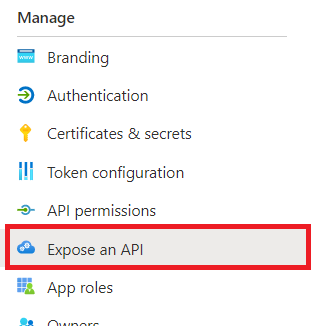
- From the left menu, select Expose an API.
- Set the Application ID URI. In theory, this URI can be anything you want.
Note down the Application ID URL used here as you will need it later in point 19 and 22.
Once you have set the Application ID URI, click on Add a scope. Configure the scope as per what is shown in the screenshot below.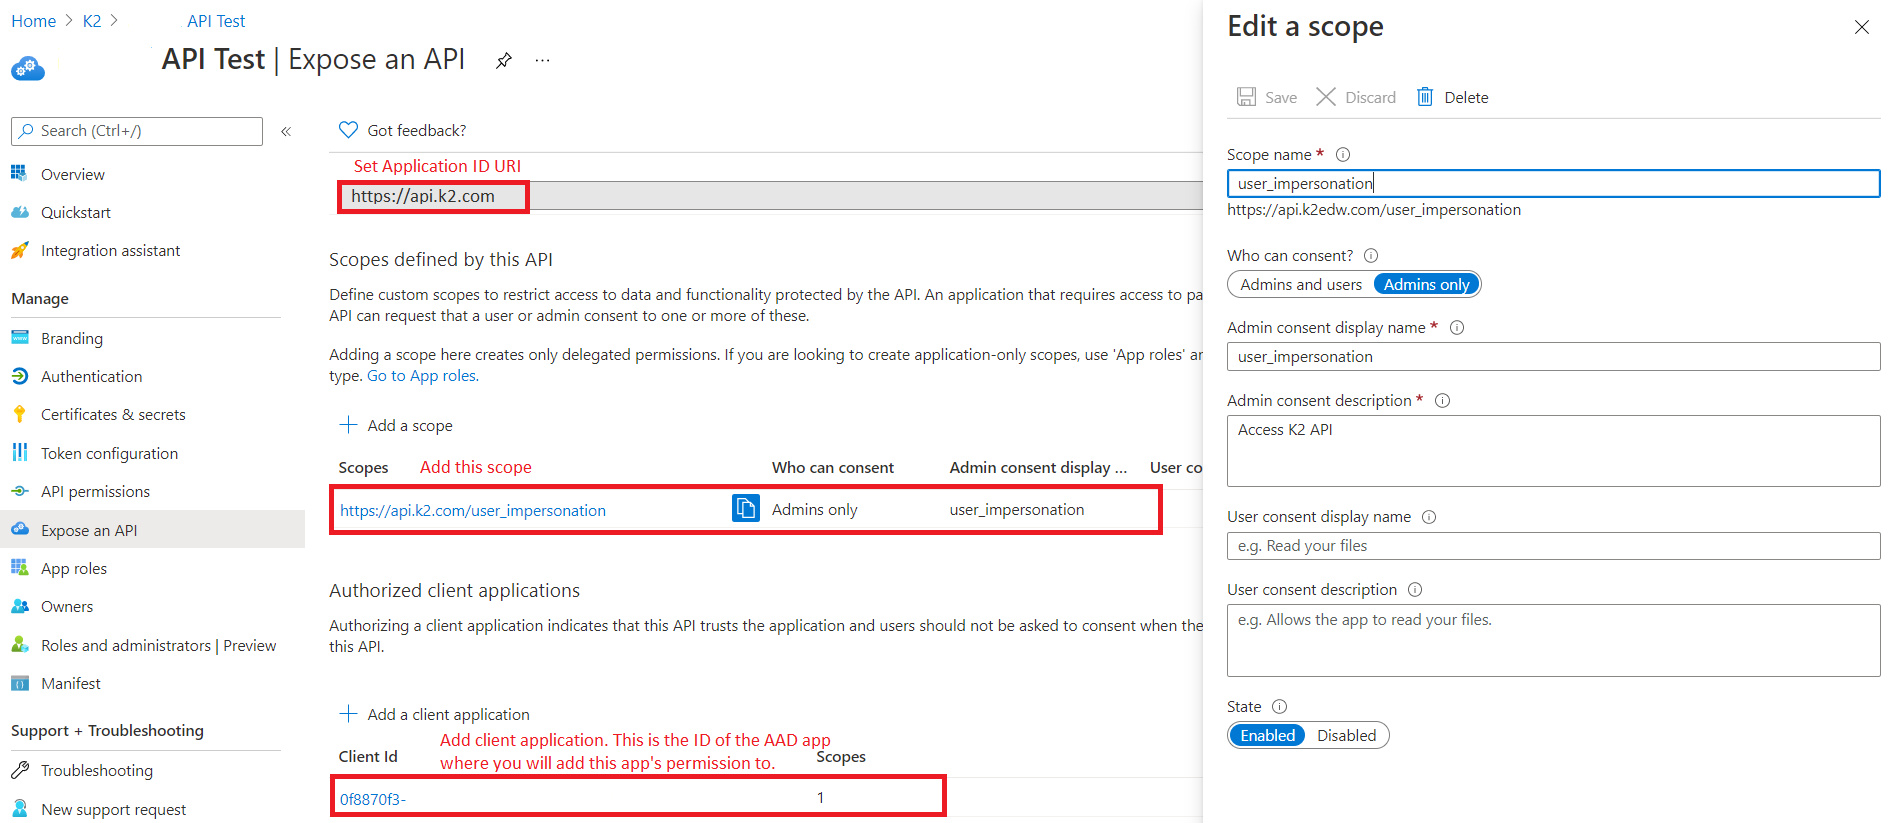
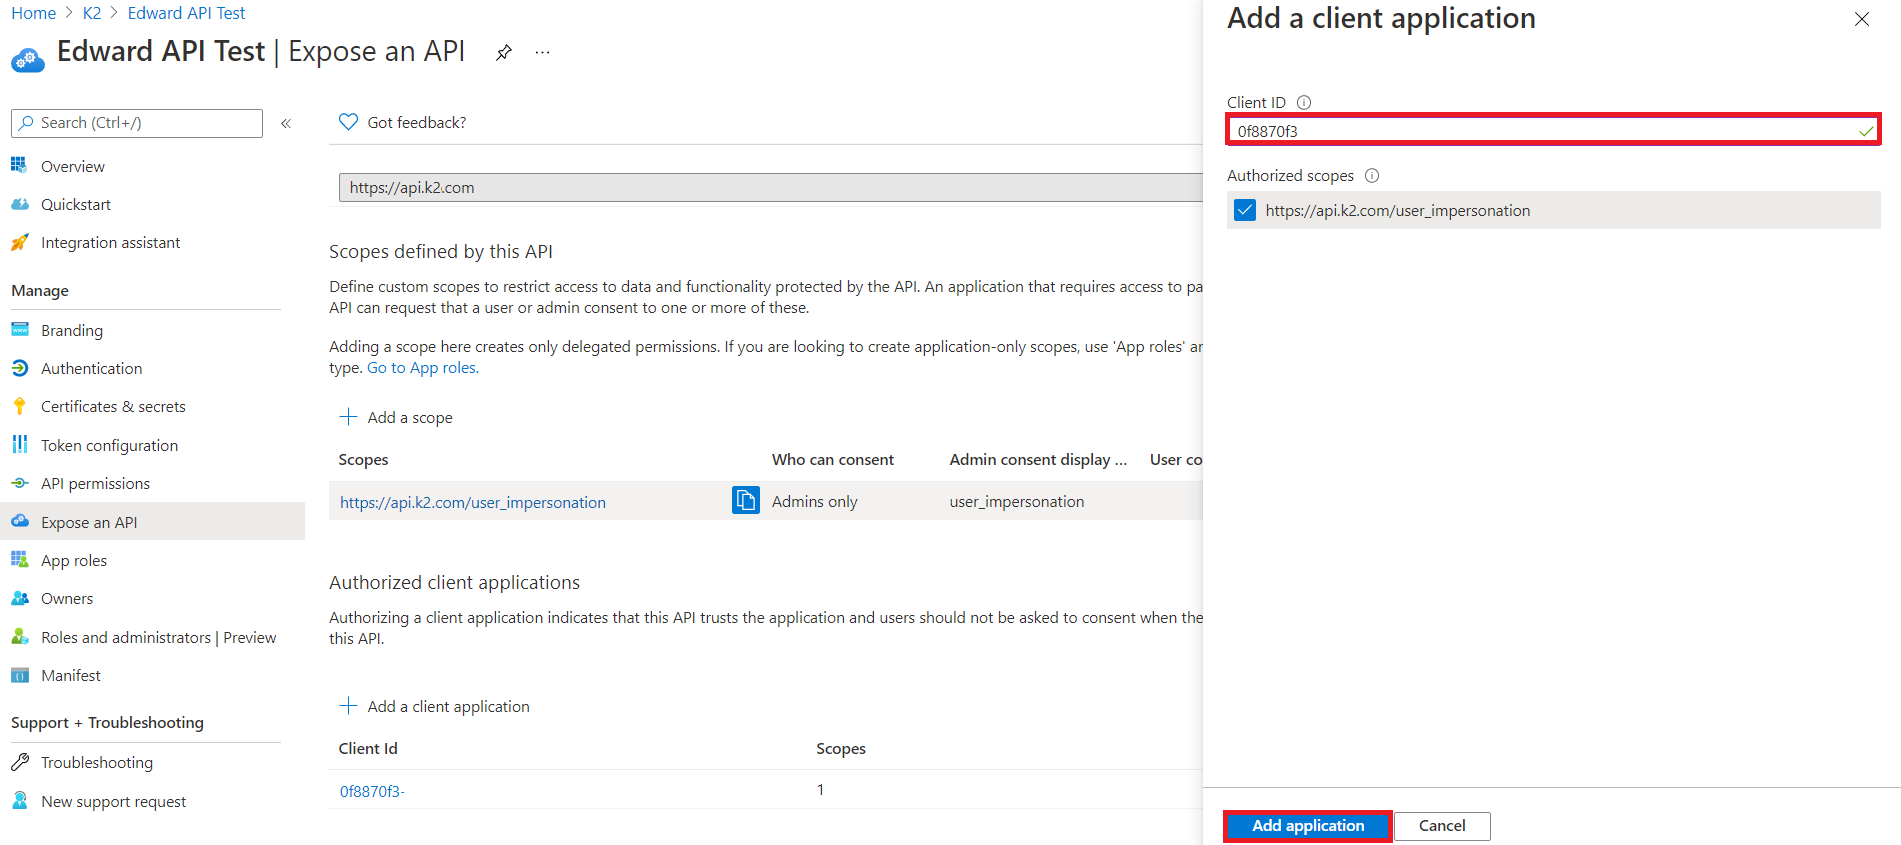
- Click on Add a client application. Provide the client ID of the app that you have created while following the steps in the article Manually Configure K2 for Azure Active Directory to setup the integration between K2 and Azure AD.
- Go back to your Azure Active Directory > App Registrations, and look for the app that you have created when setting up the AAD integration with K2.
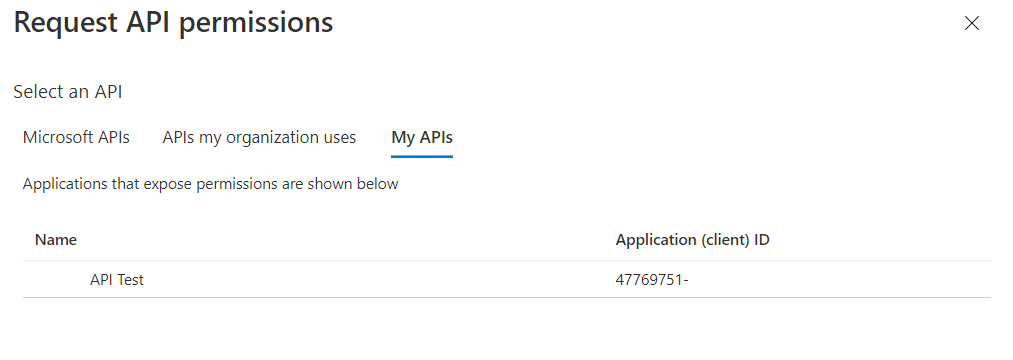
- Go to API permissions, click on Add a permission.
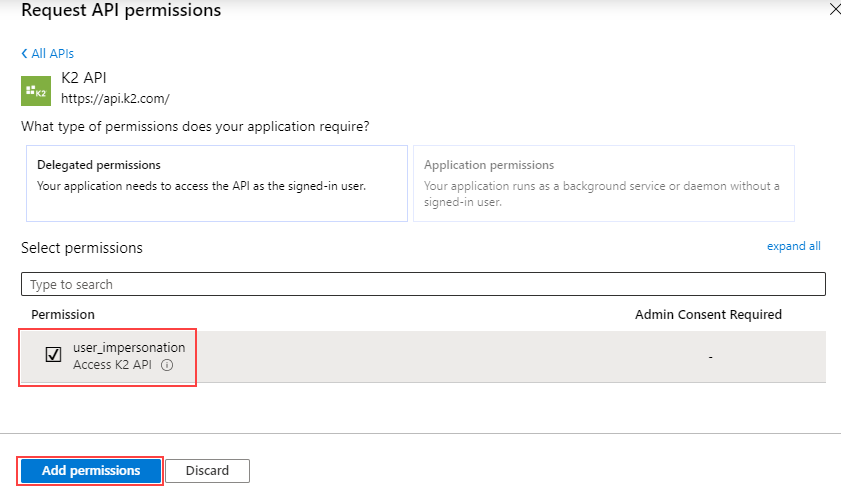
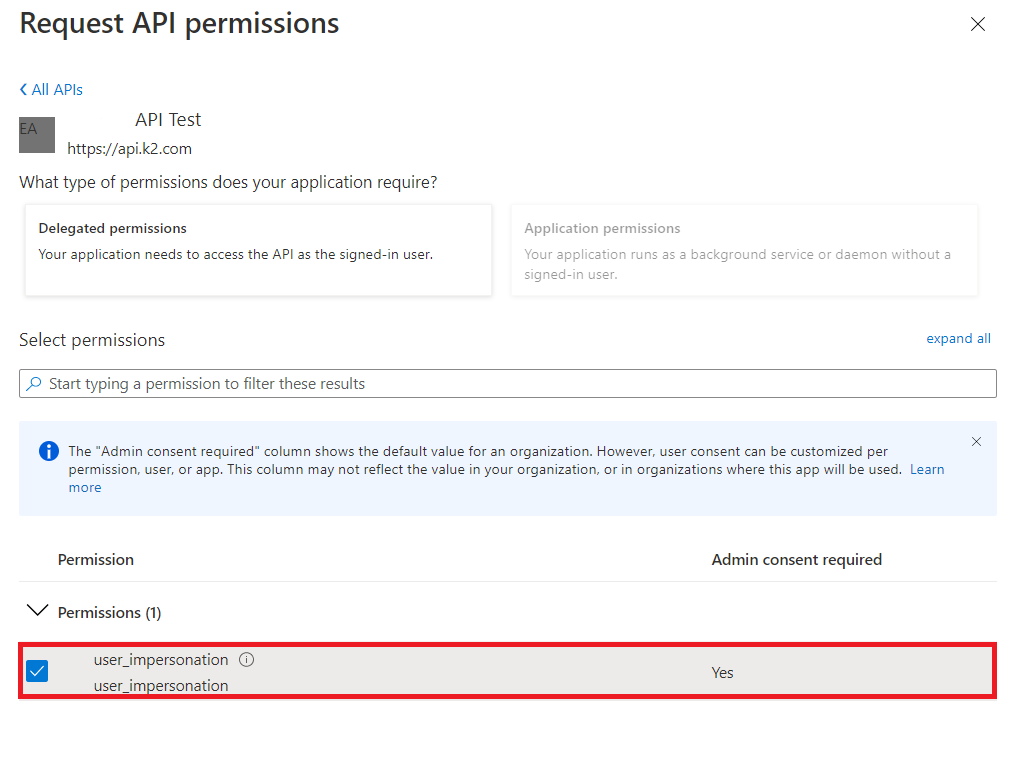
- In the popup screen on the right, select My APIs. You should see the API app that you have created. Select it.
- Check on the user_impersonation permission, and click Add permissions
- You should see the permission you have added in your configured permissions list.
- Click on Grant admin consent.
-
With the API app created, all that is left is to configure your K2. Refer to the article Configure K2 for Inbound OAuth, and follow Step 3: Configure the Bearer Token OAuth resource in K2 and Step 4: Enable the relevant K2 API.
Under Step 3 point 9 (Configure K2 for Inbound OAuth), the token value for the audience parameter comes from the Application ID URI you have set above in point 11 from this article. If you are using a different Application ID URI, then for the audience parameter, make sure you enter the Application ID URI that you are using. Remember to include the trailing slash (eg. https://api.k2.com/). - When you are done, log on to the web server that is hosting your K2 Workflow REST API.
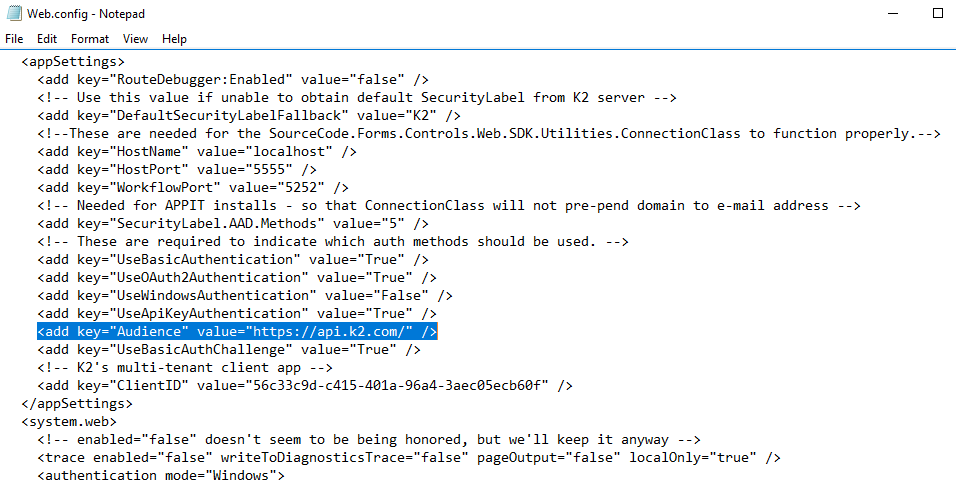
- Go to [Program Files]K2WebServicesAPIWorkflowV1, and edit web.config.
- Look for the Audience key under <appSettings>. Change this value to match the Application ID URL you have set in point 11 and in the OAuth. Remember to include the trailing slash (eg. https://api.k2.com/).
- Save the changes made to the web.config, and run IISRESET.
- To test if the Workflow REST API is working properly with OAuth, you can follow the steps in the article How To: Use Postman to Test the Workflow REST API using OAuth.
