


Support frontline workers with NWC and Microsoft Shifts
In the current climate, it is more important than ever to automate internal processes in order to free up employees to focus on mission critical tasks. Using Nintex Workflow Cloud and Microsoft Shifts, we can automate your frontline's shift scheduling and leave request process to support key workers to spend less time on admin and more time doing what they do best.
What is Microsoft Shifts?
Microsoft Shifts is a Microsoft Teams add-on that can be used to create schedules for shift workers. In this example MS Shifts will be the scheduling front-end tool.
How will we connect NWC with MS Shifts?
In order to automate our scheduling process, we will use a custom Extender (which can be downloaded from the Connector Gallery). It utilises the Microsoft Graph API, so you will need to register an app in Azure Active Directory to grant the necessary permissions for interaction with Microsoft Shifts. The next section describes how you create the app registration.
Step 1: Create an app registration in AAD
- Log into Azure portal https://azure.microsoft.com/en-gb/features/azure-portal/
- Click Azure Active Directory
- Click App registrations
- Click New registration
- Paste https://{tenant-location}.nintex.io/connection/api/Token (tenant-location: eu, us, or au) into the textbox for redirect URI
- Click on Register
- Under API permissions click Add a permission
- Click Microsoft Graph
- Add the following permissions (application level should be sufficient, but you can add Delegated as well):
Group.Read.All
Schedule.ReadWrite.All
TeamMember.Read.All
- Once added click on Grant admin consent and click Yes
- Finally click on Certificates & secrets
- Click on New client secret
- Provide it with a name and select 24 months
- Copy the value, once you leave this screen you won’t have access to that value again, best save the secret value somewhere secure - to be used in the next step
- On the Overview step, copy the Application(client) ID - to be used in the next step
Step 2: Register the Nintex Workflow Cloud Extender:
- Download the MS Shifts Extender from the Connector Gallery
- Extract the Zip file
- In NWC, go to Xtensions
- Click on the orange and white plus sign to add a new Xtender
- Upload the JSON file in the extracted Zip file and click Next
- On security select Microsoft Graph
- Paste the Client ID and secret you copied in the previous section and click Next
- Provide a name for your connector, an icon, and click Publish
- Click on Connections
- Click on Add new
- Select the Xtender you just uploaded (sometimes you need to refresh this page before it is listed) and click Connect
- Provide a name and click Connect
- You should now be prompted to log into a Microsoft account, you will need to use an account that can perform the actions that you need (the user will need to be in the Team that you will be managing)
Step 3: Create your scheduling Form in NWC
-
- Click on Create Workflow
- Select Form as your start event
- Design the Form according to your needs, here is an example Form, which is specifically geared towards a Health Centre:
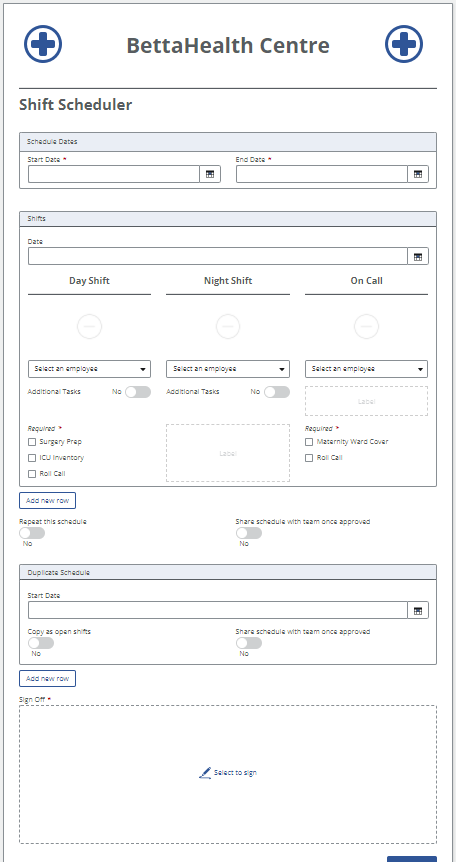
This Form is built specifically for 3 types of shifts - Day Shift, Night Shift, and On Call. It also allows for repeating schedules, as well as the option to share changes to the team as soon as the schedule is complete. Finally we add a signature control in order for the Shift Coordinator to sign off on the proposed shift(s).
Step 4: Create the Workflow
Part 1: Generate a Shift Schedule and send to Shift Manager to sign
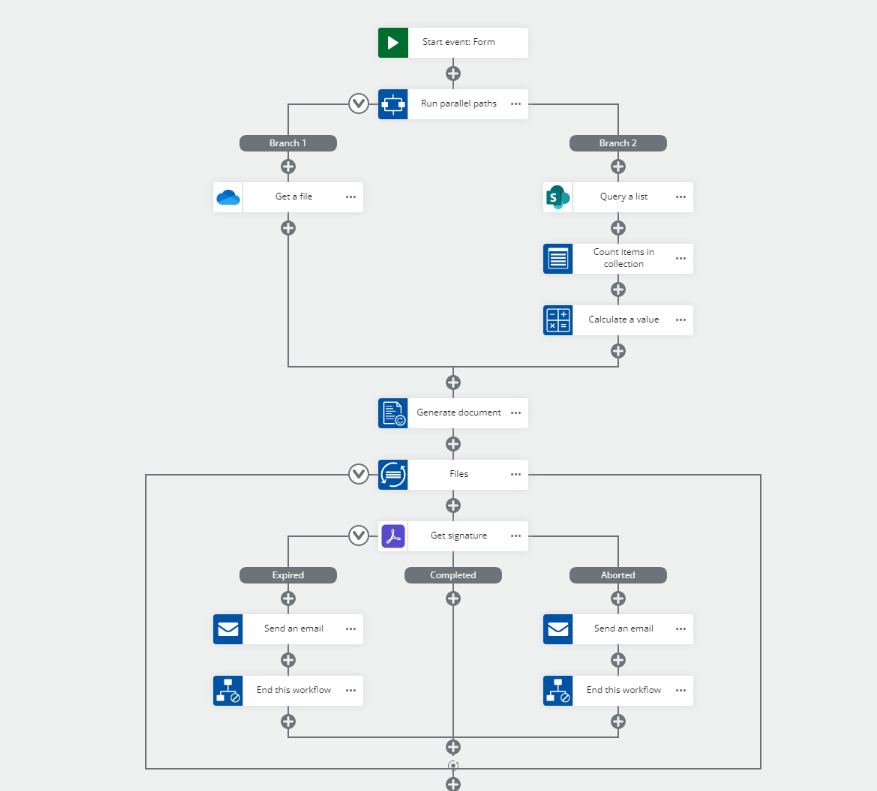
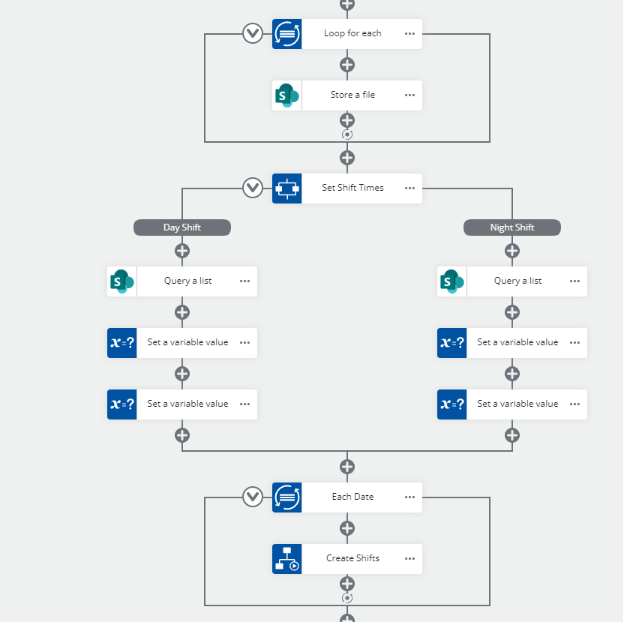
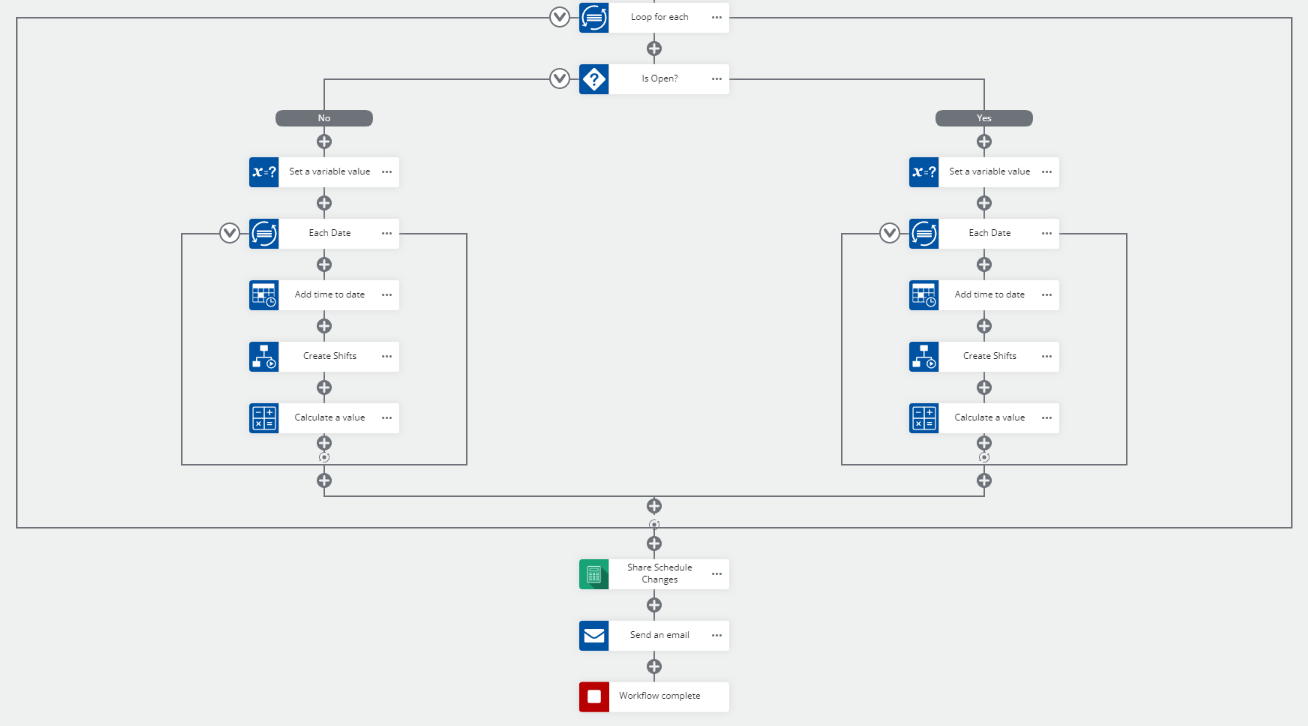
Part 2: Archive signed Shift Schedule and create shifts
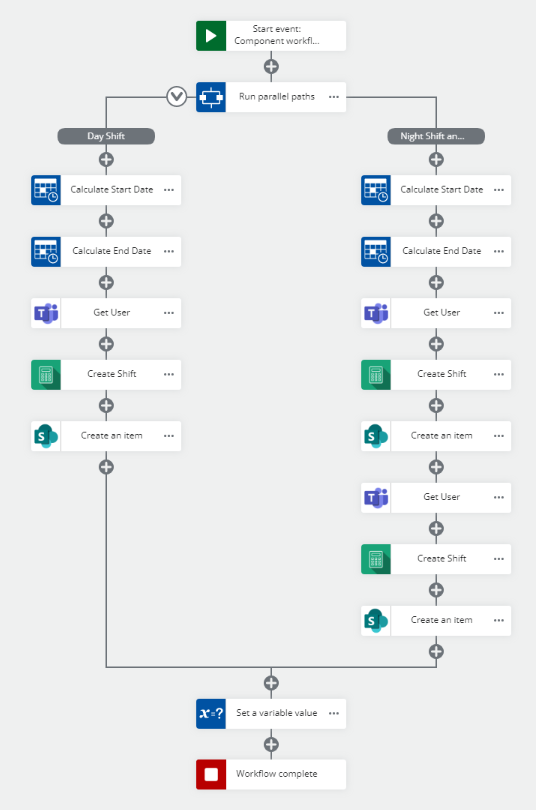
Create Shift component workflow
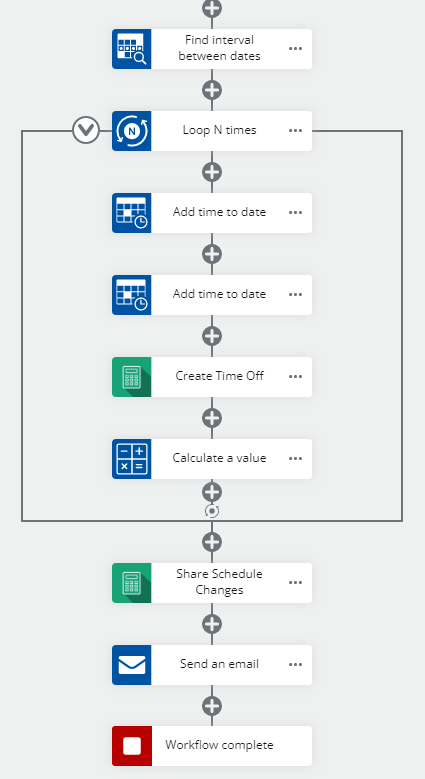
Part 3: Create schedule duplicates if specified, share changes, and notify the Shift Coordinator
Step 5: Create the Leave Request Form
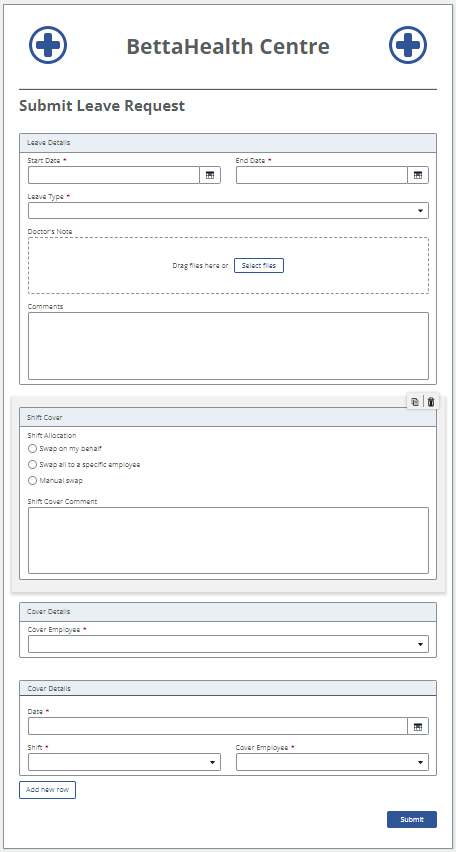
This Form gets the leave reasons from Microsoft Shifts and allows the employee to decide how their cover is allocated - either to specific employees that they have organised with, or at the discretion of the Shift Coordinator. A file upload control will appear if the Leave Type is Sick Leave.
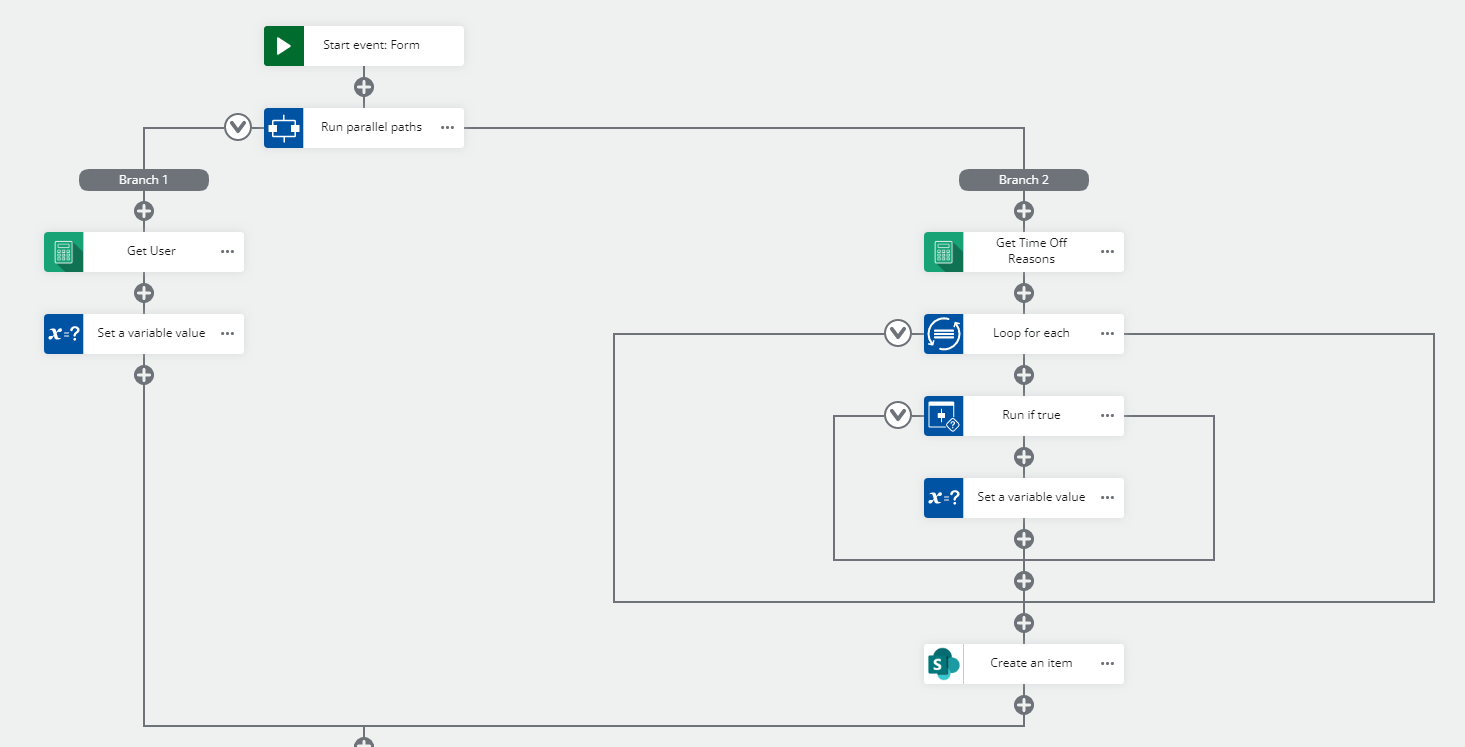
Step 6: Create the Leave Request workflow
Part 1: Get the User and Leave Type display name and create a Leave Request entry in SharePoint
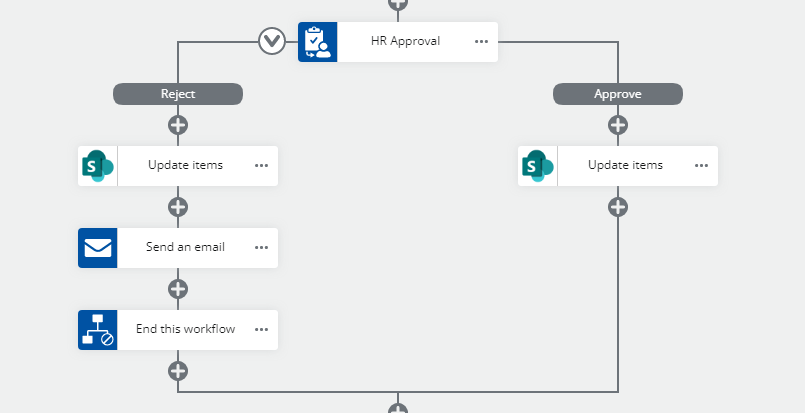
Part 2: Get HR Approval and update leave request status if approved, or send rejection email if rejected
Part 3: Create a shift list for cover request email
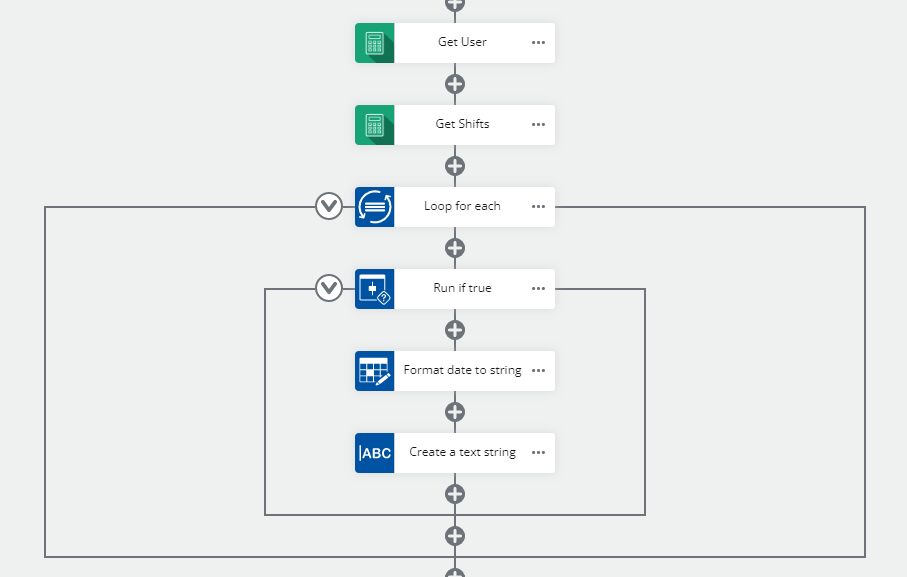
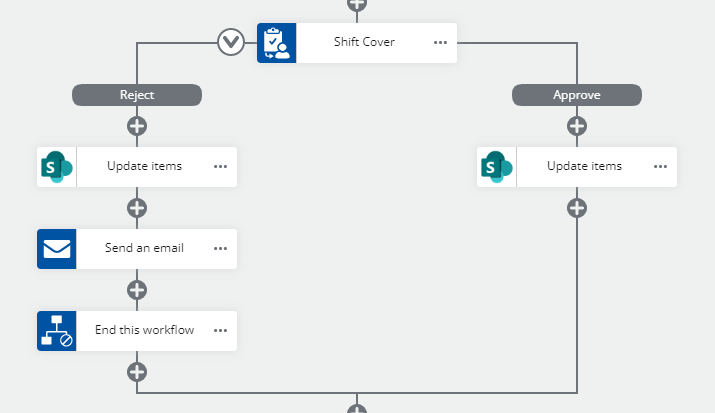
Part 4: Get shift cover approval, update leave request status if approved, or send rejection mail if rejected
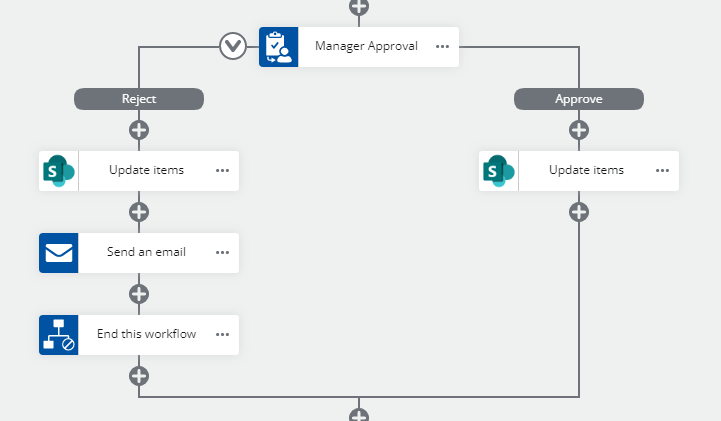
Part 5: Get manager approval, update leave request status if approved, or send rejection mail if rejected
Part 6: Move shifts to cover staff
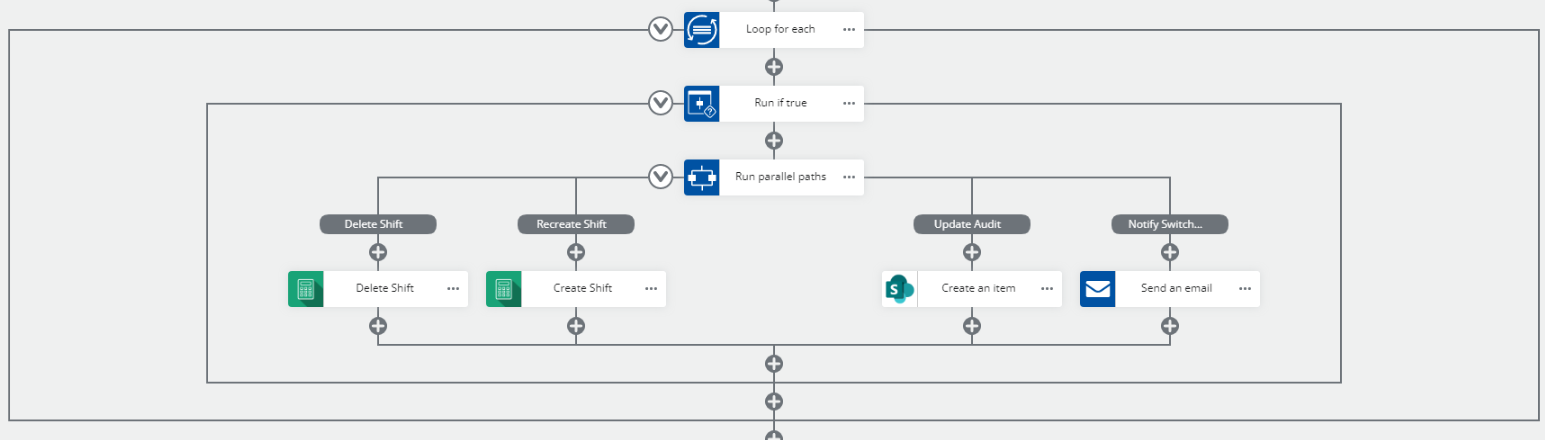
Note: At the time of development the MS Graph's Update Shift endpoint was not functioning, so the shift had to be deleted and recreated with the new assignee
Part 7: Create Time Off items in MS Shifts, share the changes with the team, and notify the employee that their leave request has been approved
What does this look like in MS Shifts?
Created Shifts

Time Off

What does it look like in SharePoint?
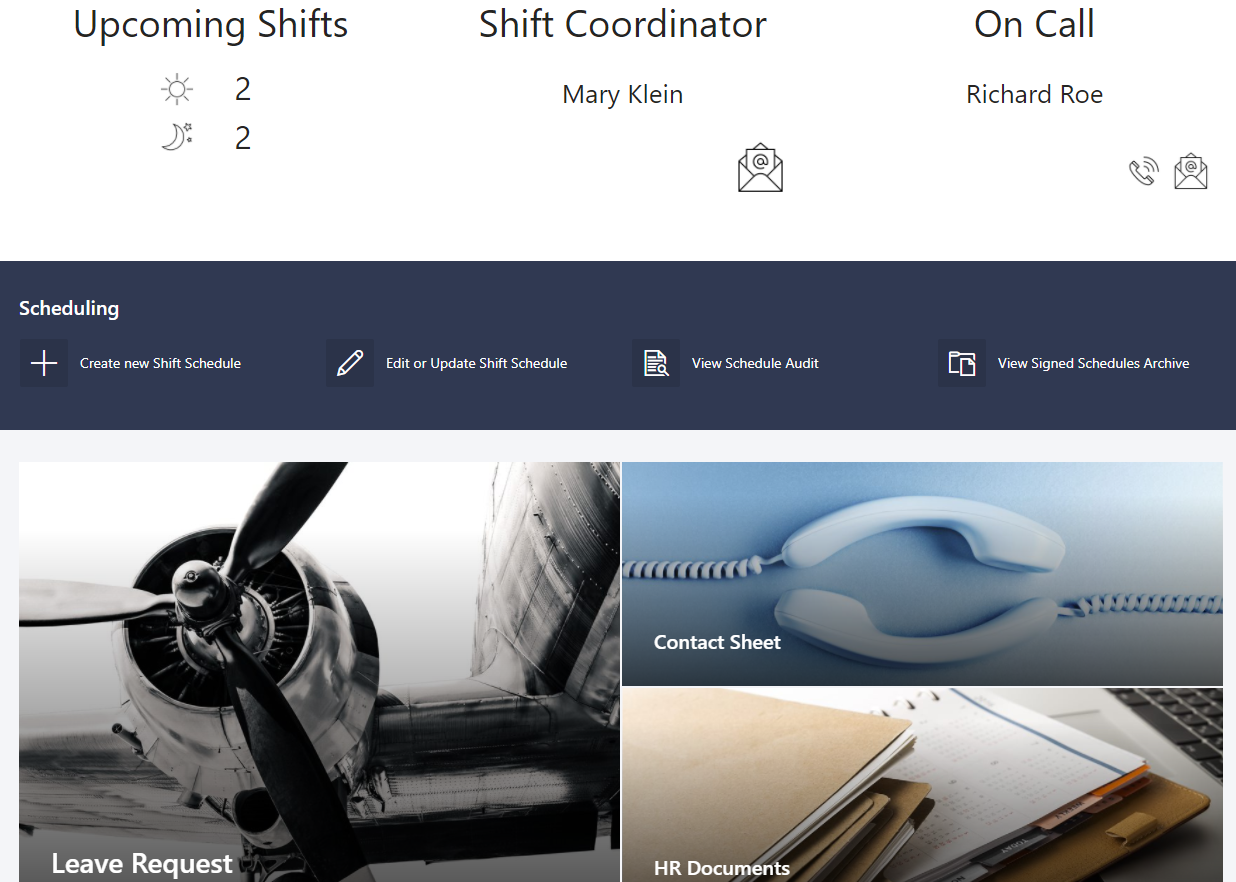
Landing Page
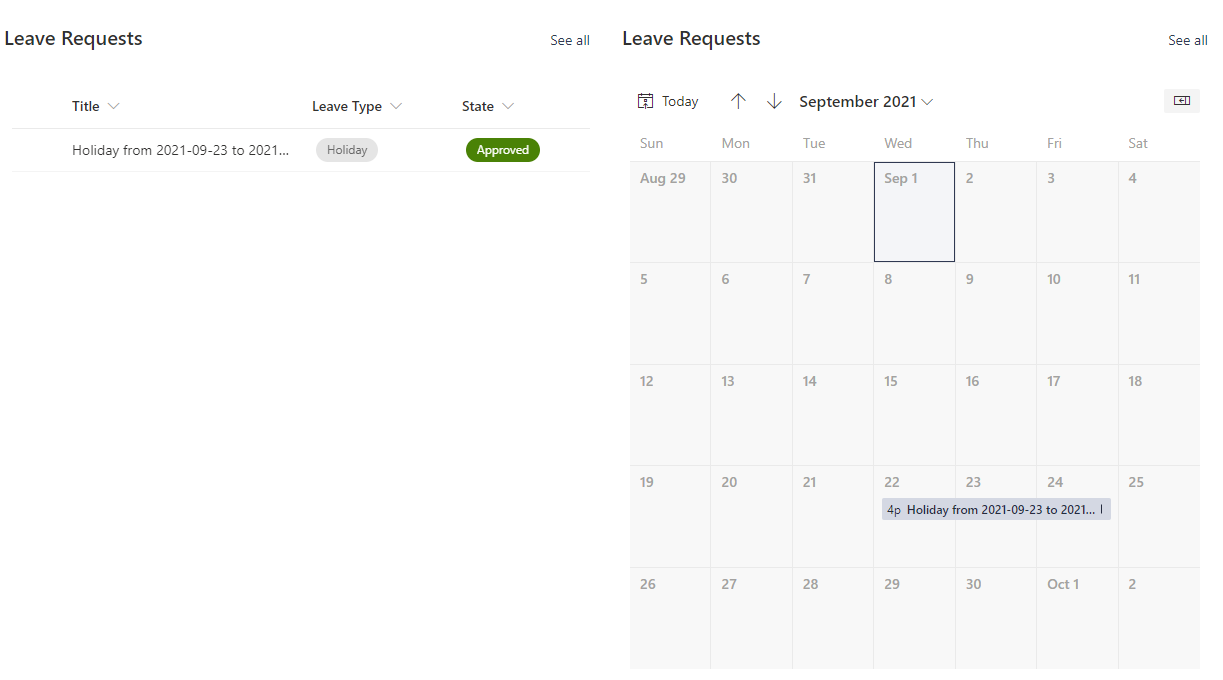
Leave Requests and Leave Calendar
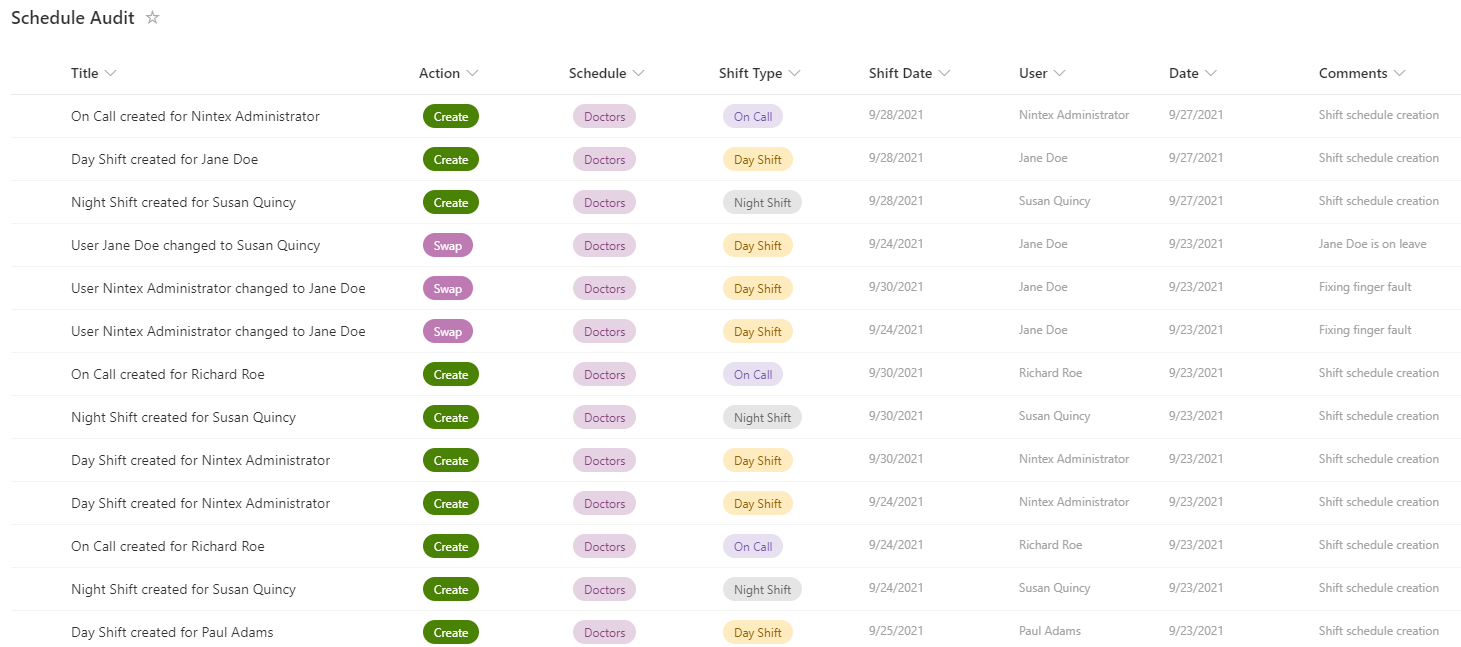
Schedule audit trail
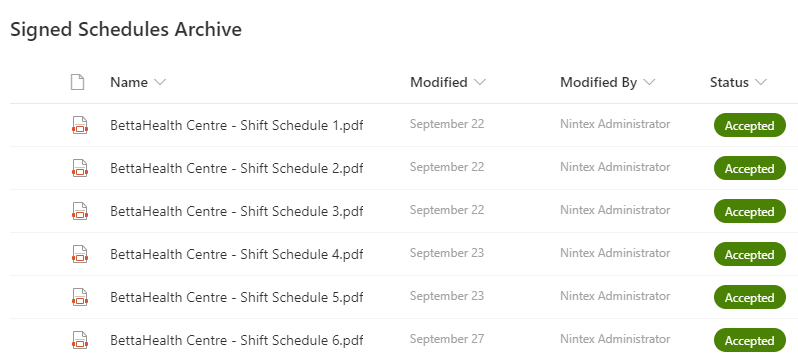
Schedule Archive
Conclusion
With such a versatile platform like NWC, it's no wonder companies can react so rapidly to a changing and volatile climate. This example also illustrates how seamlessly NWC can connect to the Microsoft stack to enable your business to still use their existing systems in a more streamlined way.
You can watch the entire webinar on this solution here.
Hero image by rawpixel.com.
