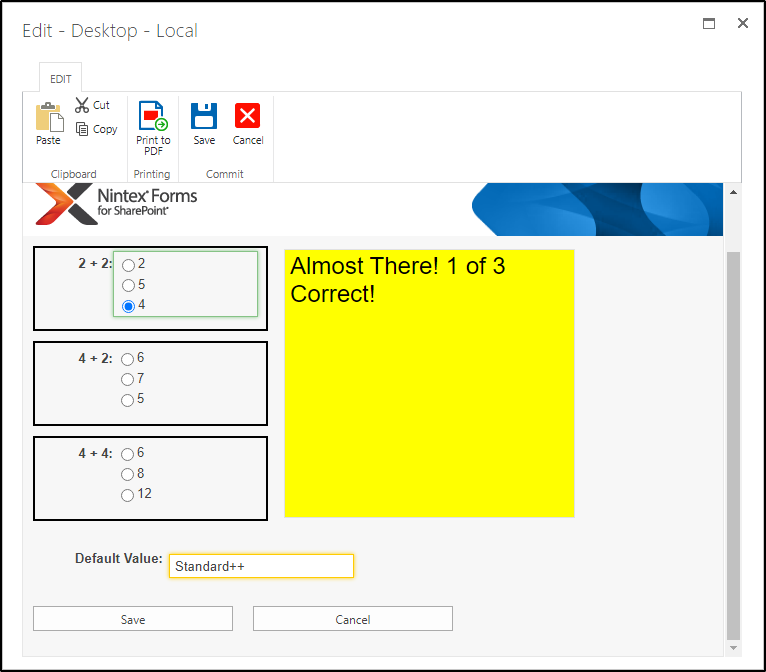
Recently started using classic form designer to use more powerful features. Nintex Workflow is great for picking up value changes and triggering workflows, but if you have too many conditional workflows, item saving time is greatly extended, as it has to evaluate all those conditions before completing the save.
I felt any changes I could make using JS or jQuery to include in the save would help. I started exploring how to pick up on field changes “on the fly” - this not only reduces conditional workflows, but also allows me to provide more real-time feedback to a user, rather than waiting for a validation rule to fire on save.
Note: I am not classically trained in JS or jQuery - I tend to learn on the fly as needs arrive - so there may be more elegant ways to do these things - please let me know in the reply.
For each of these, I have tried to provide preliminary steps, and where in my example you would perform some action, I simply alert the found value after the change to show the code grabbed the value.
This list is not complete, but has a lot of the major control types. Feedback is requested!
Thanks!
/*
Radio Buttons
	In the Advanced configuration of the Choice control, create a Client ID Javascript variable name, in this case RadioButtonChoice.

	In the Form settings, add a call to jQuery in the Custom JS Includes section, like: https://code.jquery.com/jquery-1.12.4.min.js; or depending on what else you are doing, use Nintex's built in jQuery clone (NWF$ syntax)

	The _spBodyOnLoadFunctionNames is a more elegant version on jQuery's document ready function, which has a hard time with some SharePoint/Nintex timings.
*/


		/*Using jQuery*/
		_spBodyOnLoadFunctionNames.push("myCustomFunctionName");
		function myCustomFunctionName() {
				$('#'+RadioButtonChoice).change(function(){
					var valueRadioButtonChoice = $($('#'+RadioButtonChoice).find("input:checked")).val();
					alert(valueRadioButtonChoice);
				});
		}

		/*Using Nintex's built in jQuery*/
		_spBodyOnLoadFunctionNames.push("myCustomFunctionName");
		function myCustomFunctionName() {
				NWF$('#'+RadioButtonChoice).change(function(){
					var valueRadioButtonChoice = NWF$(NWF$('#'+RadioButtonChoice).find("input:checked")).val();
					alert(valueRadioButtonChoice);
				});
		}


/*
Single Line of text
	In the Advanced configuration of the single line of text control, create a Client ID Javascript variable name, in this case SLT.

	In the Form settings, add a call to jQuery in the Custom JS Includes section, like: https://code.jquery.com/jquery-1.12.4.min.js; or depending on what else you are doing, use Nintex's built in jQuery clone (NWF$ syntax)

	The _spBodyOnLoadFunctionNames is a more elegant version on jQuery's document ready function, which has a hard time with some SharePoint/Nintex timings.
*/

		/*Using jQuery*/
		_spBodyOnLoadFunctionNames.push("myCustomFunctionName");
		function myCustomFunctionName() {
				$('#'+SLT).change(function(){
					var valueSLT = $('#'+SLT).val();
					alert(valueSLT);
				});
		}

		/*Using Nintex's built in jQuery*/
		_spBodyOnLoadFunctionNames.push("myCustomFunctionName");
		function myCustomFunctionName() {
				NWF$('#'+SLT).change(function(){
					var valueSLT = NWF$('#'+SLT).val();
					alert(valueSLT);
				});
		}


/*
Checkboxes
	In the Advanced configuration of the Choice control, create a Client ID Javascript variable name, in this case checkboxChoice.

	In the Form settings, add a call to jQuery in the Custom JS Includes section, like: https://code.jquery.com/jquery-1.12.4.min.js; or depending on what else you are doing, use Nintex's built in jQuery clone (NWF$ syntax)

	The _spBodyOnLoadFunctionNames is a more elegant version on jQuery's document ready function, which has a hard time with some SharePoint/Nintex timings.
*/


		/*Using jQuery*/
		_spBodyOnLoadFunctionNames.push("myCustomFunctionName");
		function myCustomFunctionName() {
			$(function(){
			  $('#'+checkboxChoice).click(function(){
				var valCheckboxChoice = [];
				$(':checkbox:checked').each(function(i){
				  valCheckboxChoice[i] = $(this).val();
				});
				alert(valCheckboxChoice);
			  });
			});
		}

		/*Using Nintex's built in jQuery*/
		_spBodyOnLoadFunctionNames.push("myCustomFunctionName");
		function myCustomFunctionName() {
			NWF$(function(){
			  NWF$('#'+checkboxChoice).click(function(){
				var valCheckboxChoice = [];
				NWF$(':checkbox:checked').each(function(i){
				  valCheckboxChoice[i] = $(this).val();
				});
				alert(valCheckboxChoice);/*array of checkboxes*/
			  });
			});
		}

/*
Multiple Lines of text - plain text
	In the Advanced configuration of the single line of text control, create a Client ID Javascript variable name, in this case MLT.

	In the Form settings, add a call to jQuery in the Custom JS Includes section, like: https://code.jquery.com/jquery-1.12.4.min.js; or depending on what else you are doing, use Nintex's built in jQuery clone (NWF$ syntax)

	The _spBodyOnLoadFunctionNames is a more elegant version on jQuery's document ready function, which has a hard time with some SharePoint/Nintex timings.
*/

		/*Using jQuery*/
		_spBodyOnLoadFunctionNames.push("myCustomFunctionName");
		function myCustomFunctionName() {
				$('#'+MLT).change(function(){
					var valueMLT = $('#'+MLT).val();
					alert(valueMLT);
				});
		}

		/*Using Nintex's built in jQuery*/
		_spBodyOnLoadFunctionNames.push("myCustomFunctionName");
		function myCustomFunctionName() {
				NWF$('#'+MLT).change(function(){
					var valueMLT = NWF$('#'+MLT).val();
					alert(valueMLT);
				});
		}

/*
Date Time using Date control (returns in mm/dd/yyyy format) NOTE: this will not capture the value if the Today choice is used as a selection in the date selector.  If that is a potential value, use one of the 2 options below.
	In the Advanced configuration of the date control, create a Client ID Javascript variable name, in this case DateOnly.

	I was only able to get this working using Nintex's built in jQuery clone (NWF$ syntax)

	The _spBodyOnLoadFunctionNames is a more elegant version on jQuery's document ready function, which has a hard time with some SharePoint/Nintex timings.
*/

		/*Using Nintex's built in jQuery*/
		_spBodyOnLoadFunctionNames.push("myCustomFunctionName");
		function myCustomFunctionName() {
			NWF$("#" + DateOnly).on("change", function(event){
				var calculatedValue = NWF$('#'+DateOnly).val();
				alert(calculatedValue);
			});
		}

/*
Date Time using Calculated Value control (returns in mm/dd/yyyy format)
	Set your calculated value formula to equal the named control of the Date/Time field you want to track

	In the Advanced configuration of the calculated value control, create a Client ID Javascript variable name, in this case calcValue.

	In the Advanced configuration of the date control, create a Client ID Javascript variable name, in this case DateOnly.

	I was only able to get this working using Nintex's built in jQuery clone (NWF$ syntax)

	The _spBodyOnLoadFunctionNames is a more elegant version on jQuery's document ready function, which has a hard time with some SharePoint/Nintex timings.
*/

		/*Using Nintex's built in jQuery*/
		_spBodyOnLoadFunctionNames.push("myCustomFunctionName");
		function myCustomFunctionName() {
			NWF$("#" + calcValue).on("change", function(event){
				var calculatedValue = NWF$('#'+DateOnly).val();
				alert(calculatedValue);
			});
		}

/*
Date Time using Calculated Value control (returns in yyyy/mm/ddT00:00:00 format)
	Set your calculated value formula to equal the named control of the Date/Time field you want to track

	In the Advanced configuration of the calculated value control, create a Client ID Javascript variable name, in this case calcValue.

	I was only able to get this working using Nintex's built in jQuery clone (NWF$ syntax)

	The _spBodyOnLoadFunctionNames is a more elegant version on jQuery's document ready function, which has a hard time with some SharePoint/Nintex timings.
*/

		/*Using Nintex's built in jQuery*/
		_spBodyOnLoadFunctionNames.push("myCustomFunctionName");
		function myCustomFunctionName() {
			NWF$("#" + calcValue).on("change", function(event){
					var calculatedValue = NWF$('#'+calcValue).val();
					alert(calculatedValue);

			});
		}

/*
Person using Calculated Value control
	Set your calculated value formula to equal the named control of the Person field you want to track

	In the Advanced configuration of the calculated value control, create a Client ID Javascript variable name, in this case calcValue.

	I was only able to get this working using Nintex's built in jQuery clone (NWF$ syntax)

	The _spBodyOnLoadFunctionNames is a more elegant version on jQuery's document ready function, which has a hard time with some SharePoint/Nintex timings.
*/

		/*Using Nintex's built in jQuery*/
		_spBodyOnLoadFunctionNames.push("myCustomFunctionName");
		function myCustomFunctionName() {
			NWF$("#" + calcValue).on("change", function(event){
					var calculatedValue = NWF$('#'+calcValue).val();
					alert(calculatedValue);

			});
		}

/*
People using Calculated Value control
	Set your calculated value formula to equal the named control of the People field you want to track

	In the Advanced configuration of the calculated value control, create a Client ID Javascript variable name, in this case calcValue.

	I was only able to get this working using Nintex's built in jQuery clone (NWF$ syntax)

	The _spBodyOnLoadFunctionNames is a more elegant version on jQuery's document ready function, which has a hard time with some SharePoint/Nintex timings.
*/

		/*Using Nintex's built in jQuery*/
		_spBodyOnLoadFunctionNames.push("myCustomFunctionName");
		function myCustomFunctionName() {
			NWF$("#" + calcValue).on("change", function(event){
					calculatedValue = NWF$('#'+calcValue).val();
					var calculatedValue2 = calculatedValue.split("[");
					calculatedValue2 = calculatedValue2[1]||calculatedValue;
					calculatedValue3 = calculatedValue2.split("]");
					calculatedValue3 = calculatedValue3[0]||calculatedValue2;
					peopleArray = [];
					peopleArray = calculatedValue3.split(",");
					alert(peopleArray);/*array of people with leading info*/
					for (let i = 0; i < peopleArray.length; i++) {
						alert(peopleArray[i]);/*individual person with leading info*/
						var person = peopleArray[i];
						person = person.split("\\");
						alert(person[1]);/*individual person accountname only*/
					}

			});
		}


/*
Lookup using List Lookup control (in the List Columns Form Control Section - single selection)
	In the Advanced configuration of the List Lookup control, create a Client ID Javascript variable name, in this case jLookup.

	I was only able to get this working using Nintex's built in jQuery clone (NWF$ syntax)

	The _spBodyOnLoadFunctionNames is a more elegant version on jQuery's document ready function, which has a hard time with some SharePoint/Nintex timings.
*/

		/*Using Nintex's built in jQuery*/
		_spBodyOnLoadFunctionNames.push("myCustomFunctionName");
		function myCustomFunctionName() {
			NWF$("#" + jLookup).on("change", function(event){
					var lookupValue = NWF$('#'+jLookup).val();
					alert(lookupValue);

			});
		}


