

"Not authorized" or “…missing required rights…” page in SmartForms (K2 Designer) when you try to access the Designer or Runtime site.
KB002570
PRODUCT
K2 4.7
Issue
When you use K2 4.7 and try to log into the K2 Designer or access a SmartForm, you see the login screen or you get the "Not Authorized" page.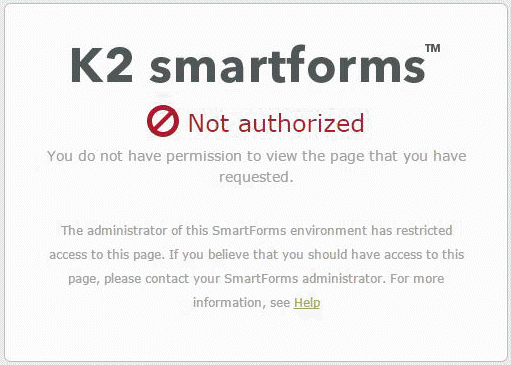
The message is shown when you access the site and the server’s IIS setting (Authorization Deny Rule) for you or a role you belong to is active.
Resolution
As an administrator, you need to update the role membership or change the Authorization Deny Rule for anyone seeing this message. For more information see the Configuring .NET Roles in IIS (Microsoft)
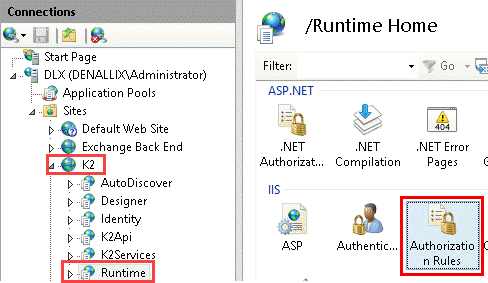
To change this site’s Authorization Deny Rule, follow the steps below:
- Open the IIS Manager.
- Expand the Server and Sites nodes and select the site.
- Open Authorization Rules from the IIS section and edit as needed.
See How to restrict access to the K2 smartforms Designer using Internet Information Services (IIS) for more information.
K2 Five and K2 Cloud
Issue
When you use K2 Five or K2 Cloud and try to log into K2 Designer, one of the following occurs:
- You are redirected to the login screen
- You see the “Not Authorized” page. This page shows when you use K2 Five and K2 Cloud versions prior to K2 Cloud Update 5.
- You get the “…missing required rights…” page. This page shows when you use K2 Cloud Update 5 and later versions.
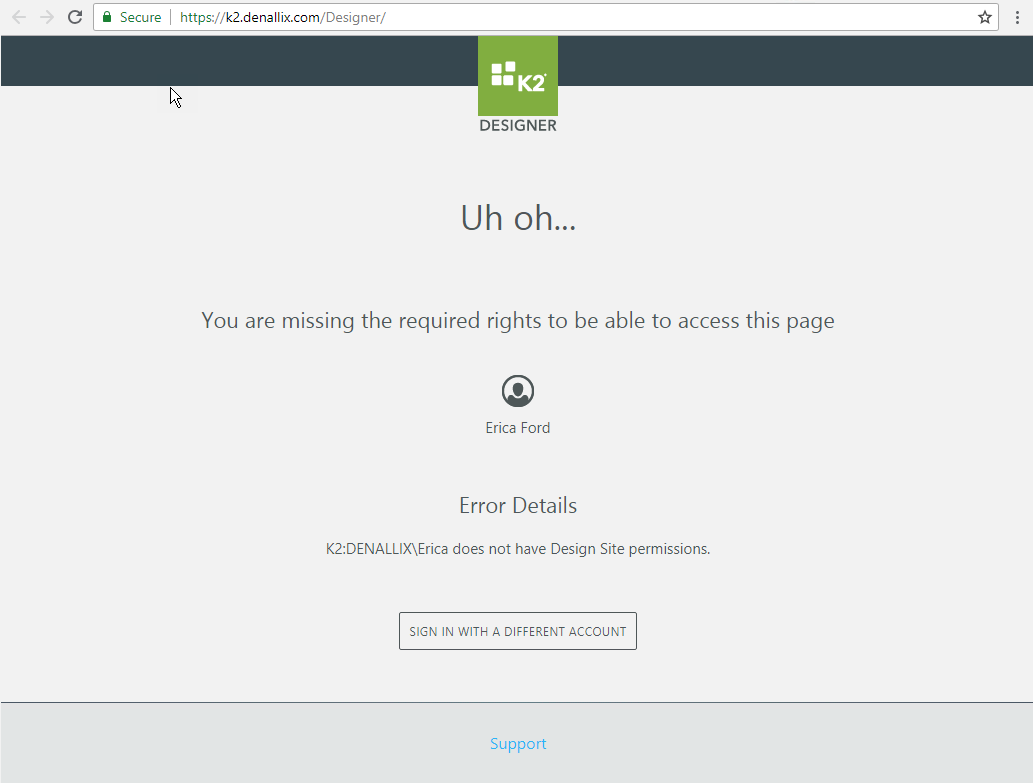
This happens if you do not have access to the K2 Designer. See Authorization Framework Overview for more information.
Resolution
An administrator that is part of the Security Administrators role must authorize you to use the K2 Designer.
Follow these steps to add authorization to K2 Designer:
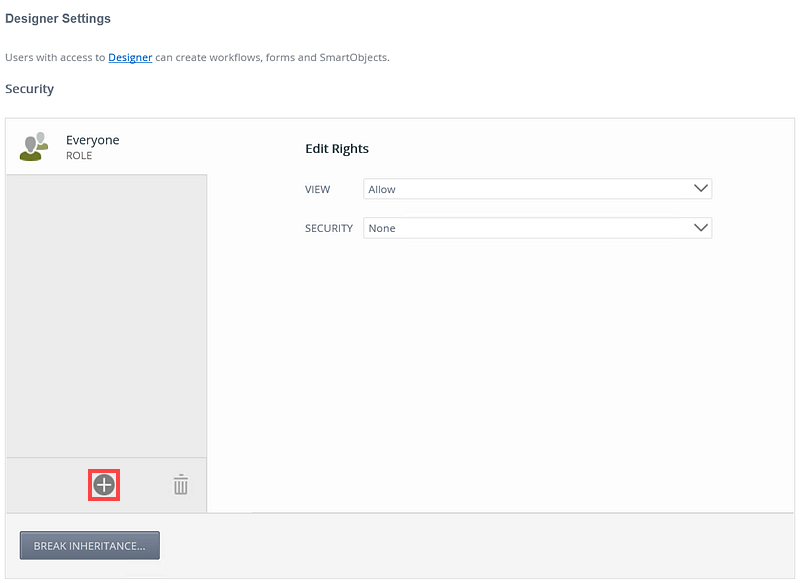
- Open K2 Management and go to the Designer node.
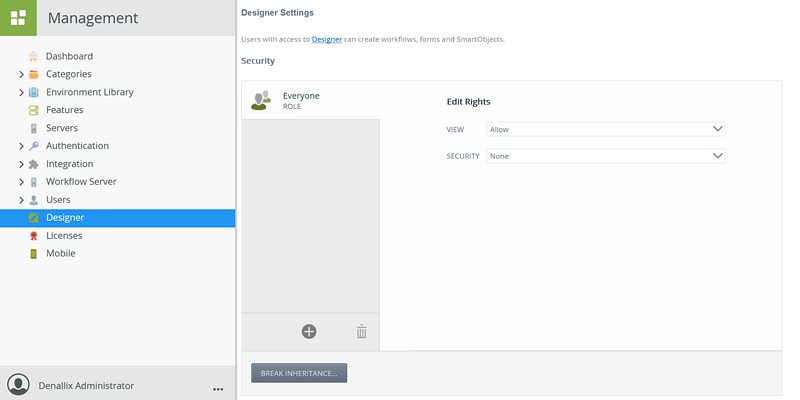
K2 Designer Rights Description View Browse to and use K2 Designer. Security You can assign Security rights to K2 Designer, which allows others to manage K2 Designer security, including assigning View and Security rights for other users. - On the Security page, add a user or group by clicking the Add button.
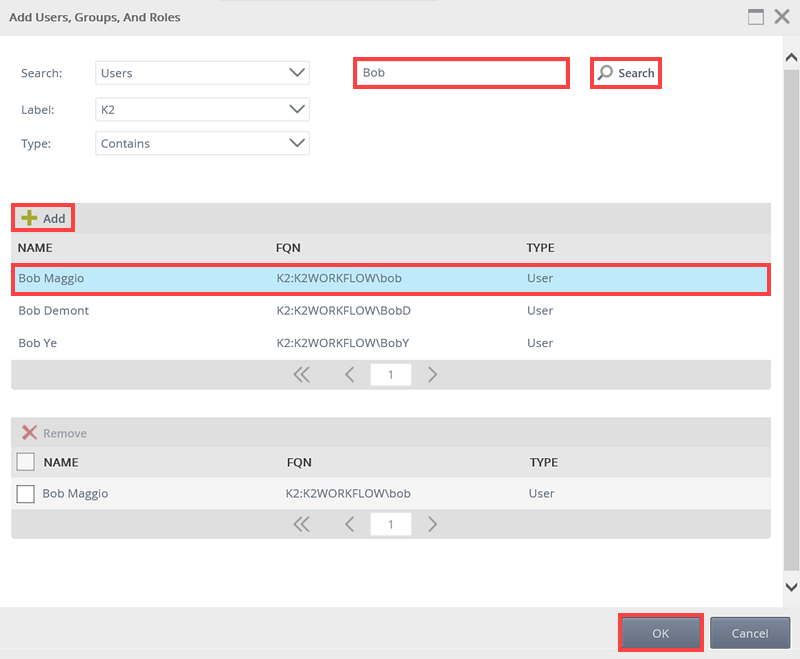
- On the Add Users, Groups, And Roles page search and add a user, group or role. Click OK.
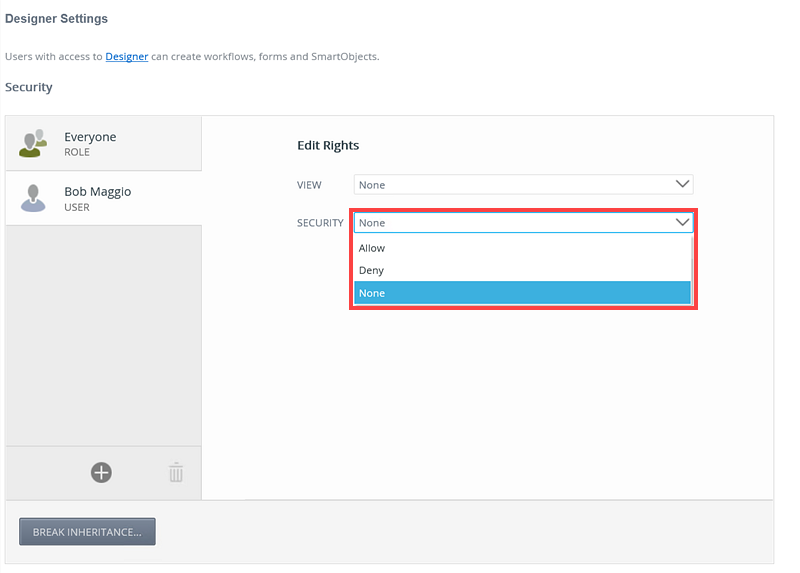
- Specify the user, group or role's View and Security rights. The following rights are available: Allow, Deny and None.
See How to: Restrict access to the K2 Designer using IIS Authorization Rules for more information to restrict access to the K2 Designer.
