

Scenario
How to upgrade a Nintex for Office 365 workflow to Nintex Workflow Cloud that uses the action, Document Generation.
Before Upgrade
It is recommended that you enroll in the training course, Nintex Workflow Cloud - Advanced Document Features, over at Nintex University to learn more about how document generation works in Nintex Workflow Cloud. The concept is basically the same as Nintex for Office 365, but it will be helpful to know the tools, actions, and properties available to you in the new platform before you upgrade.

After Upgrade
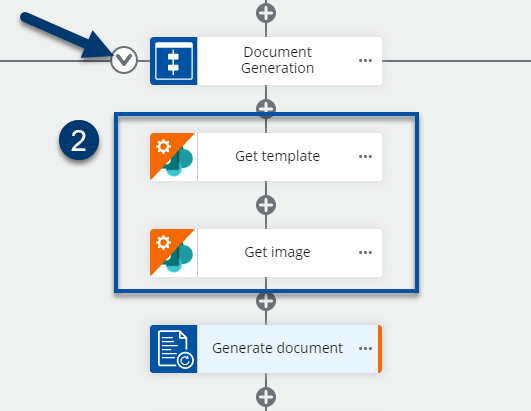
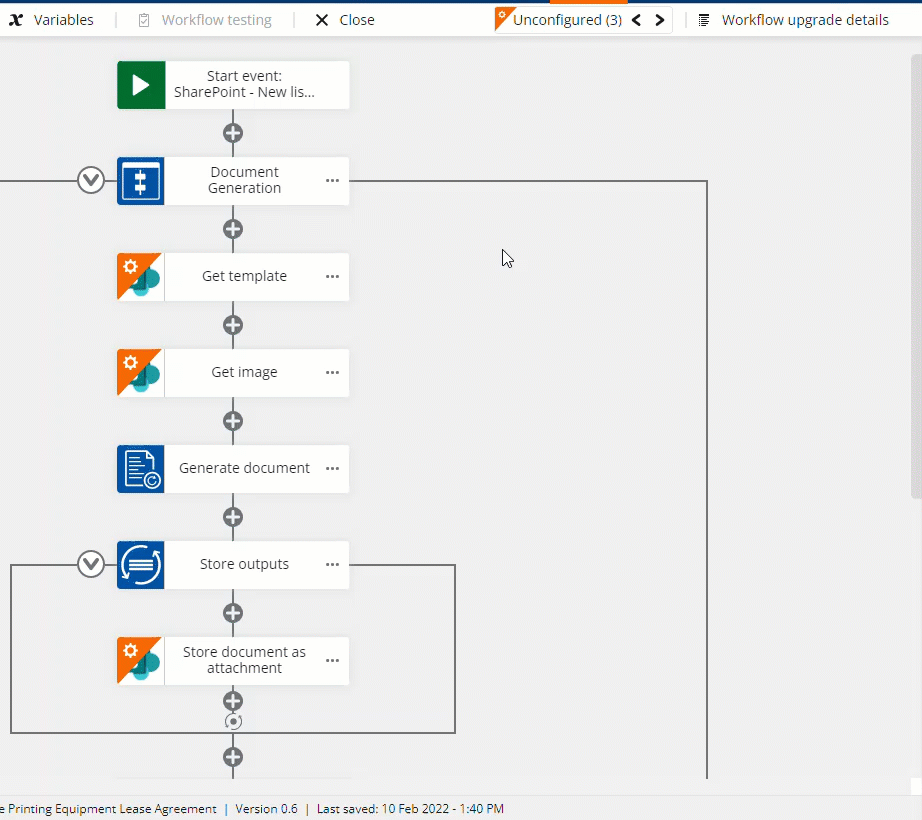
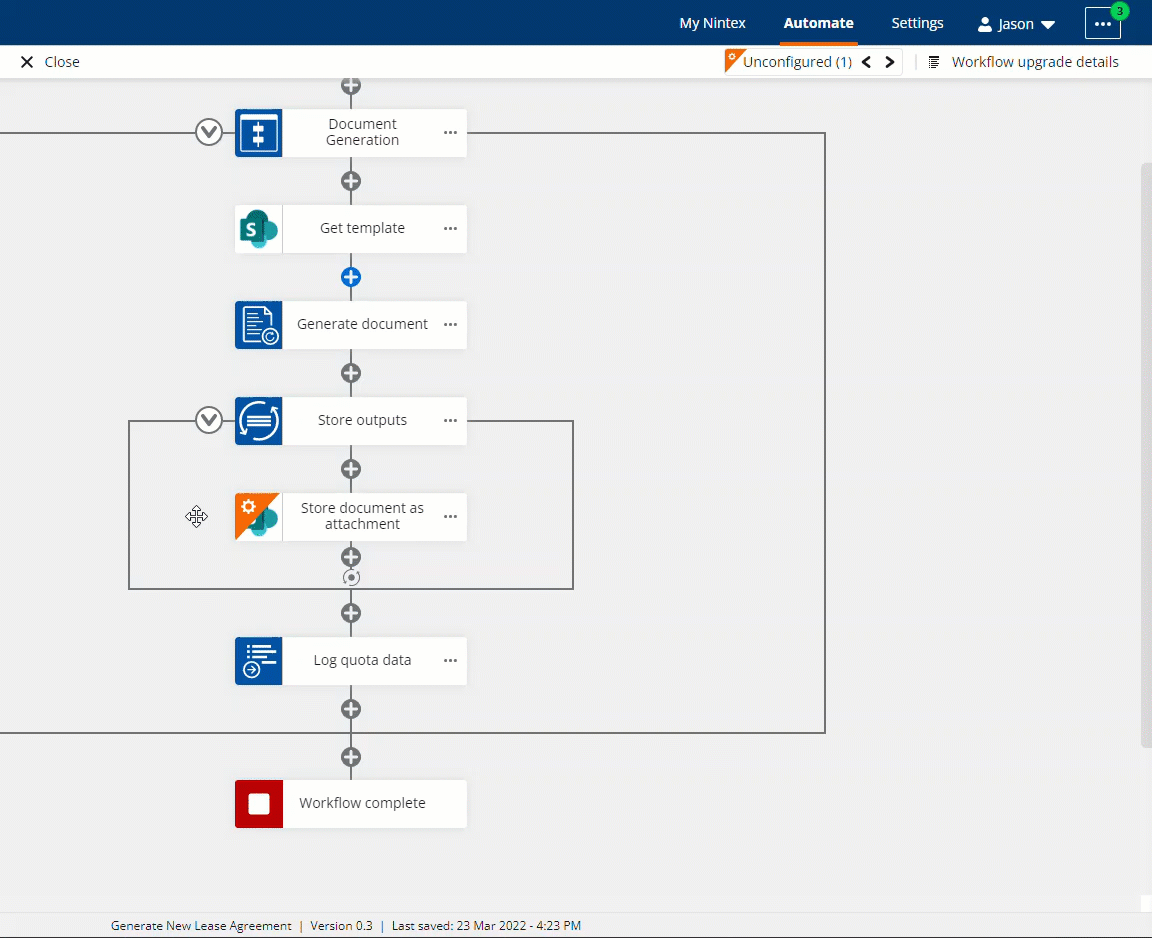
- The action will change into a compound action configuration by grouping multiple actions that work together to generate documents into an Action Set. Some actions will require configuration updates.
- Connections to your SharePoint environment may need to be reconfigured using an existing connection in Nintex Workflow Cloud.
- You will need to retag your document templates using tags that come from the Nintex Workflow Cloud Document Tagger. See Nintex Workflow Cloud - Advanced Document Features training course in Nintex University for help in this area.
- Data tables will become repeating sections and will need to be reconfigured with the document tagging tool. You may want to review the article, Workflow upgrade with Nintex Form repeating section data and Generate Document action, if you use Nintex Forms with repeating sections and work with the XML from that throughout your workflow for display purposes.
- Output file names in the Document Generation action may be set to "undefined" and will need to be reconfigured if you used variable tags from Nintex for Office 365. If you used plain text only for your generated filenames, they will not need to be reconfigured.
- You will need to configure the action, SharePoint Online - Add attachment to an item, if storing generated documents as attachments to a SharePoint item that starts the workflow.
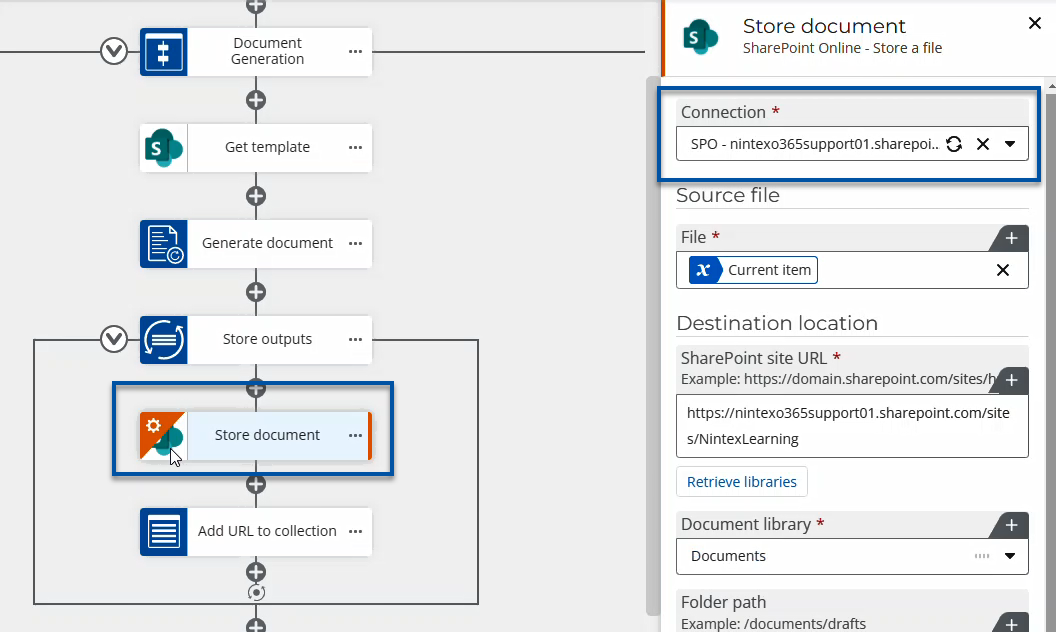
- You will need to check the configuration of the action, SharePoint Online - Store a file, to make sure it is configured correctly when storing generated documents to a document library. It should upgrade with no issues, but it may need to auto-reset the connection and document library properties based on the start event's selected connection property.
Differences
- Document templates can come from external document storage providers as well as SharePoint document libraries.
- Separate get a file style actions are needed to retrieve document templates into file variables no matter where they are stored.
- Table Data is renamed to repeating data.
- Repeating data will need to be reconfigured in the Generate document action.
- The document tagger becomes a web-based tool and will not be embedded inside Microsoft Word as a plugin.
- There will be a separate action named, Log to instance details, that will be used for logging document generation quota alerts on Nintex Workflow Cloud's instance details reporting page.
Configuration
Workflow
- You may need to reset the start event's connection property to point to an existing connection to your SharePoint environment.
- After resetting your Start Event connection to SharePoint, open the Document Generation action set and review any SharePoint Online - Get a file actions to ensure they are configured to pull the correct document templates and images into your workflow.
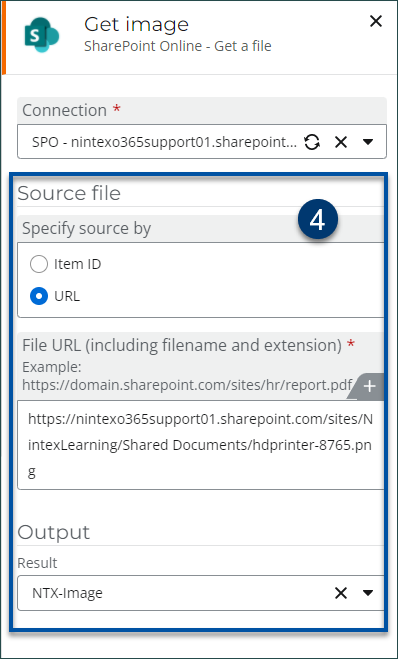
- Ensure that the Connection property is set correctly. Upon opening the configuration panel, the Get a file actions will automatically set the connection based on what you select in the start event.
- Review all Source file properties along with Output variable names that store your document templates and images for use later in the workflow.
- Repeat steps 2 - 4 for every SharePoint Online - Get a file action.
Generate document action - tagging
You will need to retag all of your document templates using the Nintex Workflow Cloud tagging tool. NOTE: For more information on how to do this, we recommend that you take the Nintex Workflow Cloud - Advanced Document Features training course from Nintex University.
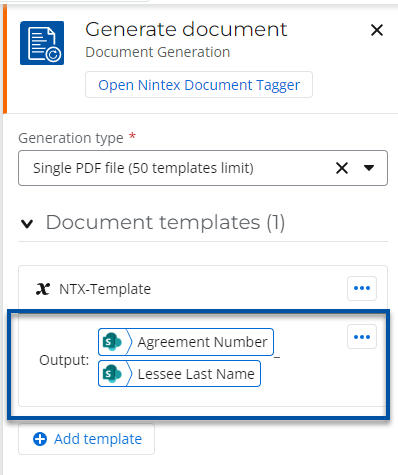
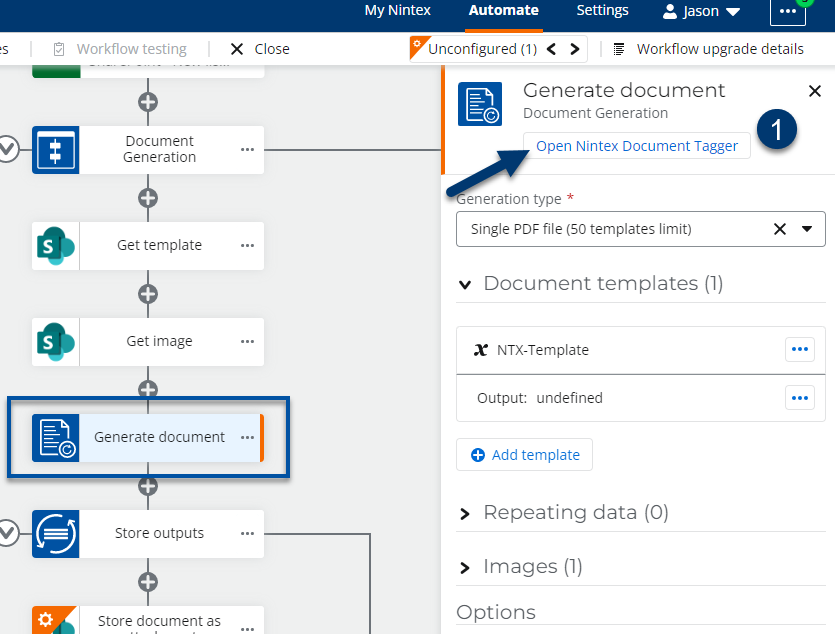
- In the Generate document action properties, click on the button, Open Nintex Document Tagger, in the properties for the Generate document action to open the document tagging tool.
- Line the tagging tool up with your document template and use the Start event variables or other variables to copy tags into your document templates.
- Review the output setting for each document template to ensure the filename is configured the way you want it. Click the ellipses next to this setting to reconfigure the filename using text and variables as desired.
Optional Actions
- You may need to reset the Connection property for the action, SharePoint Online - Add attachment to an item, if you selected the Output location property to Attach to current item in your original Nintex for Office 365 workflow.
- You may need to reset the Connection property for the action, SharePoint Online - Store a file, if you selected the Output location property to Document library in your original Nintex for Office 365 workflow.
References
- Nintex for Office 365 Help - Upgrade Workflows
- Nintex Workflow Cloud Help - Workflow actions upgrade details (Scroll down to Document generation action for more details)
- Nintex Workflow Cloud Help - Generate Document
- Nintex Workflow Cloud Help - SharePoint Online - Add attachment to an item
- Nintex Workflow Cloud Help - SharePoint Online - Store a file
- Part 1: Work with repeating section data from SharePoint based Nintex Forms
- Part 2: Work with repeating section data from SharePoint based Nintex Forms
