How to Check Group Membership When a Form Loads
KBS100024
PRODUCTObjective
In some situations, it may be necesary to check whether a user is allowed to view a SmartForm when they open it. The best method to do this is to checke whether the user is a member of a group that has been given permission. This article is about how to check the group membership for SmartForms when they load.Before You Begin
This KB assumes that you know the basics of SmartForm design. Additionally, it assumes that an AD Service2 Service Instance and its SmartObject have been created already on your environment to provide access to the full array of methods.How-to Steps
1) To start with, create or edit the form where you want to check for group membership.
2) In the layout for the form, add a data label control which you will be using to check the membership. In the example below, it is called Group Data Label:

Depending on the overall design of your form, you may want to set this data label to not be visible.
3) If there is already a rule for "When the Form is Initializing", edit this rule. Otherwise, create a new rule that uses "When the Form raises an event" as the event and choose Initializing as the event.
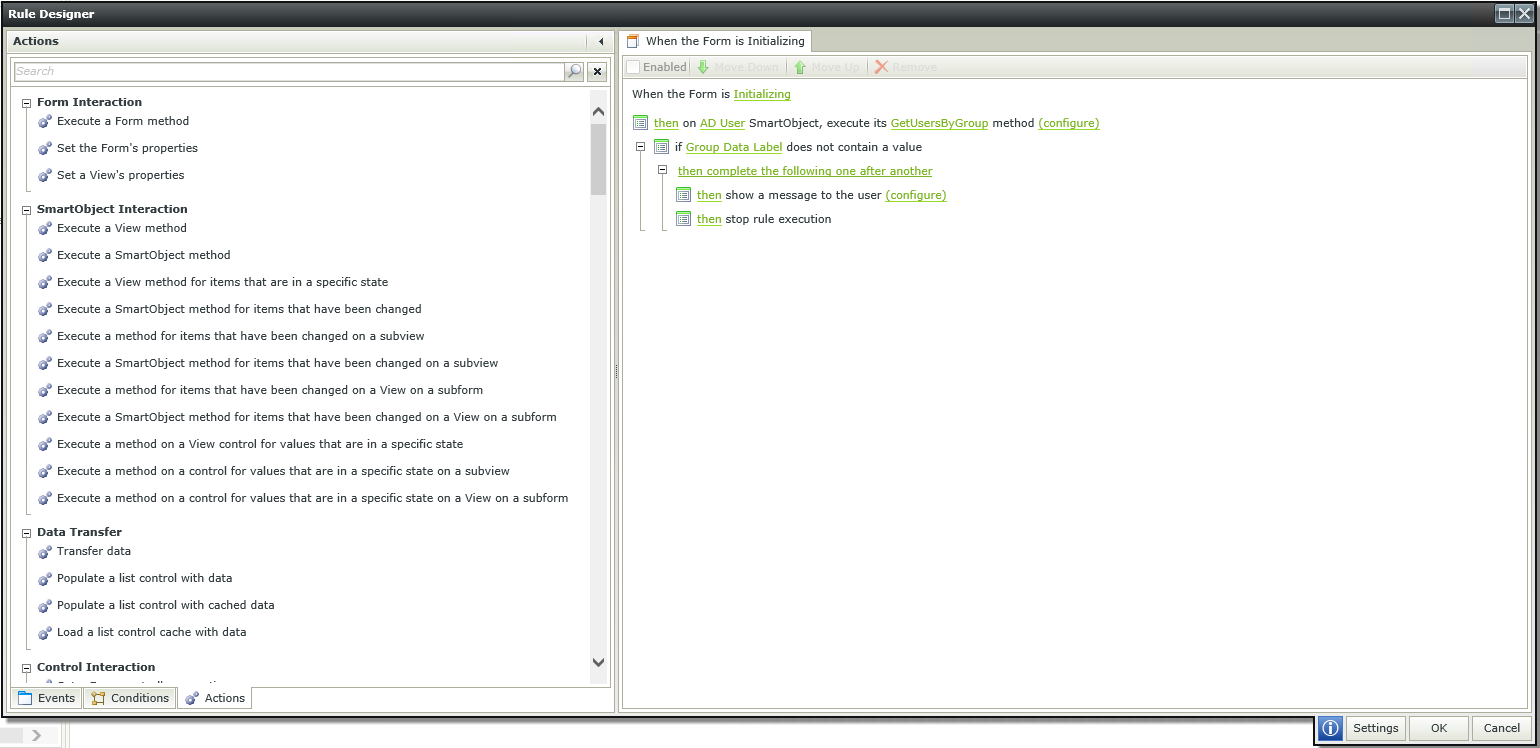
4) As seen in the above image, you will add several steps to the rules to check to see if the user is a member of the required group. I would suggest that you add these before any other rules in order to minimize load times.
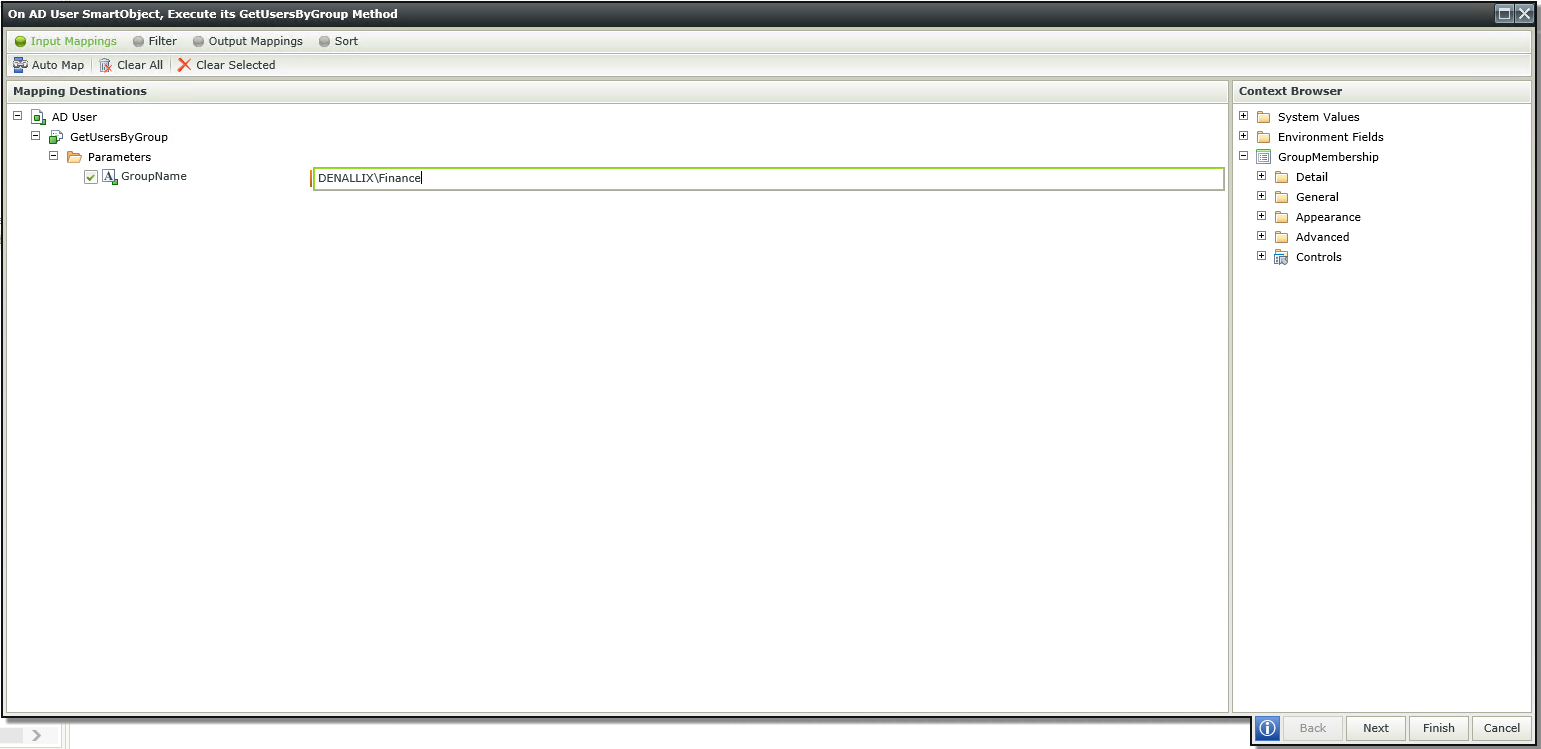
5) Add an "Execute a SmartObject method" action to the rules.
6) Use the AD User SmartObject from the AD Service2 Service Instance as the SmartObject and GetUsersByGroup as the method.
7) Configure the SmartObject action.
😎 For the Input Mappings, input the name of the group, as seen below.
9) Next, for the Filter, add a filter against the Name of the Current User in the System Values of the Context Browser.
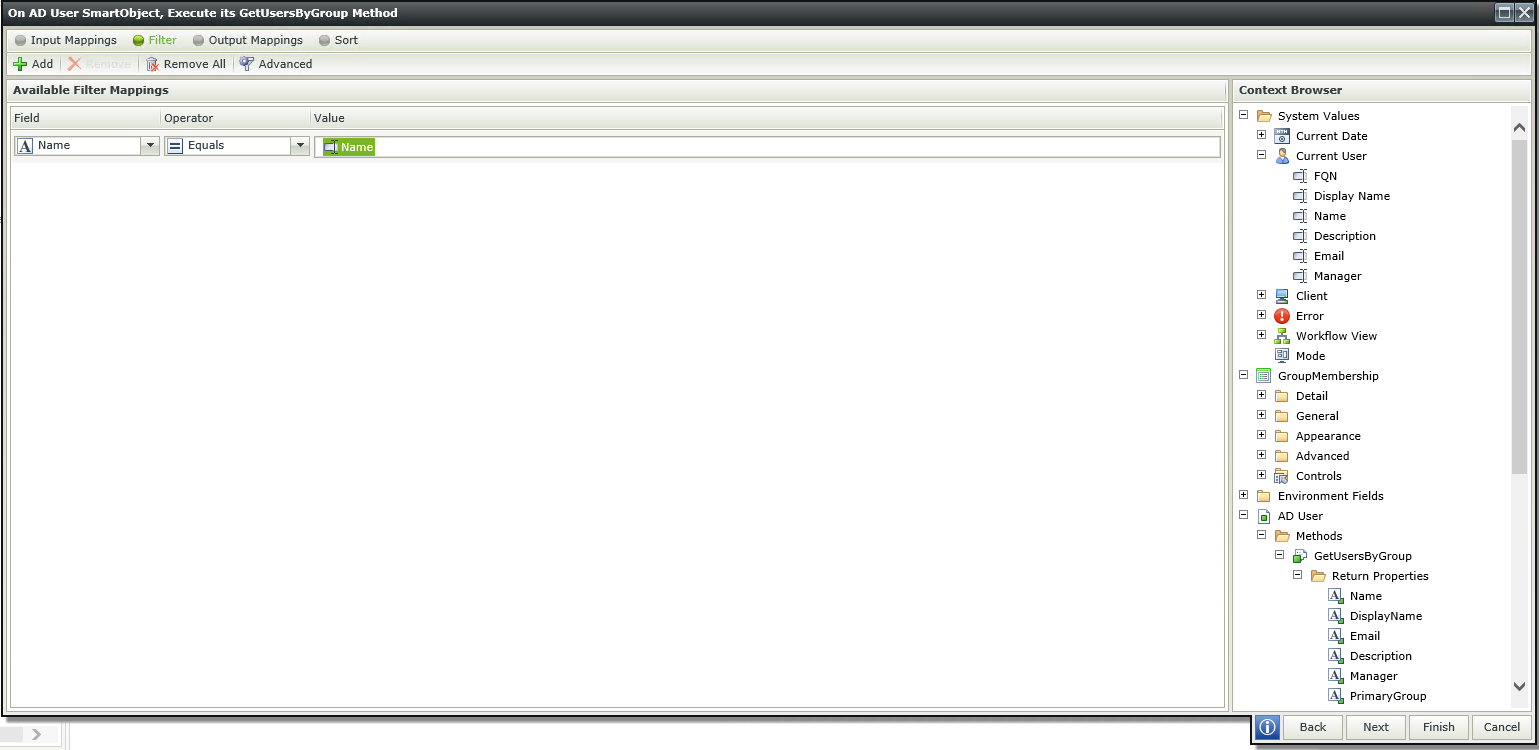
This will make it so only the name of the current user is returned. If the SmartObject call returns a value, then the user was in the group. Otherwise, the user was not in the group.
10) Finally, for the Output Mappings, transfer the DisplayName from the return properties to the Group Data Label that was created earlier.
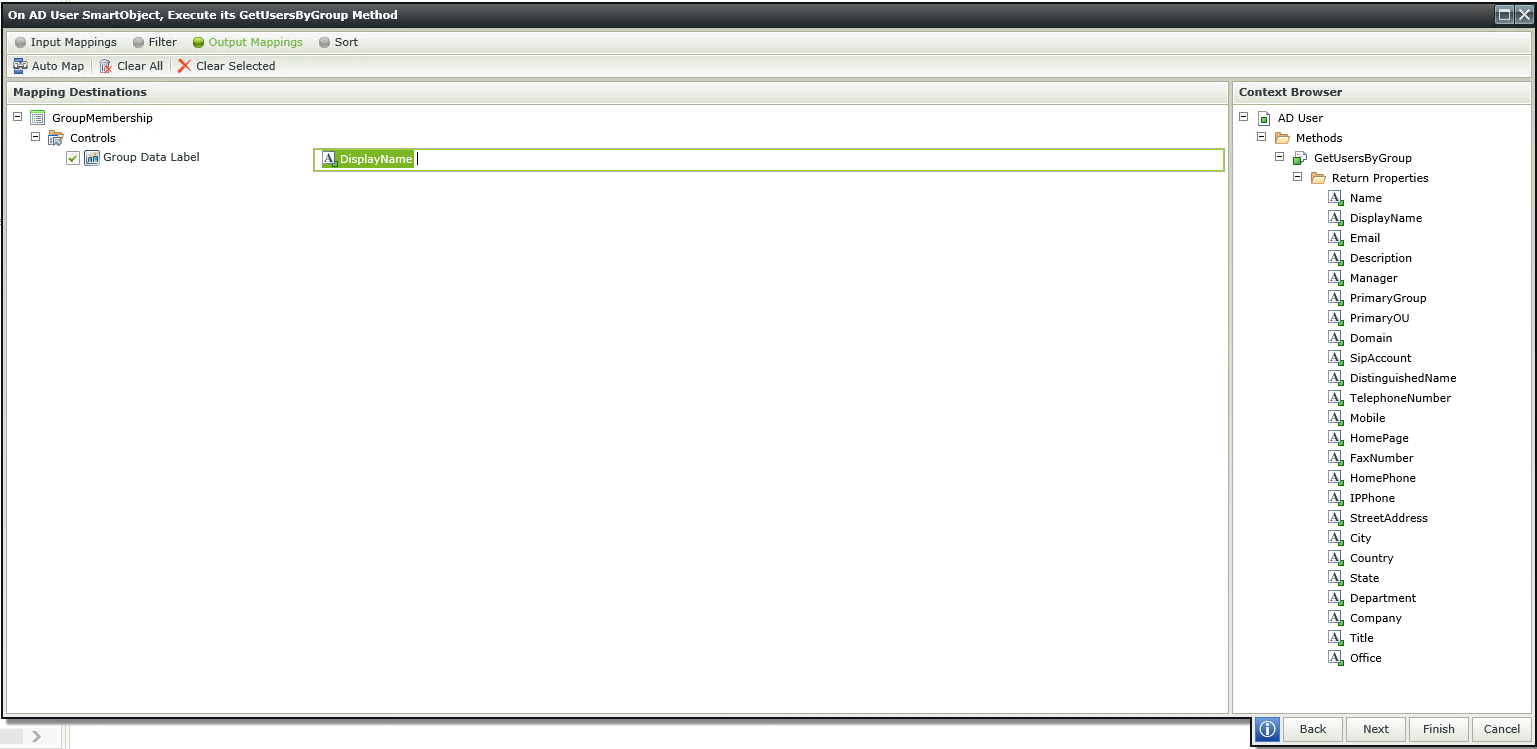
Which value is actually returned is not completely important. As such, any of the return values can be used.
11) You will then start adding the rest of the rules. To start with, add a condition to check whether the Group Data Label has a value.

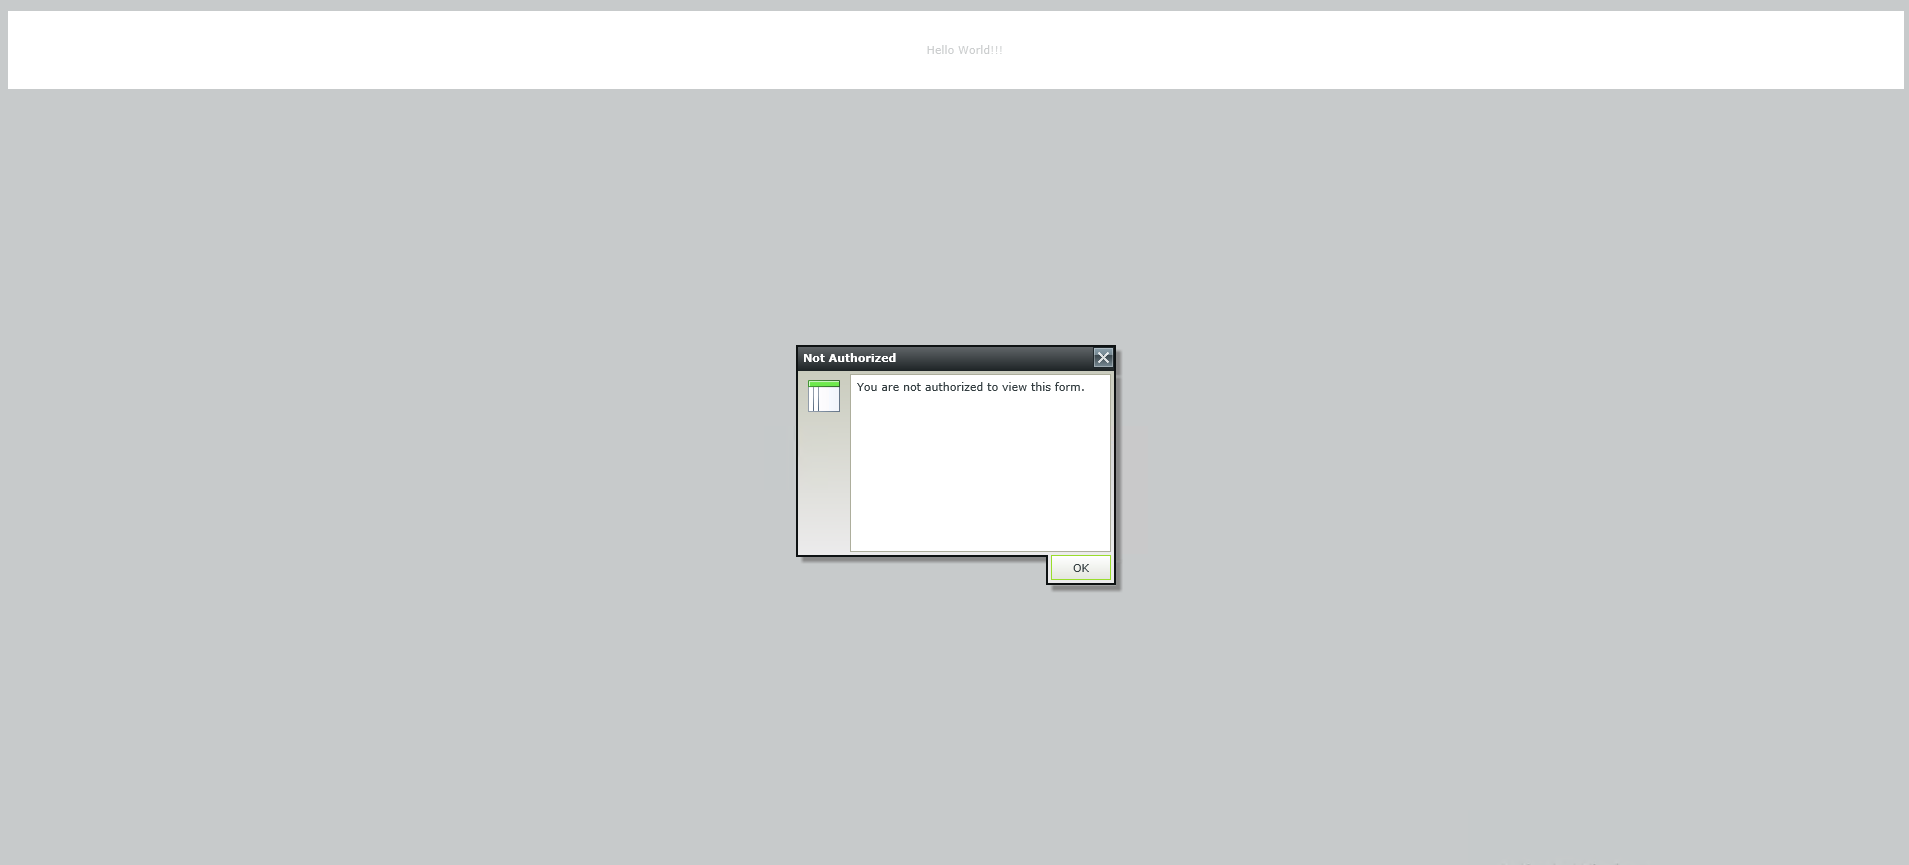
12) After this condition, you can then add an action to show a message to the user to tell them that they are not allowed to view the form.
13) Finally, add an action to stop the rule execution. This is important, as it will prevent the rest of the form from loading, disallowing the user from using it. Instead, you can choose to have the browser go to a different webpage, or simply close the window.
14) The finally form should look like the following when an unauthorized user attempts to access the page: