Solved

Displaying Approver's Attachments in a Different Attachments Control in Nintex Forms

  • 18 April 2024
  • 3 replies
  • 26 views

Badge +1

Hello,

I'm currently trying out 'Nintex Forms for SharePoint 2019'. I've designed a Nintex form with two Attachments controls: Attachments1 and Attachments2. Attachments1 is the default control.

I need to display the attachments uploaded by the approver in Attachments2. How can I achieve this?

icon

Best answer by SimonMuntz 22 April 2024, 00:46

View original

3 replies

Userlevel 6
Badge +22

Hi @Tannic,

First, copy the file from the task to the item where you want to display it.

If you make Attachments2 the default control, the Attachment will appear on that control.

Badge +1

HI @SimonMuntz 


For example, my SharePoint list item uploaded 10 attachments (old data migrated to the new Nintex form), and I want to customize it so that Attachments1 displays 5 of them and Attachments2 displays the remaining 5. How to implement this? Thank you

Userlevel 6
Badge +22

Hi @Tannic,


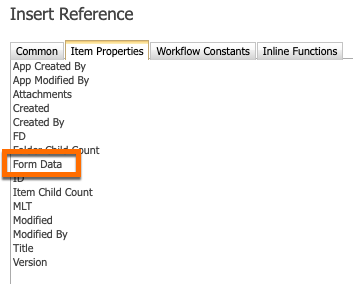
Nintex forms keeps track of unbound controls (controls not connected to a SharePoint column) and attachments by storing the information in a hidden column called Form Data.


The data is stored in XML format.
Example:

<?xml version="1.0" encoding="utf-8"?><FormVariables><Version /><Q1 type="System.String">Yes</Q1><Q2 type="System.String"></Q2><Q3 type="System.String"></Q3><Q4 type="System.String"></Q4><Q5 type="System.String"></Q5><QR type="System.String">Yes</QR><Attachments1 type="System.String">File1.Doc;File3.Doc</Attachments1><Attachments2 type="System.String">File2.Doc</Attachments2></FormVariables>
  1. Create a new workflow on the list.
  2. Use the Set variable action to store the Form Data column in a Multi Lines of Text variable.
  3. Use the Update XML action to add the file names to the XML in the variable.
  4. Use an Update item action to update the Form Data column with the updated XML variable.

As you migrated the data, the Form data column may be empty. To populate the column, you must open the item in edit mode and then save it.

Reply