Configure Request Filtering to Secure a Secondary SmartForms Runtime Site
KB002925
PRODUCT
Use IIS Request Filtering to limit the forms available on a secondary SmartForms runtime site. Take this security measure when you need to limit the number of forms available on your secondary runtime site, especially if forms are accessed anonymously.
For information on setting up a secondary runtime site, see Configuring a Secondary SmartForms Runtime Site.
Elements Used
There are three main web.config elements that you use when configuring request filtering. You add these elements to the <configuration><system.webserver><security><requestFiltering> section of the web.config file. It is recommended that you make these changes in the web.config file located in the Runtime subfolder of the secondary runtime site instead of in the main folder's web.config file for easier maintenance.
The three elements are:
- <denyUrlSequences>: Used to deny sequences at the folder level, such as /Runtime/Runtime/Form/ which denies all forms.
- <alwaysAllowedUrls>: Used to allow particular URLs based on the form name, such as /Runtime/Runtime/Form/Information+Request+-+Public/
- <denyQueryStringSequences>: Used to deny forms and views by ID, such as 165f9225-3bed-4b89-8168-7044588cc347
Within each of these elements you use an add elements to configure the sequences, URLs, and query strings that you want to deny or allow.
Scenario
You have four forms deployed to your K2 server. The names and IDs in this scenario are as follows:
- Leave Request (165f9225-3bed-4b89-8168-7044588cc347)
- Expense Claim (ce033920-dad5-43f4-9fce-de98927cbb19)
- Information Request - Public (44ba654a-27d5-4eb2-83f0-034f8a44cf36)
- Support Request - Public (204d4f3f-945e-4787-8acd-1bb2bb4647eb)
The Information Request - Public and Support Request - Public are forms that you expect to be accessed on your secondary SmartForms runtime site, and these forms are accessed anonymously because required fields allow people to fill in their preferred contact information. You do not want employees to fill out Leave Request and Expense Claim forms using the anonymous site because those forms rely on user information being automatically populated based on the logged-in identity. For the secondary site, you decide to block all traffic except the two public forms. Though not part of this scenario, you could also decide to deny access to the public forms on the main (internal) runtime site.
Step 1: Backup your web.config File
Browse to your secondary runtime site location on your hard drive and open the Runtime subfolder in this site. For example, [Drive]Program Files (x86)K2[secondaryruntimesite]Runtime. Open the web.config file and note its contents. Typically the web.config file in the Runtime subfolder is blank as opposed to the one located in the main folder of the site. However, make a backup copy of it anyway and save it in the same location if you need to revert your changes at a later time.
Step 2: Configure IIS Request Filtering
In this second step, you choose the IIS application for your secondary SmartForms site to configure IIS request filtering. You configure this in IIS Manager using the Runtime subfolder of the secondary runtime site. You can instead modify the web.config file directly, which you do in Step 2.
- Open Internet Information Services (IIS) Manager.
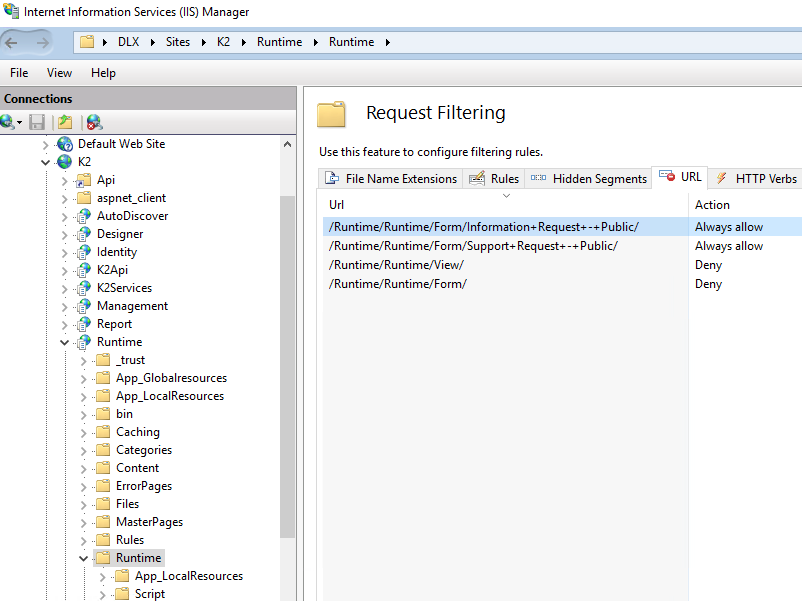
- Select the Runtime folder located in Server > Sites > [Your Secondary Runtime IIS Application] > Runtime.
- Double click Request Filtering and then select the URL tab.
- Click the Deny Sequence link in the right pane and configure one each for the following:
/Runtime/Runtime/Form/
/Runtime/Runtime/View/ - Click the Allow URL link in the right pane and configure one each for the following. Change the form names to suit your needs and substitute any space characters with plus (+) signs in your form names:
/Runtime/Runtime/Form/Information+Request+-+Public/
/Runtime/Runtime/Form/Support+Request+-+Public/ - Your final configuration should look similar to the following:
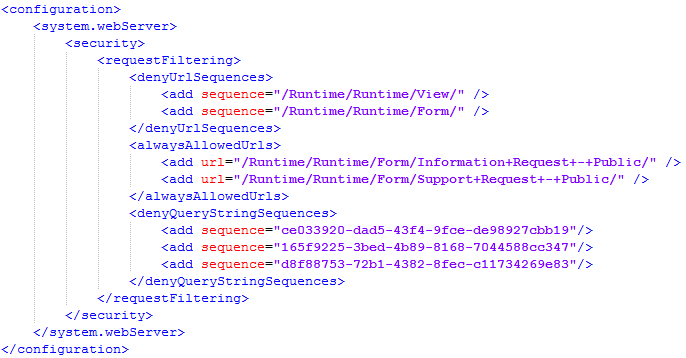
- Test your configuration by browsing to the URLs of forms that should and should not be allowed. Note that the entries you make on the Request Filtering page are written to the web.config of the associated IIS application. For example, the following XML entries appear in the Security section of the web.config located in the Runtime subfolder of your secondary runtime site:

Step 3: Add the Deny Query String Sequences to the Secondary Runtime Site
To fully block the non-public forms on your secondary runtime site, you must also specify the IDs (GUIDs) of the views and forms in the denyQueryStringSequences element. Views and forms are accessible by ID when using the following URLs:
- https://<webserver>/runtime/runtime/view.aspx?_ID=<guid>
- https://<webserver>/runtime/runtime/form.aspx?_ID=<guid>
To deny access to these views and forms by their IDs, use add elements as follows:

It is recommended that you edit the web.config file directly for these entries and do not use the Request Filtering module's Query String tab to do this part of the configuration.
To find the GUIDs for your views and forms, follow these steps:
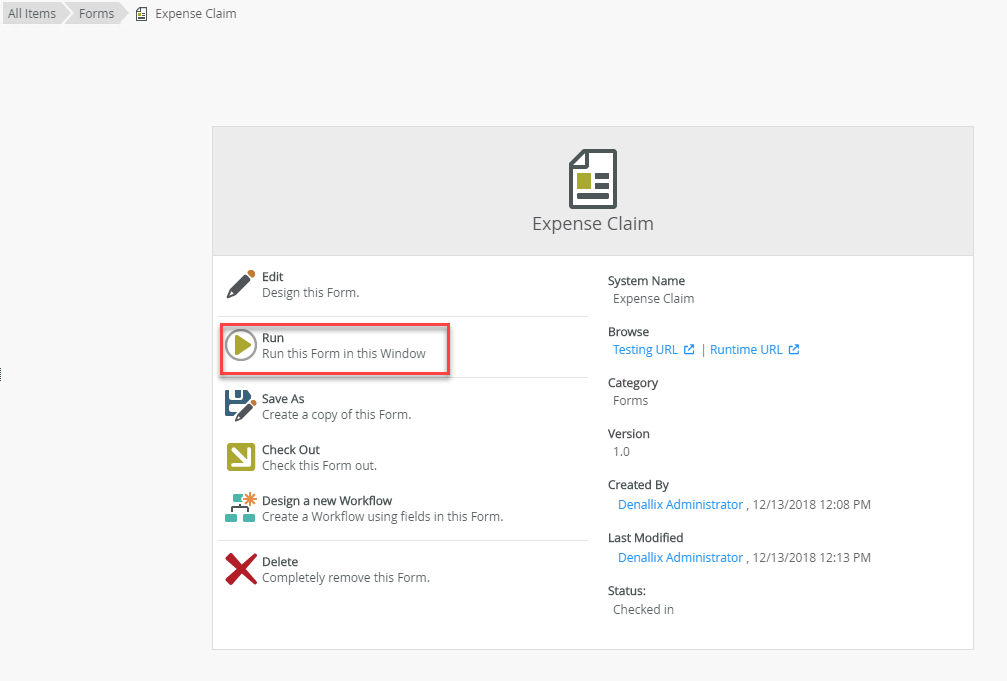
- Browse to the properties page of a particular view or form
- Click the Run button on the Properties page as shown here:
- Once the view or form renders, copy the GUID from the URL:
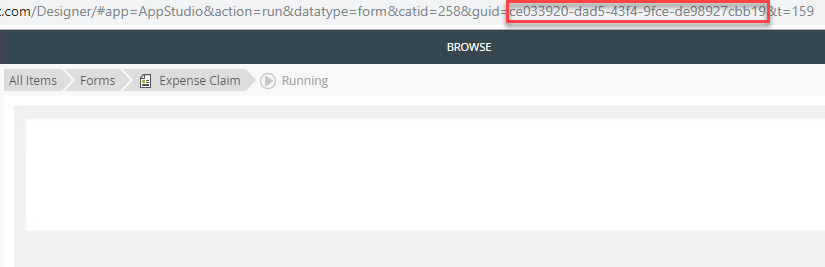
- Make a list of every view and form GUID that you do not want to be accessible on your secondary runtime site.
- Create an add element for each GUID in the web.config file. Your final web.config file looks similar to the following: