How To: Add rules that control the submission of InfoPath forms to K2
KB000107
PRODUCTK2.net 2003
TAGSMicrosoft InfoPath
LEGACY/ARCHIVED CONTENT
This article has been archived, and/or refers to legacy products, components or features. The content in this article is offered "as is" and will no longer be updated. Archived content is provided for reference purposes only. This content does not infer that the product, component or feature is supported, or that the product, component or feature will continue to function as described herein.
This article walks through the process of adding rules to the submission behavior of an InfoPath form so as to allow a form variable determine whether the form gets saved to a SharePoint Form Library or submitted to K2.
| Introduction | |||
| The purpose of this article is to demonstrate that custom rules can be added to the submission properties of an InfoPath form. This particular example shows how these rules can be used to determine if an InfoPath form should be saved to a SharePoint form library or submitted to K2.net® 2003 process. | |||
| |||
| 1) | Open the desired Form for editing (Do not use the "Design Document" feature in K2.net Studio. See important note above) | ||
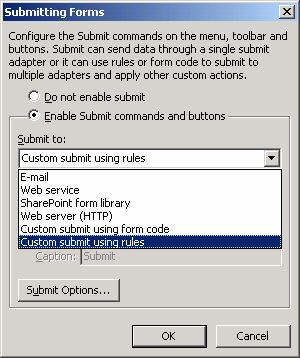
| 2) | Click on "Tools->Submitting Forms" | ||
| 3) | Select "Custom submit using rules" from the "Submit to" drop down list | ||
| | |||
| 4) | Click the rules button. The rules defining the form's submission behavior are configured here. For the purposes of this example, the instructions will illustrate how to create a rule to perform a simple check that will either submit the form to K2.net or save the file to a SharePoint document Library | ||
| Back to Top | |||
| How to create a rule: | |||
| 1) | Click "Add" to add your first rule and provide the rule with a name | ||
| 2) | Click "Set Condition" | ||
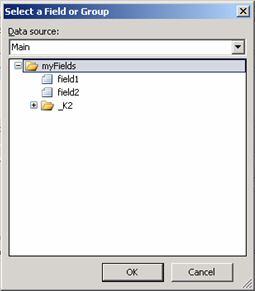
| 3) | Create the condition "Field1 is equal to Submit" where "Field1" is a field on the form that determines whether to submit or save and "Submit" is the value that would indicate a submission to K2 | ||
| | |||
| 4) | Click OK to complete the condition | ||
| Back to Top | |||
| How to add an action | |||
| The next step is to add the actions that occur as a result of the rule equaling "true" | |||
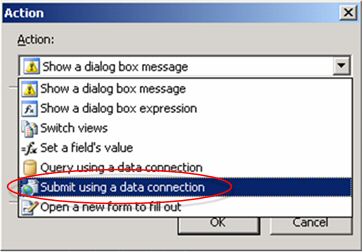
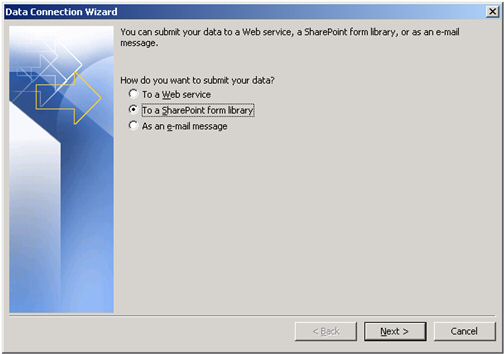
| 1) | Click Add Action and select Submit using a data connection | ||
| | |||
| |||
| |||
| | |||
| |||
| | |||
| |||
| |||
| | |||
| |||
| |||
| | |||
| |||
| | |||
| |||
| |||
| 2) | Click "OK" to complete the creation of the data connection Action | ||
| 3) | Click "OK" to complete the creation of the rule | ||
| 4) | Click "OK" to finish creating rules | ||
| 5) | Click "OK" to complete the Form Submission properties | ||
| 6) | Save the form and run the process to ensure that you can submit to the 2 data connections based upon form data | ||