


SharePoint Online User Interface changes
KB001792
PRODUCT
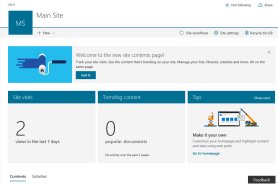
Recent changes to SharePoint Online include a new user interface (UI) that is visible in the SharePoint Online Site Contents page as well as in lists and libraries. It is most notable in lists and libraries where the Ribbon toolbar is no longer present. The new UI is the default experience but you can switch back to what is known as Classic SharePoint.
To enlarge click on each image below
Visit What's new in Microsoft SharePoint Online and The SharePoint Site Contents Page for more information.
How does it affect K2 integration?
The UI changes have the following implications for K2 integration:
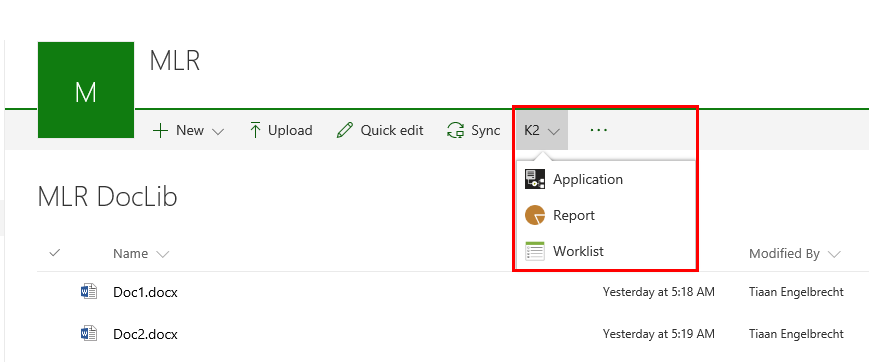
- K2 features can be accessed in the K2 drop-down menu item.
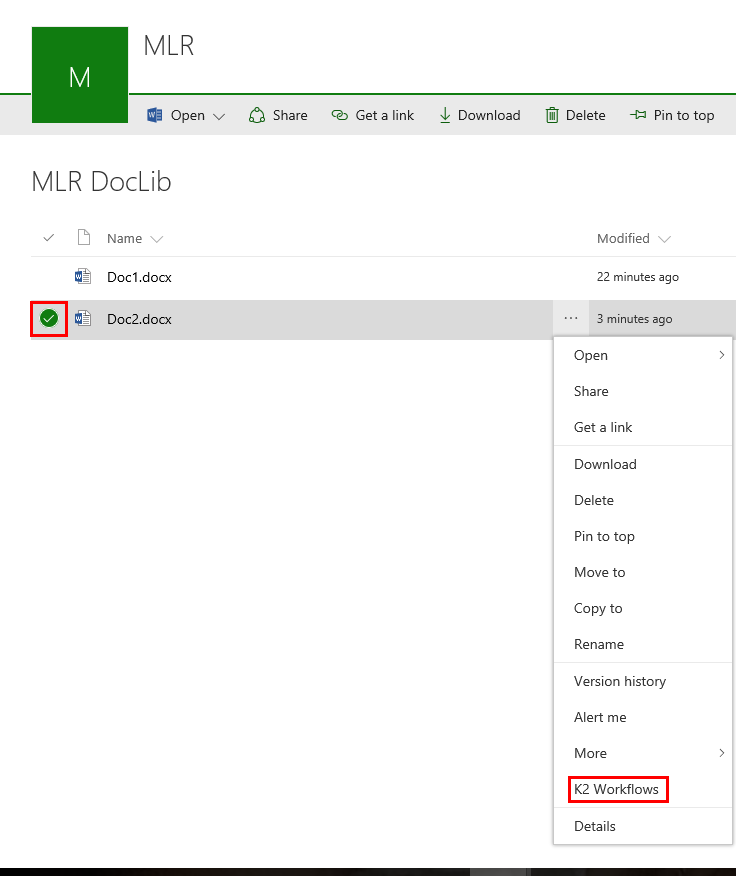
- Manually starting a K2 workflow – Select a document, click the ellipsis and select K2 Workflows.
- Information panel – If you have required fields in a library and a workflow that starts with the upload of a document, use the information panel to view and edit the required fields. Alternatively switch back to classic SharePoint to revert to the previous UI experience which opens the form containing the required fields when a document is uploaded.
- Accessing K2-generated forms causes a switch back to the old UI.
- Accessing the K2 artifacts page while using the new UI may indicate that there are no K2 artifacts associated with the list or library. If you create SmartObjects you will see the rest of your previously-created artifacts.
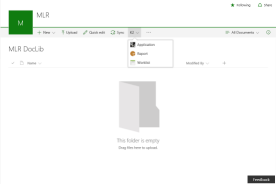
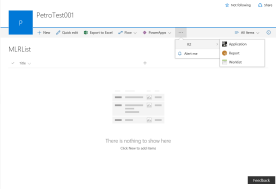
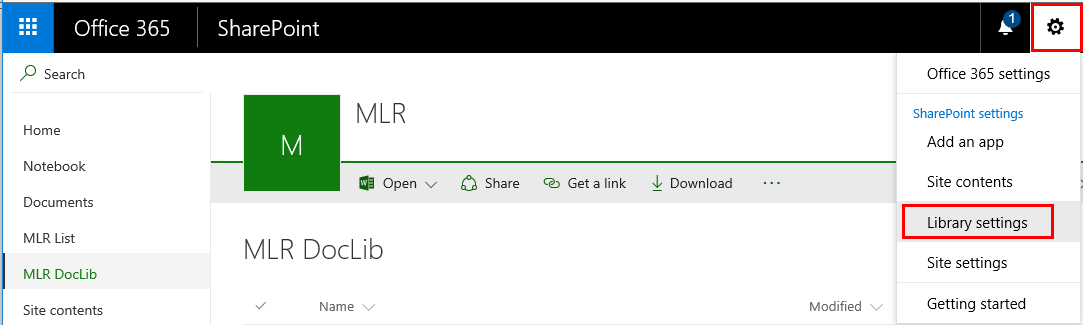
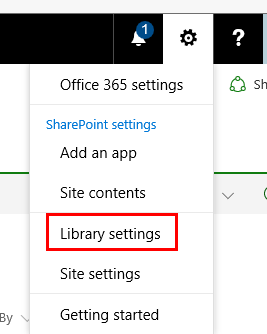
- Add a column – Columns must be added through Library settings.
- Add a Page - The Worklist web part can no longer be added to a page. You can embed Worklist in a page using formatted iframe code.
| Note: A new add-in development platform is available that focuses on the user interface (UI) experience for SharePoint users and administrators. |
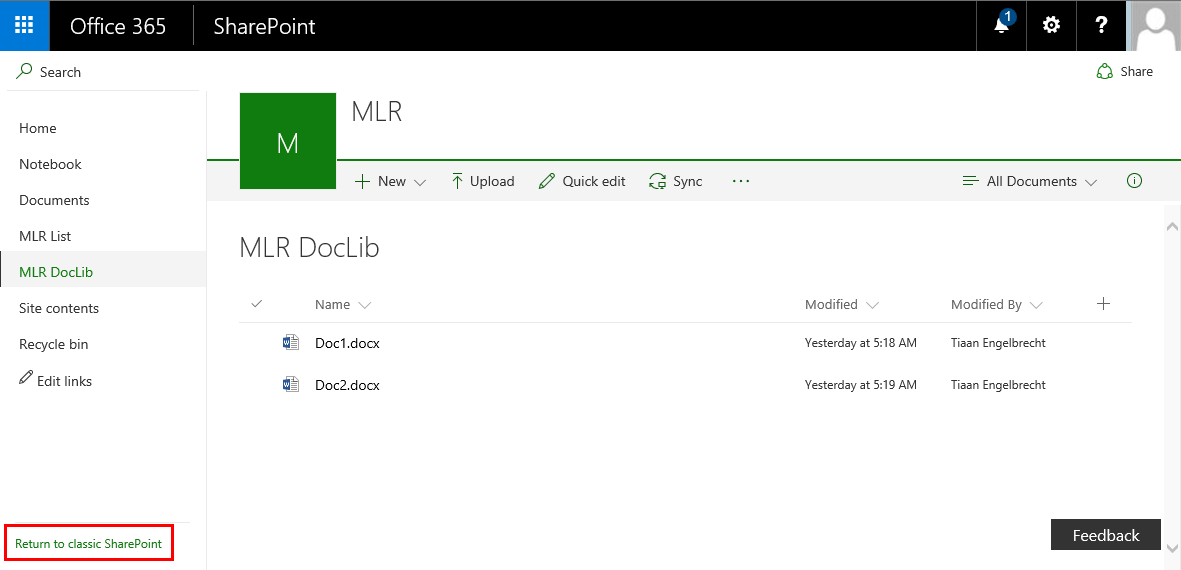
You can switch back to the previous UI (Classic SharePoint) if you need to.
You can switch back to classic SharePoint by clicking Return to classic SharePoint at the bottom left of the list or library page. You will be in classic view for the remainder of your browser session. If you close your browser and then re-open Site Contents or a list or library, you are presented with the new UI.
If you are an administrator and want to change the default experience to Classic SharePoint for your users, follow these steps:
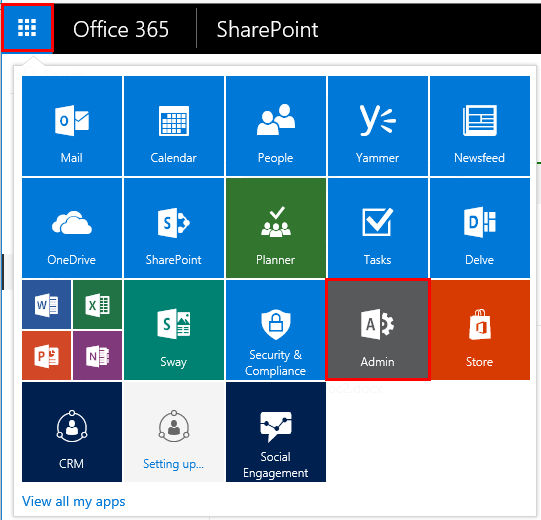
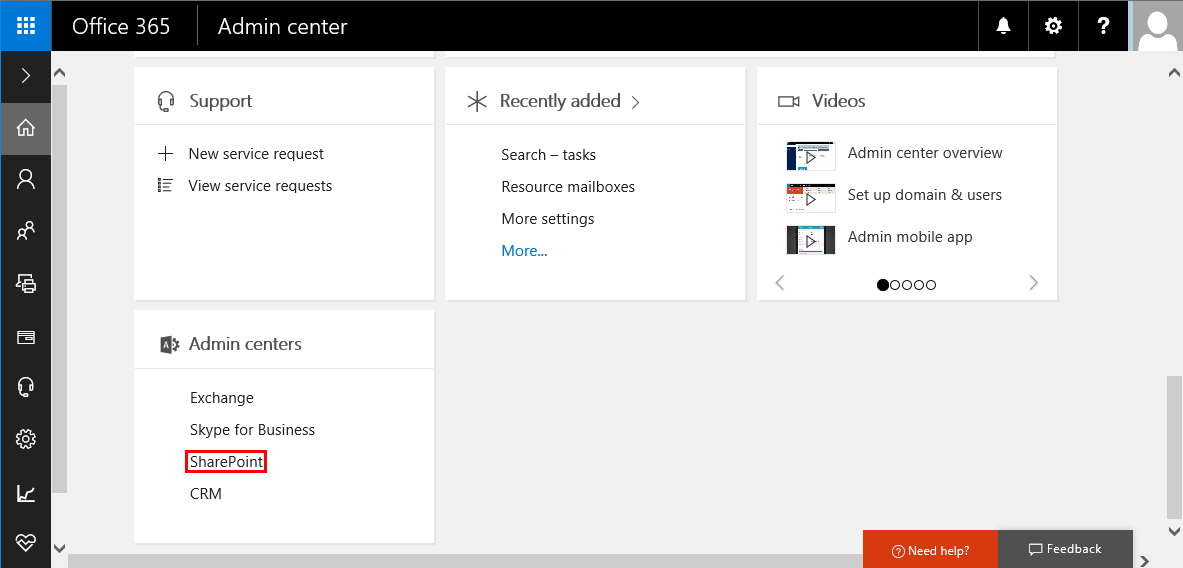
- Choose Admin and then SharePoint on the images below.
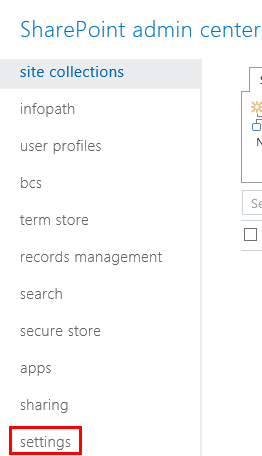
- Choose settings.
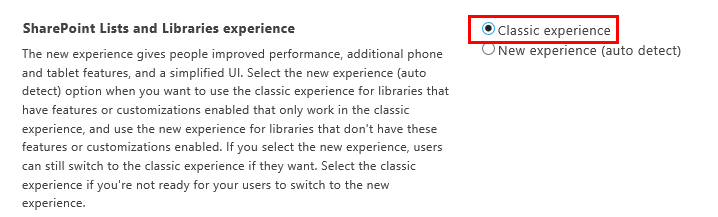
- Next to SharePoint Lists and Libraries experience, select either Classic experience or New experience (auto-detect).
| Note: Although this section refers to lists and libraries, it is also used to set the default experience for Site Contents. |
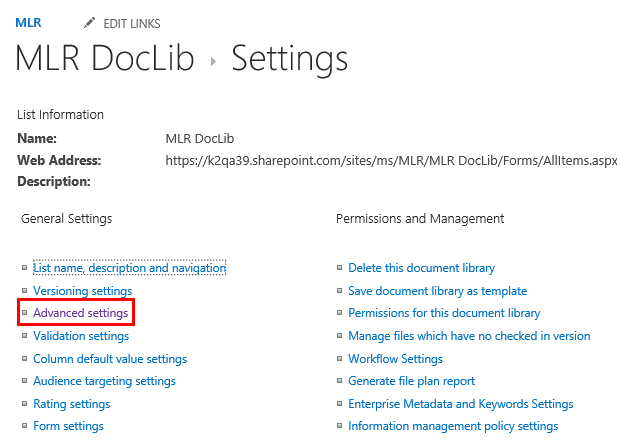
This setting can also be accessed on Libraries by selecting Library settings > General settings > Advanced settings.
| Note: Microsoft may remove the option to switch back to Classic SharePoint at any point in time. You may want to begin working in the new UI to become comfortable with it |
K2 features are available in the K2 drop-down menu item.
This is much the same as it used to be. To start a workflow manually on a document, select the document and click on the ellipsis, and then select K2 Workflows.
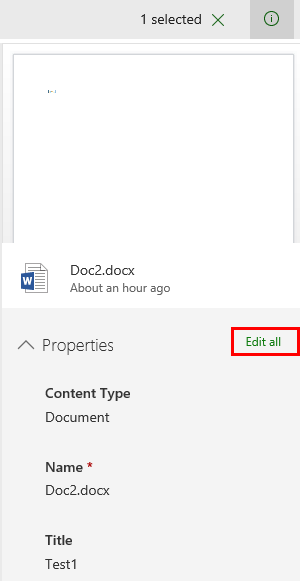
| Important: If you are uploading documents and you have required fields for the document metadata, you are no longer presented with a K2 form that includes the Start Workflow button. You must click Edit All in the information panel to see the K2 form. For more information see the following section. |
The information panel replaces the edit form experience for document metadata editing. Select the document, click the Details item context menu or the ‘i’ icon to access the information panel when uploading a document.
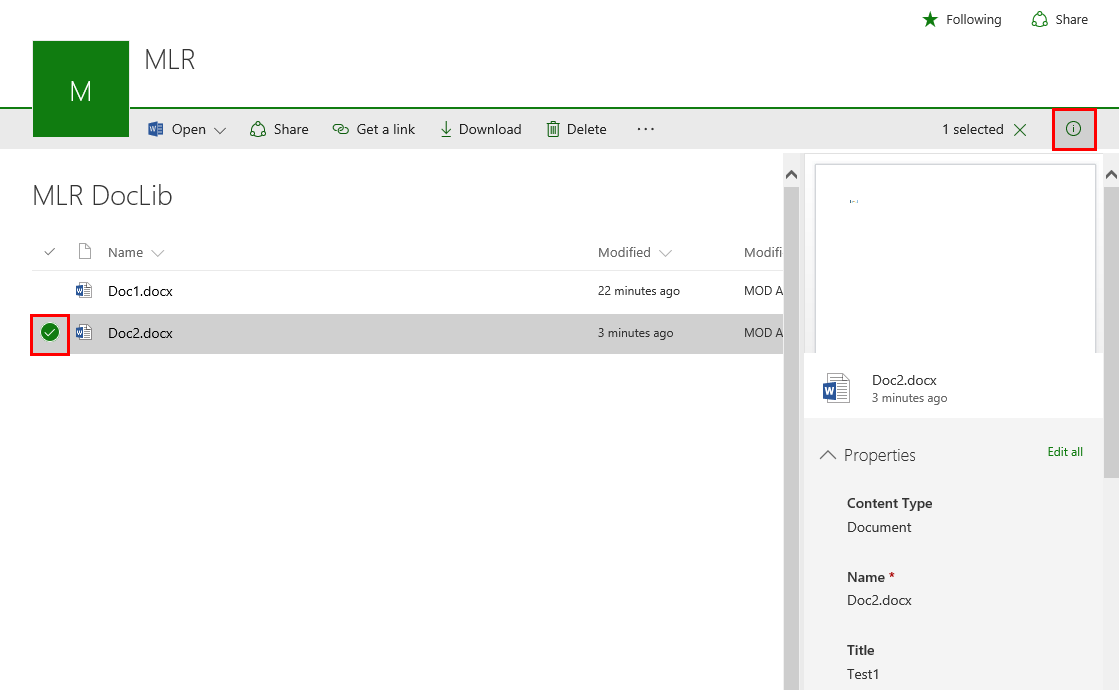
Click Edit all to see the full details of the form.
Access the library settings by clicking the master toolbar gear icon in the top right corner. Go to Columns > Create column. If you switch back to Classic SharePoint the Library Settings button is still found in the Ribbon.
Add a page from the SharePoint Online Site Contents page by clicking the New drop-down menu item and selecting Page.
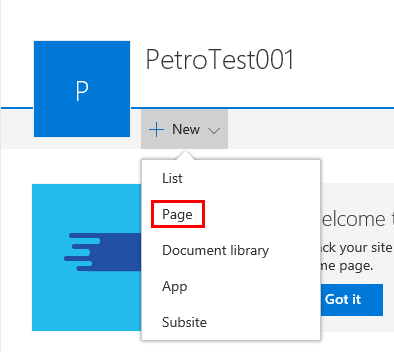
Provide a title for your page and select a web part from the list provided. The Worklist web part can no longer be added to a page. Use formatted iframe code to embed the Worklist in a page.
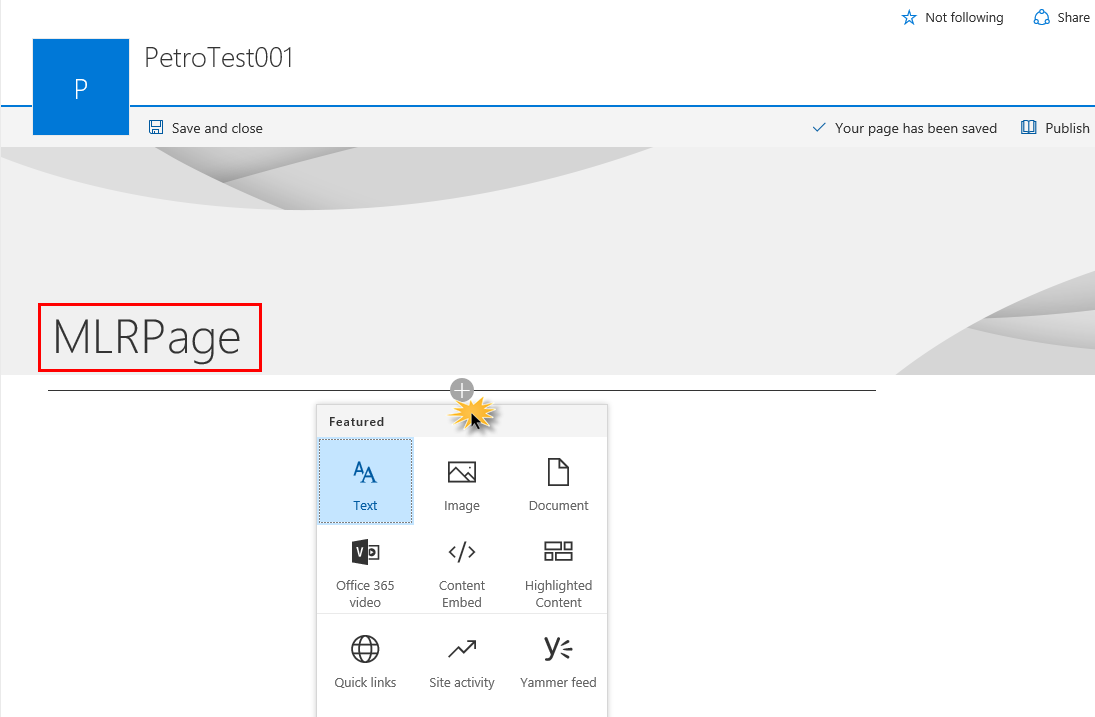
Click Save and close. The page is created in the default library.
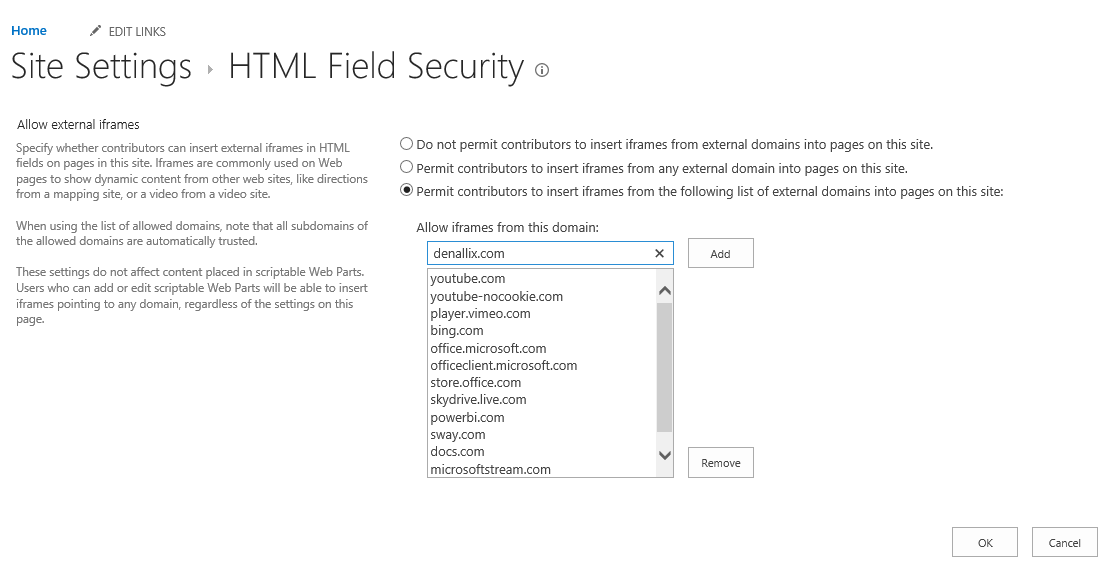
Follow the steps below to embed Worklist into a page.
- Add the K2 server domain to the list of allowed external domains.
- Navigate to Site Settings > Site Collection Administration > HTML Field Security.
- Add {K2ServerDomain} to the list. Example: denallix.com.
- Create a new page with Worklist embedded.
- Navigate to Site Contents > New > Page.
- Provide a title and insert an Embed widget.
- Click Add embed code.

- Paste the following formatted iframe code into the box.
<iframe width="700" height="500" src="https://{K2URL}/Runtime/Runtime/Form/K2%20for%20SharePoint%20Worklist"></iframe>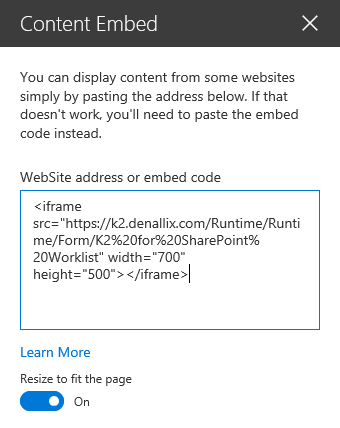
- Tab out of the box and Worklist appears.
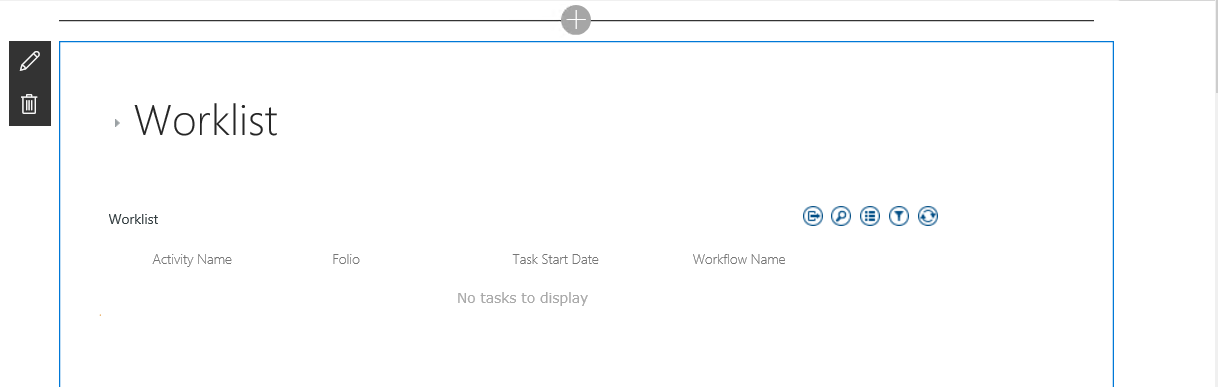
- Save and close the page.