


Scenario
This How To article describes the information needed after upgrading a Nintex for Office 365 workflow to Nintex Workflow Cloud that uses the Start option, Start Manually, for your workflow design. You cannot directly start a Nintex Workflow Cloud SharePoint Event workflow manually from the SharePoint item menu like you can with Nintex for Office 365. The article, Nintex Workflow Cloud - Manual start and Workflow testing for SharePoint Online start events, will explain how manually starting SharePoint workflows with a list item ID works in Nintex Workflow Cloud.
If you would still like to start workflows directly from the list, one suggested workaround is to change the start event on your upgraded Nintex Workflow Cloud workflow to the option called, Nintex Form. You can then add a hyperlink column to your list that points to the workflow's start form URL and pass the Item ID over to the form by using a querystring parameter. With external datasources and form variables configured, your form can load up the selected SharePoint item and start a workflow against it.
After Upgrade
-
SharePoint related actions in the upgraded workflow will require reconfiguring the connection to your SharePoint site.
-
If Start manually was the only option selected in Nintex for Office 365, the upgraded Nintex Workflow Cloud workflow will be configured as a component workflow in the start event. You will need to set the Start from property to Nintex Form to match this solution.
Differences
-
The workflow start option, Start manually, is not supported for SharePoint start events directly from a list item's Workflow menu option.
Configuration
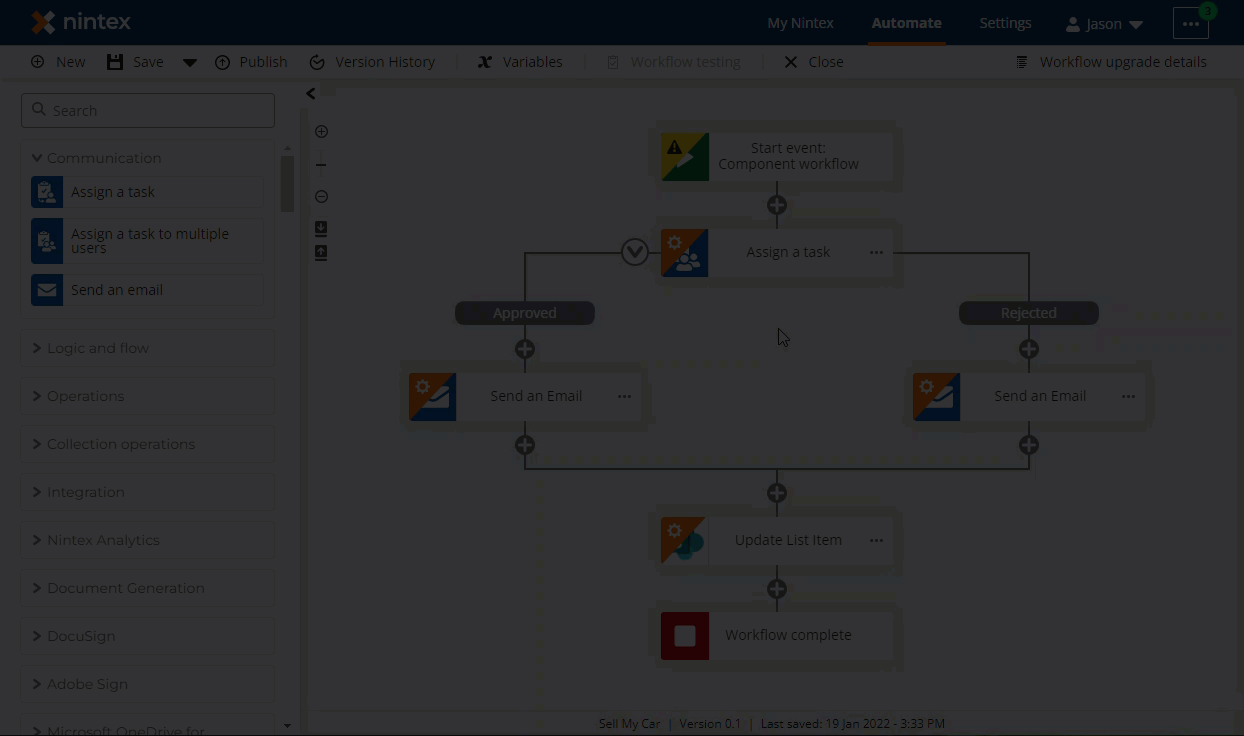
This is a suggested option for starting a workflow manually with SharePoint lists and libraries in Nintex Workflow Cloud. The steps below align with a demo workflow called, Sell My Car, that has a Nintex Form start event. This article also assumes all other actions in your upgraded workflow have been reconfigured/reviewed as needed up to this point.
Nintex Workflow Cloud
-
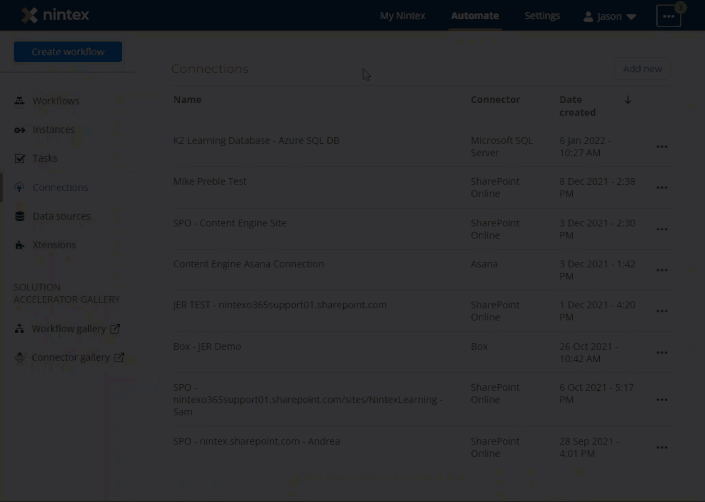
If you do not have one already, create a SharePoint Online connection using the SharePoint Online connector that references your SharePoint tenant.
-
Using the SharePoint connection from the step above, create a data source that references your SharePoint list. By doing this, we can configure form controls in a workflow start event to show list item data from a list query.
-
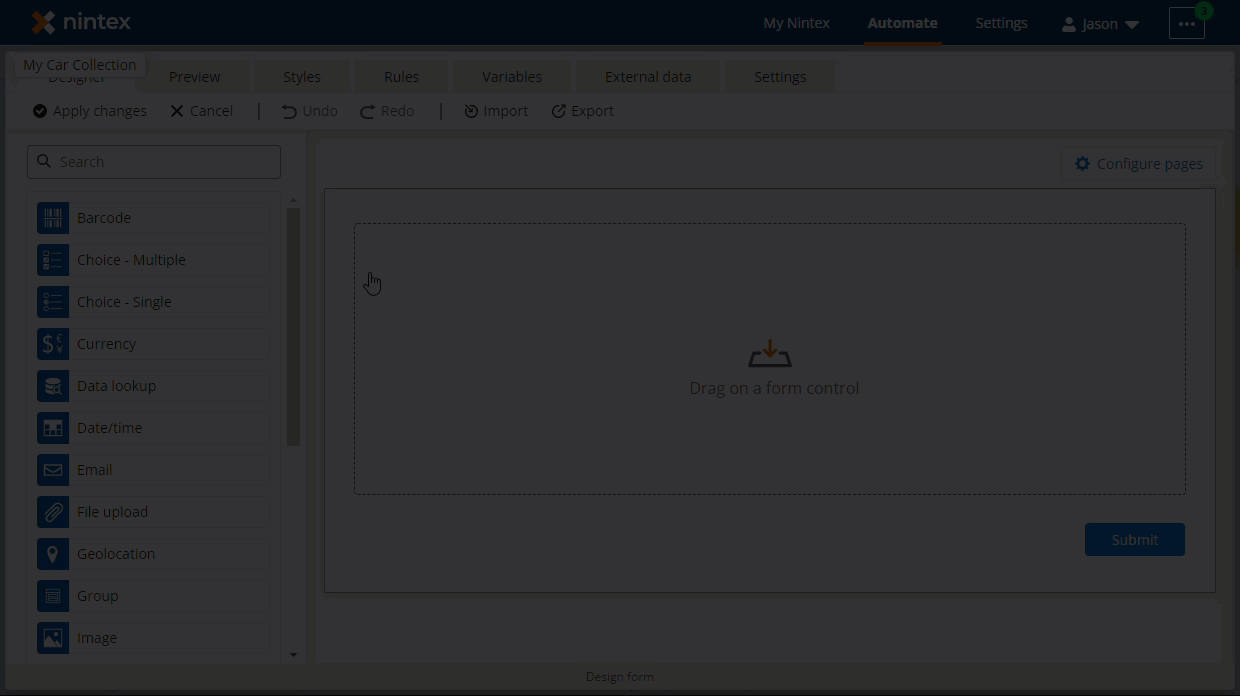
After your workflow is upgraded, change the Start event to Nintex Form. Then click the Design Form button to open up the form designer.
-
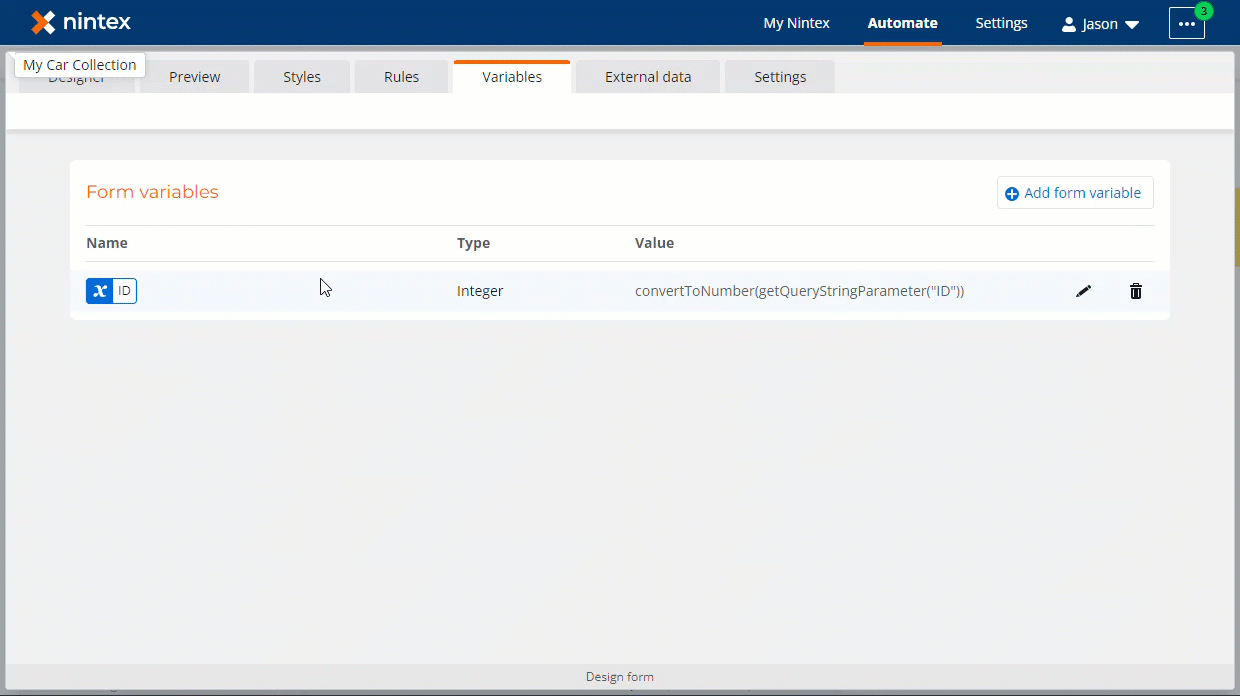
Next, you will need to create an integer based form variable that gets populated by reading in the "ID" querystring parameter passed over in the URL to your form. This will be used to filter the data source query later on. Inside the form designer's Variables tab, click on Add form variable. Select the functions, convertToNumber and getQueryStringParameter. Enter the name of your parameter in quotes inside getQueryStringParameter's parenthesis.
-
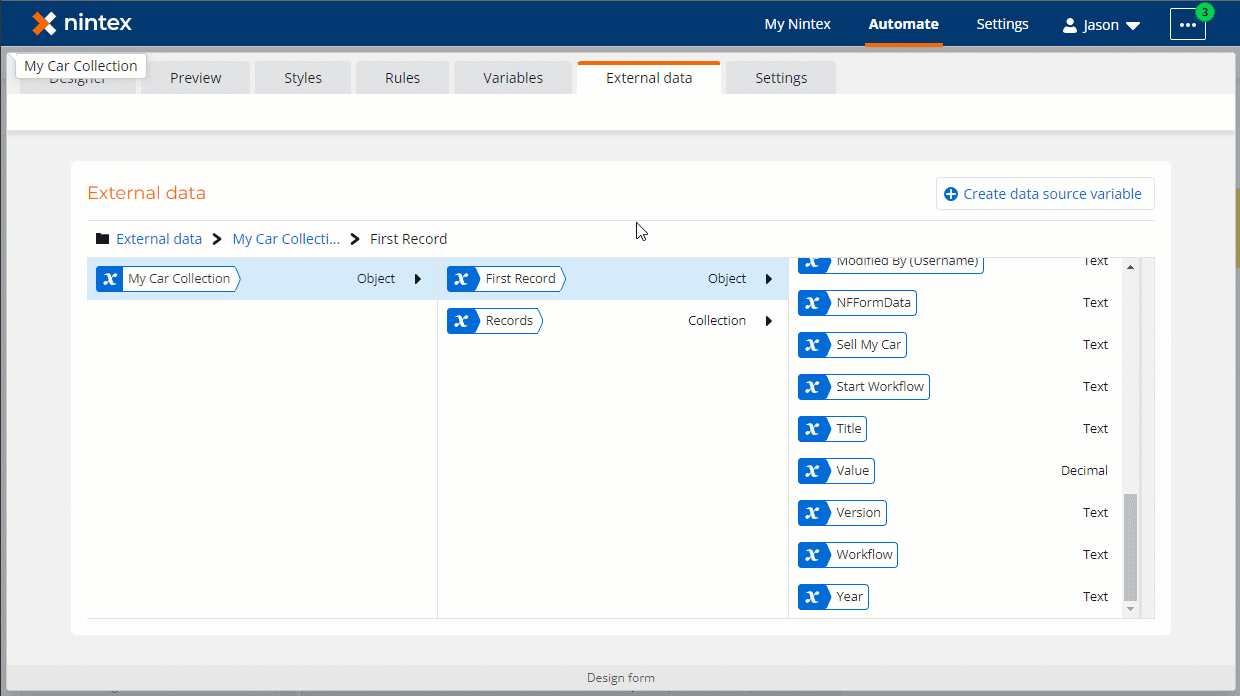
The form will need to connect to your SharePoint list and load the selected list item based on the ID variable we created in the previous step. The list is considered external data here, so you can select the External data tab inside the form designer. Create a data source variable that points to your list by clicking the button named, Create data source variable. Add a condition to filter the query on the ID variable. This will tell the Nintex form to query the list and filter the query based on the list item ID passed in as a querystring parameter and store it in the data source variable. Be sure to save the new condition, then create the data source variable.
-
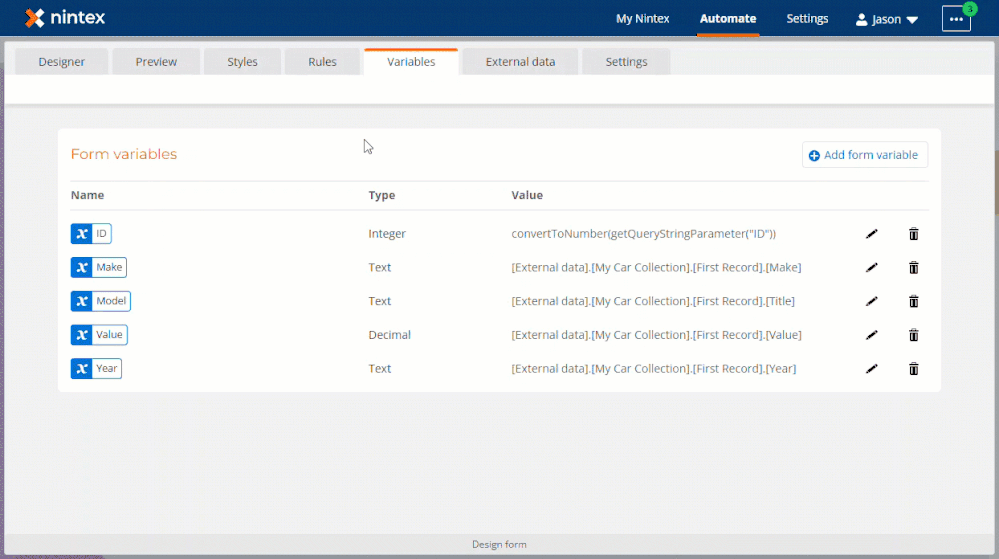
At this point, the data is only available to the form. To make the form data available to your workflow, you will need to create form variables that correspond to the columns that come back from the query. You can go to the Variables tab and click the Add form variables button to do this. Enter the name of your form variable, then open the Lookup - Variables tab on the right to drill down into the external data object variable to locate the desired column. The example below uses the first record that comes back with form variables. The result is five variables that can then be used down in the workflow in actions such as Send an Email.
Form
-
To display data values on your form, click on the Designer tab in the upper left corner of your page. Drag a label control over to the design canvas. Enter desired text into the Text property of the label control. Click the "+" insert icon and select the desired form variable you would like to display in your label control. Repeat this for all the data points you would like to include on your form. Apply the changes when your ready to go back to the workflow.
Workflow
-
Resolve any Start variables in the upgraded workflow, based on your needs.
-
Make any reconfigurations to actions that require review based on the Workflow upgrade details information. You can review other How To articles in the Upgrade Center How To section to find more details on other workflow actions.
-
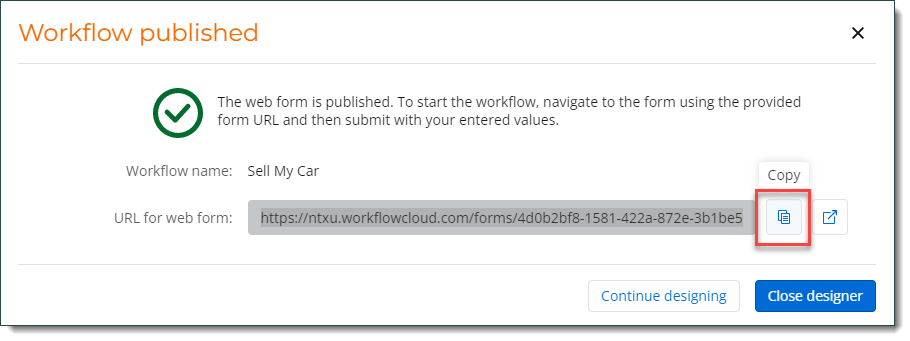
Publish your workflow when you're ready and make a copy of the Start form URL for use in the Hyperlink column of your SharePoint list. You can copy the URL after publishing by clicking on the Copy icon next to the URL for web form link on the Workflow published dialog window. See red square highlight below.
List
-
Add a hyperlink column to your SharePoint list that is configured to point to the start event. When users click on the link, it will open the Nintex form that starts the workflow.
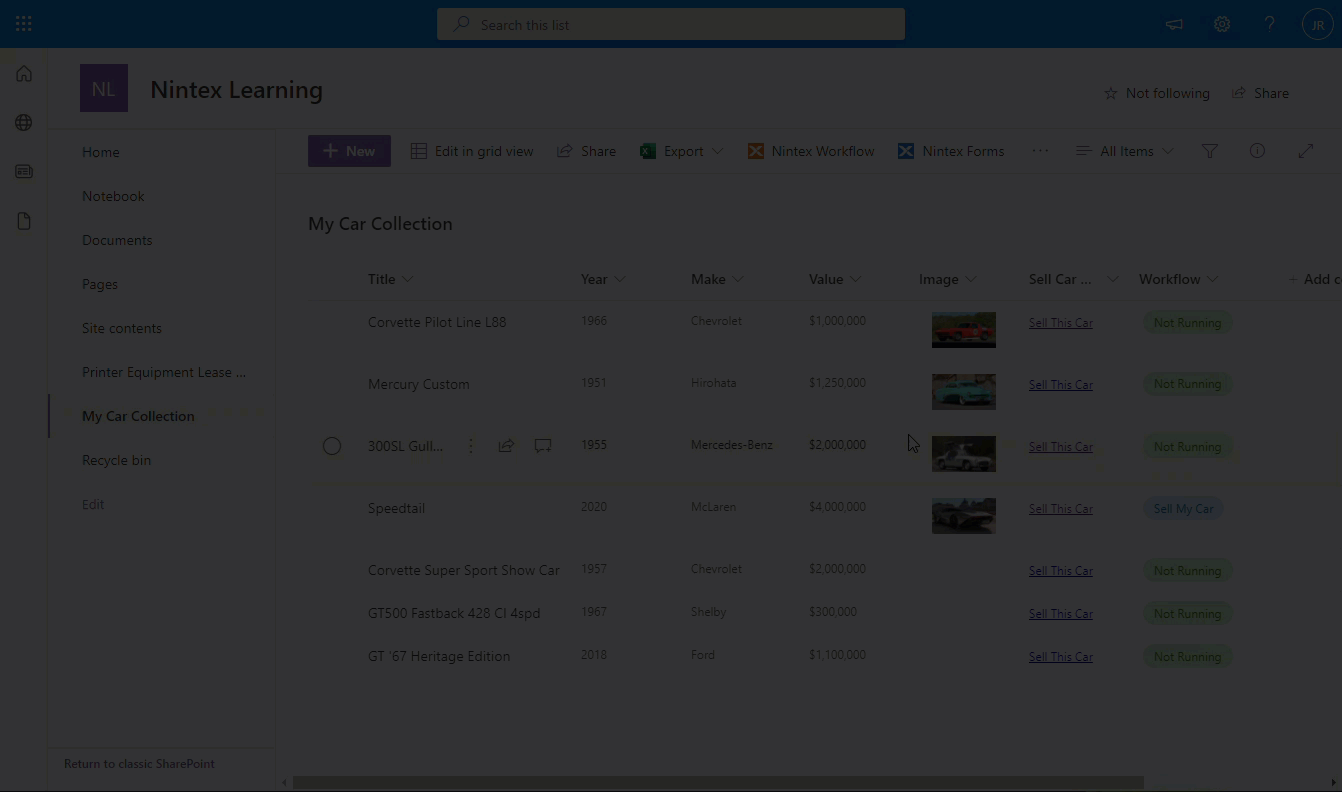
-
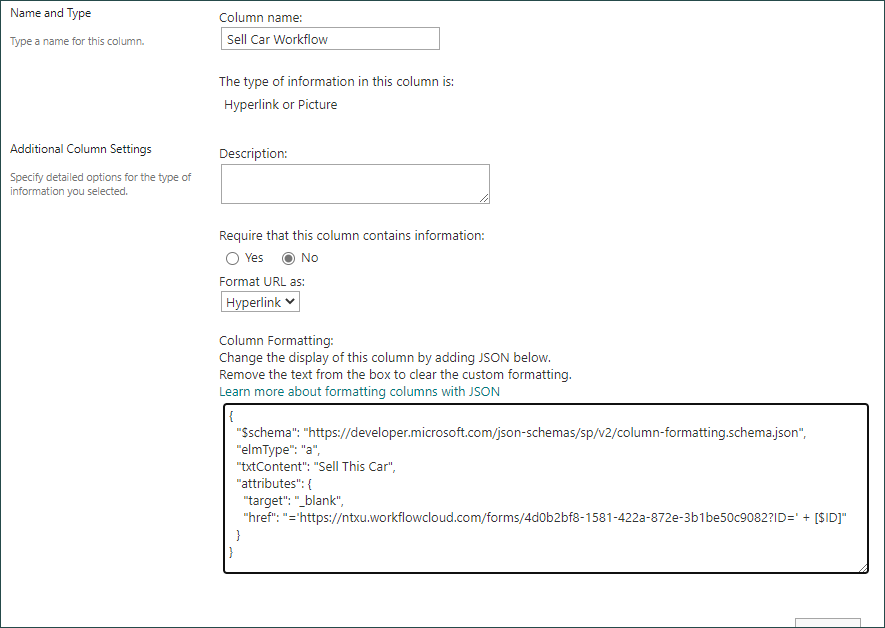
You can format the column display by using JSON and append the current item ID value to the URL. See JSON source code example below to copy.
-
You can copy this JSON code below to format your hyperlink column, if desired. Replace the text, [URL TEXT TO SHOW] and [LINK TO YOUR FORM] accordingly.
{ "$schema": "https://developer.microsoft.com/json-schemas/sp/v2/column-formatting.schema.json", "elmType": "a", "txtContent": "[URL TEXT TO SHOW]", "attributes": { "target": "_blank", "href": "='https://[LINK TO YOUR FORM]?ID=' + [$ID]" } }