

How to manually reconfigure K2 for AAD using Microsoft Graph API
KB003671
PRODUCTMicrosoft is deprecating Azure AD Graph API, and as of June 30th, 2020 stopped adding new features to the API. See these Microsoft articles for more information:
- Migrate Azure Active Directory (Azure AD) Graph apps to Microsoft Graph
- Azure Active Directory (Azure AD) Graph to Microsoft Graph migration FAQ
They strongly recommend upgrading to Microsoft Graph API to access Azure AD APIs as well as APIs from other Microsoft services. K2 resources requiring access to the https://graph.windows.net resource (AAD Graph), must be upgraded to access https://graph.microsoft.com (MS Graph) as part of the migration from AAD to MS Graph.
If your environment has SharePoint Online registered against Nintex K2 Five 5.x (K2 on-premises), you will need to follow this procedure when you migrate to MS Graph. This procedure involves running the K2 Five for SharePoint app Registration wizard and reactivating site collections in your SharePoint environment. For more information on the K2 Five for SharePoint app, see the K2 for SharePoint App Registration and Activation topic in the Nintex K2 Installation and Configuration Guide.
Procedure
Follow these steps to migrate your SharePoint Online instance to MS Graph.
- Install the correct Fix Pack / Cumulative Update for your system.
- Navigate to your SharePoint Online App Catalog.
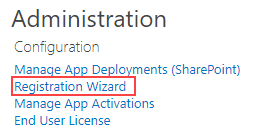
- Click the K2 Five for SharePoint App.
- Click Registration Wizard.
- When the Registration Wizard opens, check that your environment site URL is correct and click Next to continue.

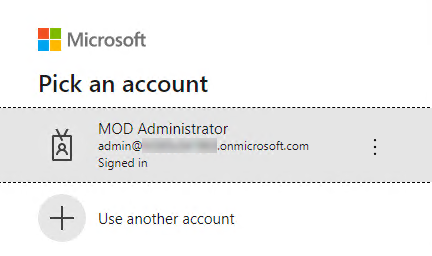
- If you are prompted for your tenant admin credentials, sign in to continue.
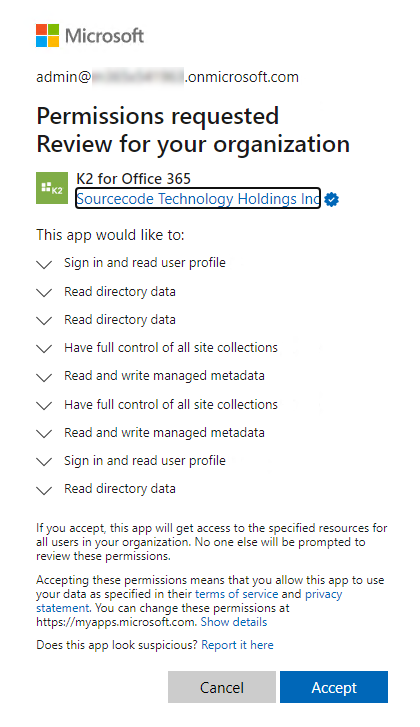
- Review the permissions and click Accept to continue. This completes registration.
- Click Finish to navigate back to the K2 five for SharePoint app.
- Click Manage App Activations, on the Site Collections Activation page, specify the site collection you need to update, and click Activate. For example:

- On the Activate Site Collection page, a dialog opens with a click-here link.
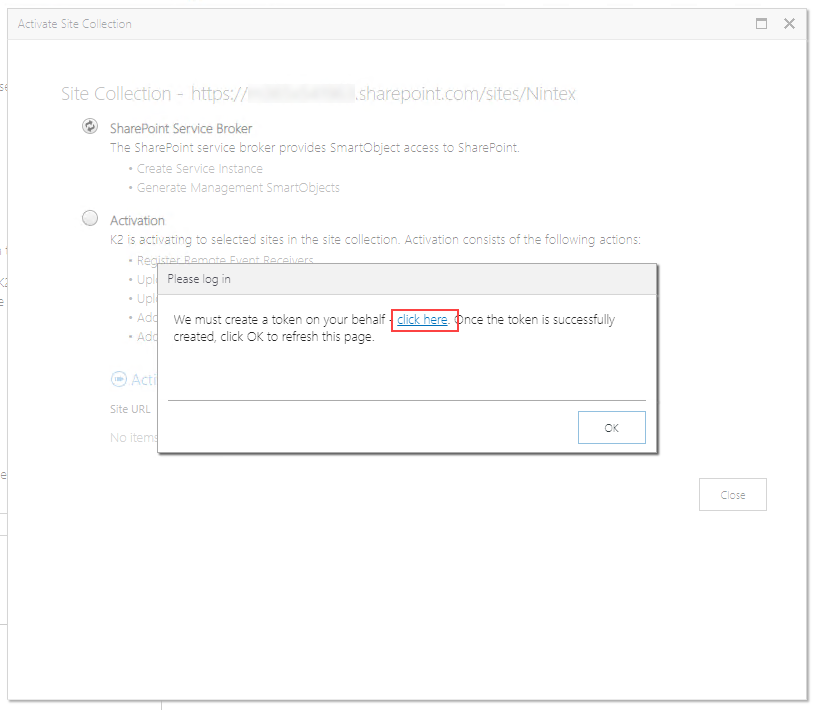
Clicking the link generates a token and after that shows the Authorization Successful page in a new browser tab. Close that tab to go back to the previous page.
- Click OK on the dialog. The Activate Site Collection page should now look like this:
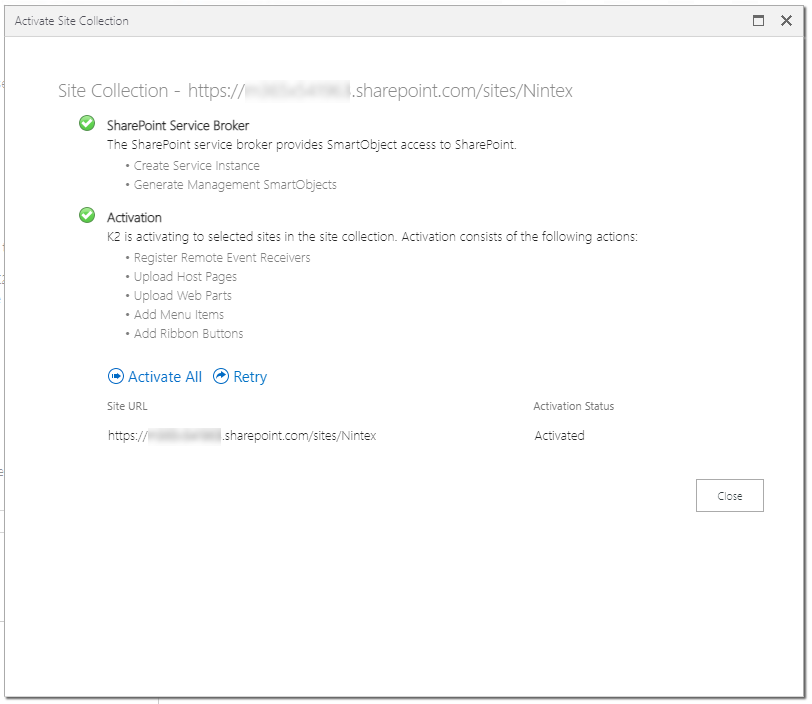
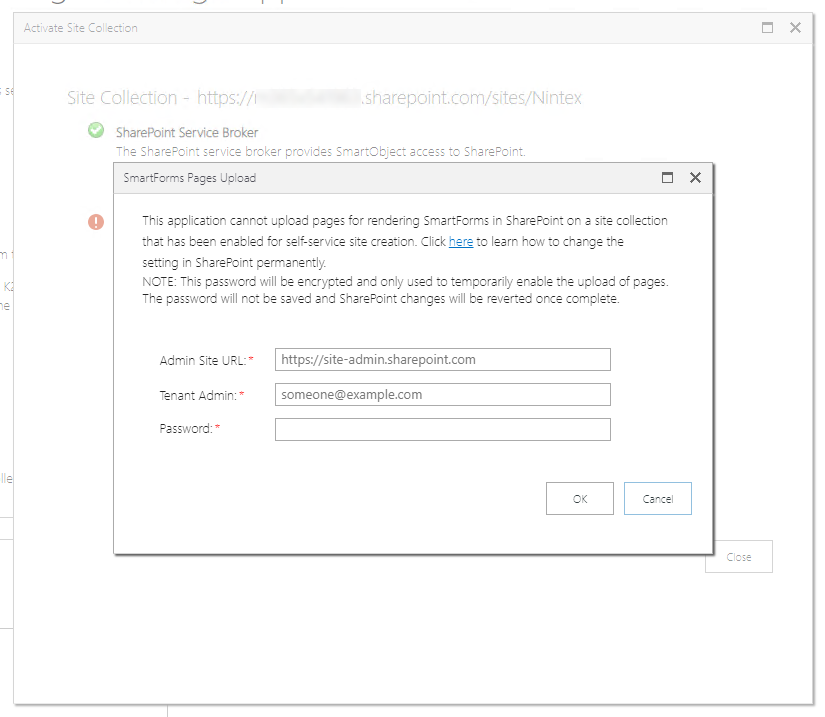
- Although the site collection was previously activated, you need to reactivate it because of the migration. Click Activate All to reactivate your site collection. The SmartForms Pages Upload dialog shows, enter your admin info, and click OK to continue.
The permissions re-consent is now finished. Click the Close button to complete this process.
