Request Approval : Edit Task Form issue

  • 18 February 2016
  • 5 replies
  • 25 views

Badge +3

Hi All,

Can someone help me to fix the following issue that iam facing on Nintex Request Approval action ?

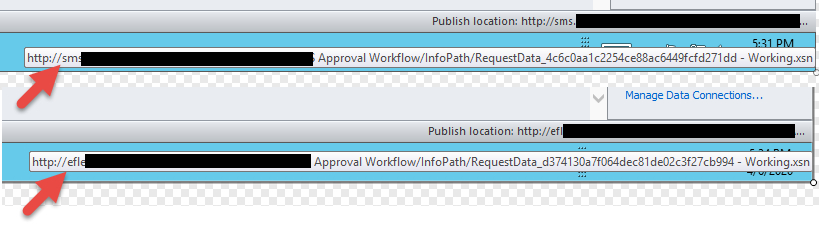
I created a new workflow where it generates checklist form and adds in share point list for the mangers approval. As part of this workflow i have added a Request approval action (as shown below) and customized the approval form using Edit Task Form --> Edit with Microsoft InfoPath 2010. it works fine on same sharepoint list where the workflow has been created.

But i get default form instead of my customized form when i tried to export the same workflow to other share point list and try to send checklist form for managers approval. Can someone guide em how can i fix this issue ? as i don't want to re-create the form each time i export the workflow. basically customization of this form takes 2 to 3 days to do.  I tried to save the template and import on new SharePoint list workflow but nothing seems to work fine.

177612_pastedImage_0.png

Thanks for the heads up on this issue..


5 replies

Userlevel 6
Badge +16

This worked for some people:

  1. Create an export for the workflow in dev.
  2. Go to [exportsite]/NintexWorkflows/[workflowname] and download the Infopath-form you modified
  3. Import the workflow in your new environment
  4. Go to [importsite]/NintexWorkflows/[workflowname] and delete the Infopath-form available there.
  5. Upload the form you exported in step 2.

Now the new form should show up when you use the flexitask.

Badge +3

Thanks Fernando.

But unfortunately we cannot import the info path form directly inside the workflow, Even i tried to open the form and publish to workflow but it doesn't allow me to change the publishing path.

Badge +3

Got the solution..

I think it might help someone to fix it as well. please see steps i have followed to fix this issue.

1. Get the backup of InfoPath form from the developed site

  • Open the Nintex workflow (where the info path form has been added).
  • For example, here I am taking "Request Approval action" inside the Nintex workflow where I have customized the form using info path form.
  • Save the customized form (added inside the Request approval action) to your local pc.

2. Import the InfoPath form (of Nintex workflow) to Live or other Site

  • You can deploy info path form (of Nintex workflow), only after importing & saving (or publishing) the Nintex workflow to the destination location.
  • Open the Nintex workflows collection location on the site, where you want to deploy your info path form. Eg : http://(Site Address)/NintexWorkflows/Forms/AllItems.aspx 
  • Open the Nintex Workflow folder. (you can see here each workflow holds separate folder with the same name as workflow name)

177743_pastedImage_1.png

You can enter the following values(for the above fields shown in image) based on your workflow and List
      Name --> Give  a relevant name to identify the form
      NWAssociatedWebID --> This ID is global & common to SharePoint 2010 & 2013. Enter the value “1d5afadd-d013-4d88-b3b2-38b570da9b6f
      NintexWorkflowID --> Open the “Site Actions (from the top menu ribbon)--> Site Settings --> Workflows gallery (under Nintex workflow section) --> Right click on workflow (where you have added the current form) --> Properties --> select all the text under General tab (as shown in below ) --> copy and paste on note pad --> extract workflow id (value after “WorkflowId” and before “&Category”. See example below marked in pink)”
      Eg: Preview.aspx?WorkflowId=2c684d6c-4a1b-4d8b-88db-1bc8ef02dd52&Category=List&ListId=1daf8978-b6a5-463d-9fb6-19a8b63bde8f

     AssociatedListID --> from the steps of NintexWorkflowID, you can get the list id as marked (in pink colour) in below example     

Eg: Preview.aspx?WorkflowId=2c684d6c-4a1b-4d8b-88db-1bc8ef02dd52&Category=List&ListId=1daf8978-b6a5-463d-9fb6-19a8b63bde8f

  • Now after entering all the values select " Check in --> Save "
  • Now under same url, select “Library (from the top menu ribbon) --> Open with Explorer”.
  • Here you can see the file name starting with “Request Approval_******** - Working” (which is default .xsn file). Now copy this name and keep on notepad rename this file with “default form”.
  • Now rename the uploaded .xsn file name to the copied name (“Request Approval_******** - Working” .xsn file name)
  • Now open the Workflow (where you want to customizer the form).
  • Select action “Request Approval --> Edit task Form --> Edit Task form With Info Path Form 2010”.
  • Now you will be able to see your customized form. If not you can go select "File --> Open --> Give the location (windows explorer path) of SharePoint where you have saved your InfoPath form --> open publish the form --> save & publish workflow".

Done. This is how you can deploy the customized form for Nintex workflow actions.

Badge +1

Hi,

I follow the steps given above, but i am getting error message as "no file" message when i click on edit task form with infopath. I am using SP 2013 and Nintex 2013. Can anyone provide me the solution to how to use customize infopath forms in Flexi Task or Request Approval Actions?

Badge

I've followed the instructions above and was able to access the updated form in my workflow, however when I try to publish it I get an error.  Looking at the form in InfoPath, I can see that the Publish location is still set to the original server where I copied the form from (current form vs. imported form):


7197iF0182C90F98BD3BD.png

Reply