Solved

Auto Incrementing in NWC

  • 10 February 2023
  • 7 replies
  • 178 views

Userlevel 1
Badge +9

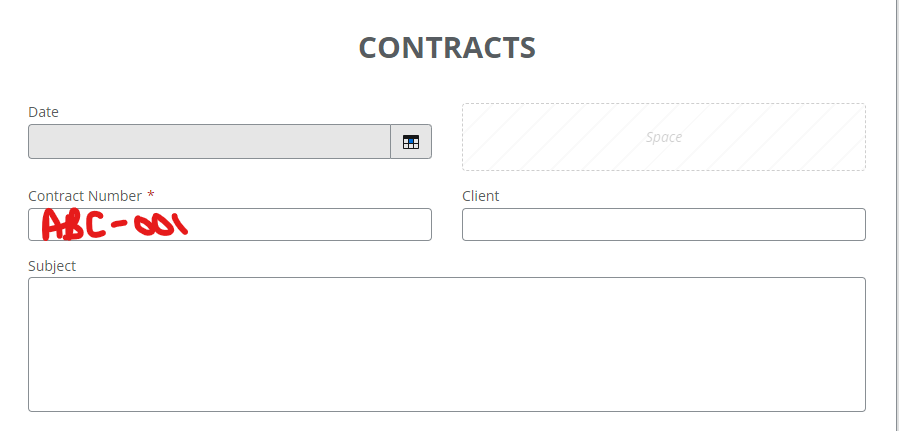
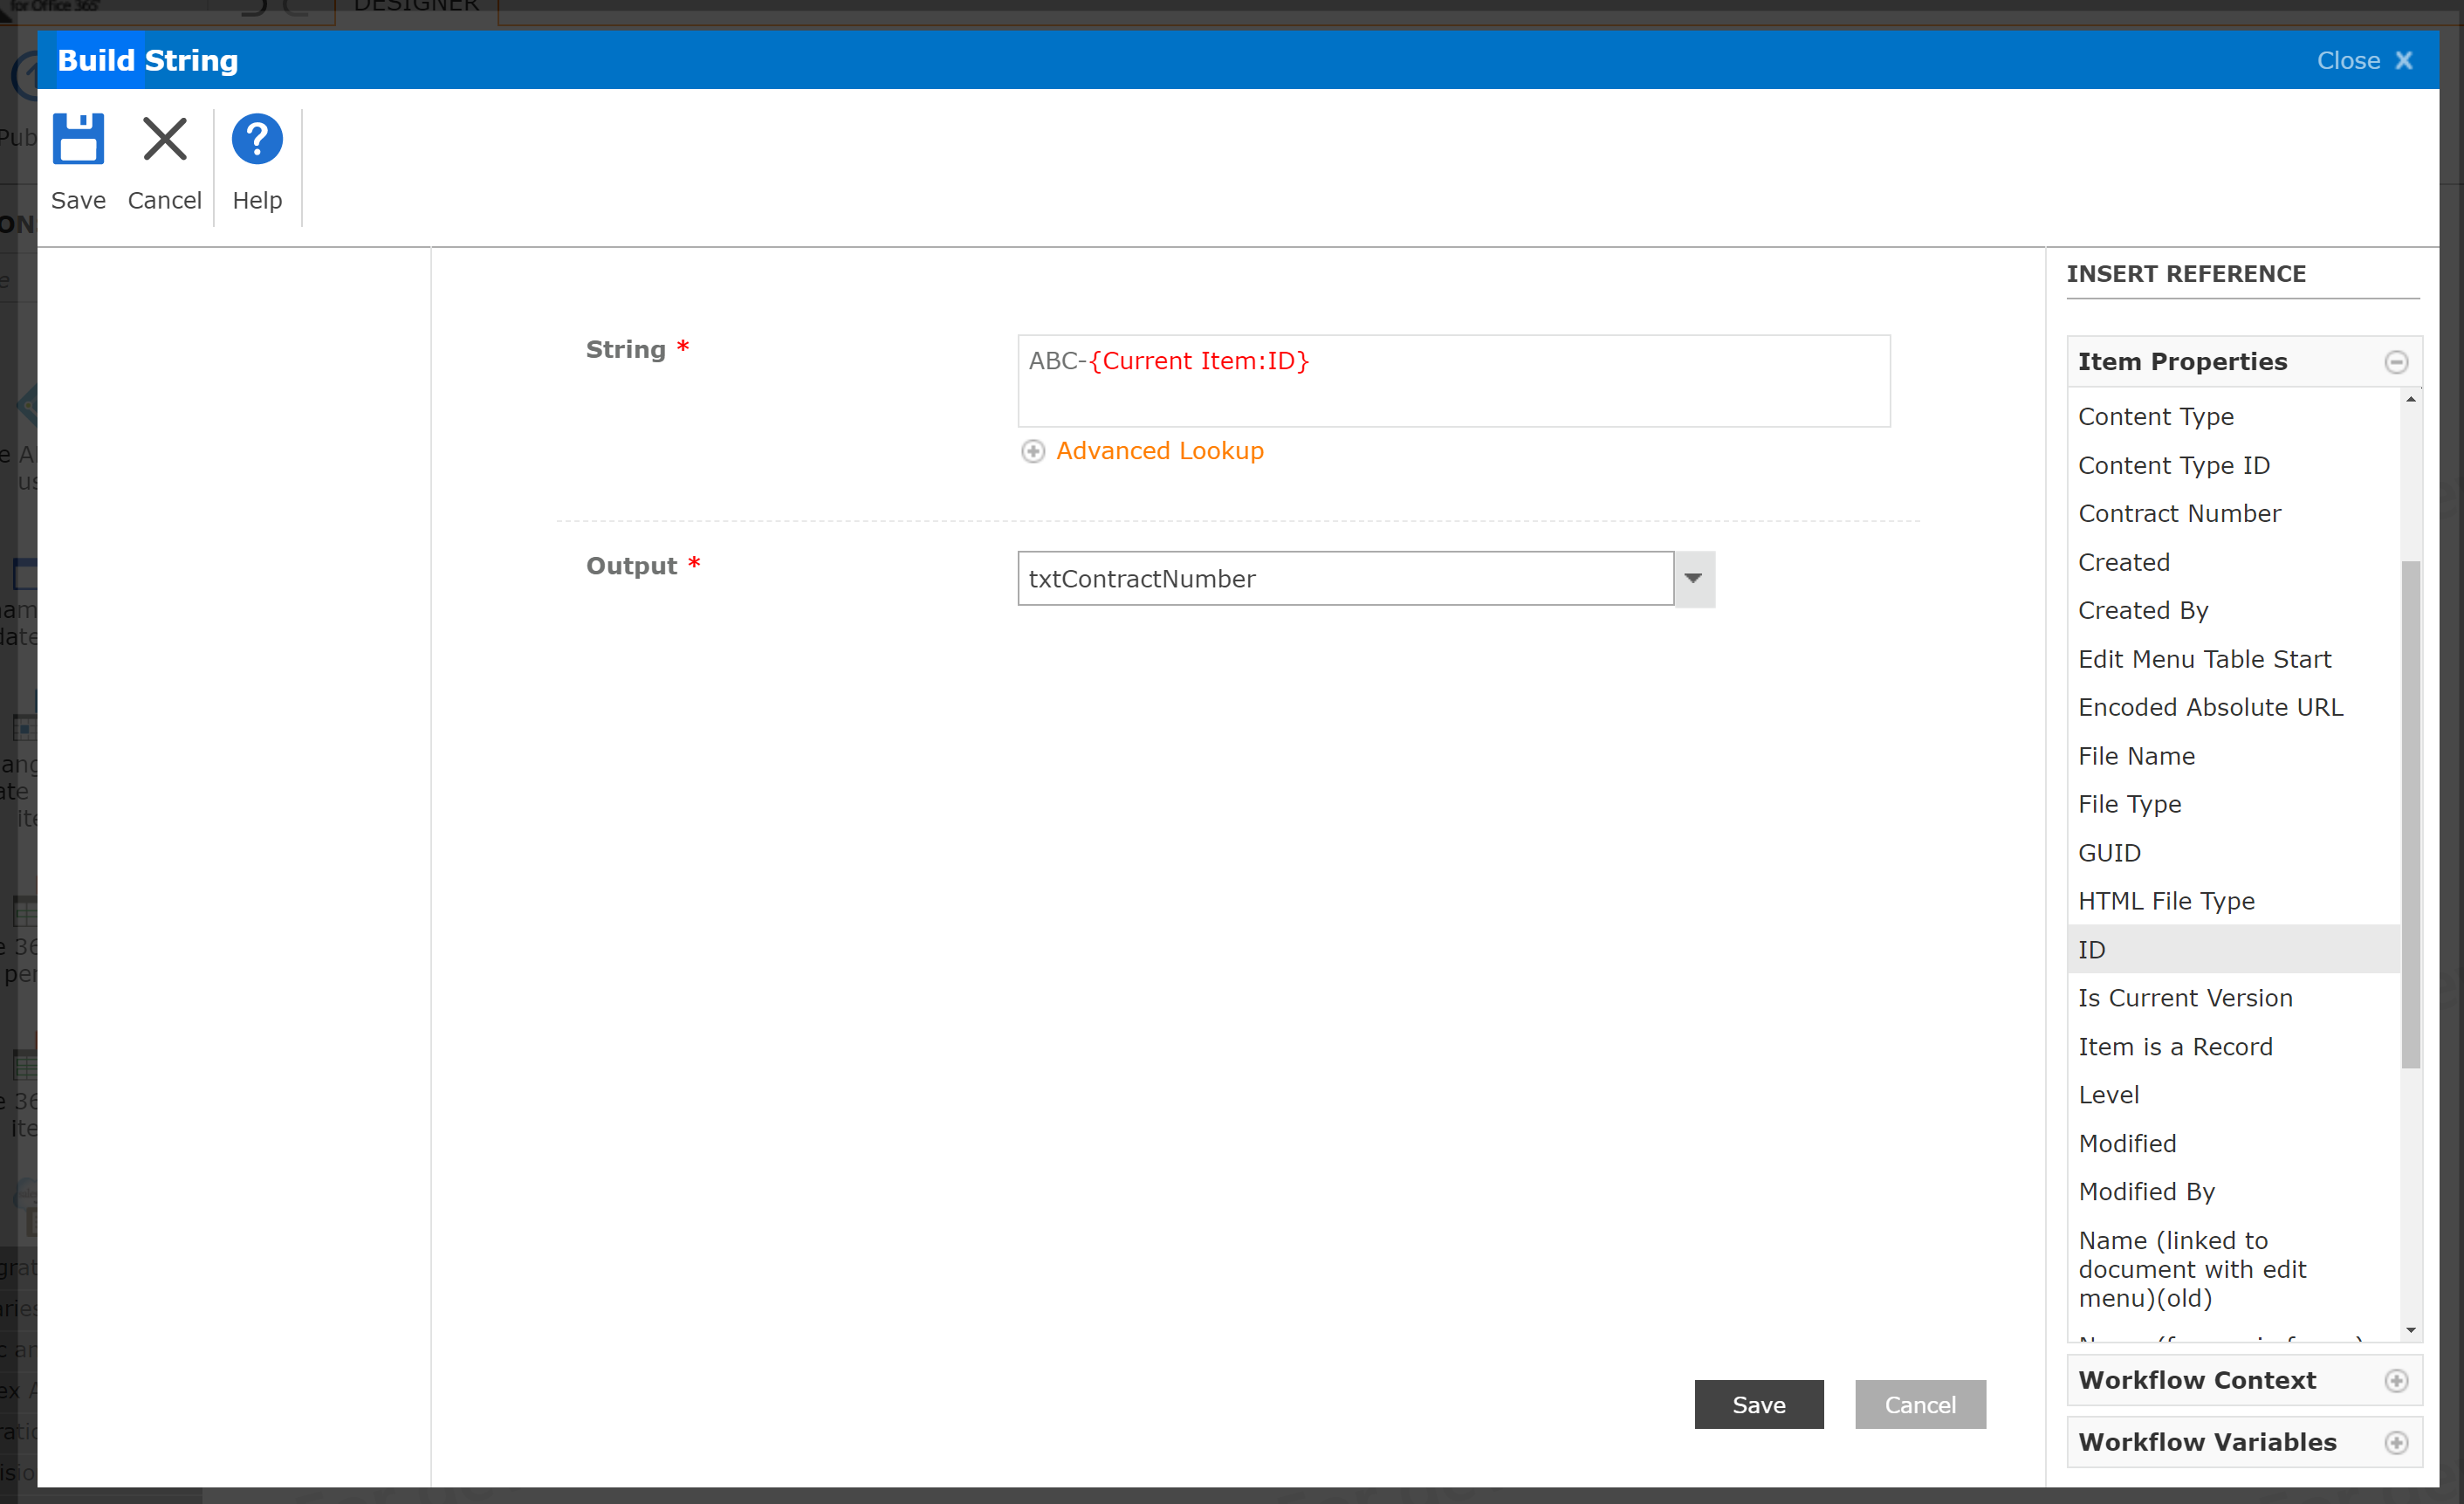
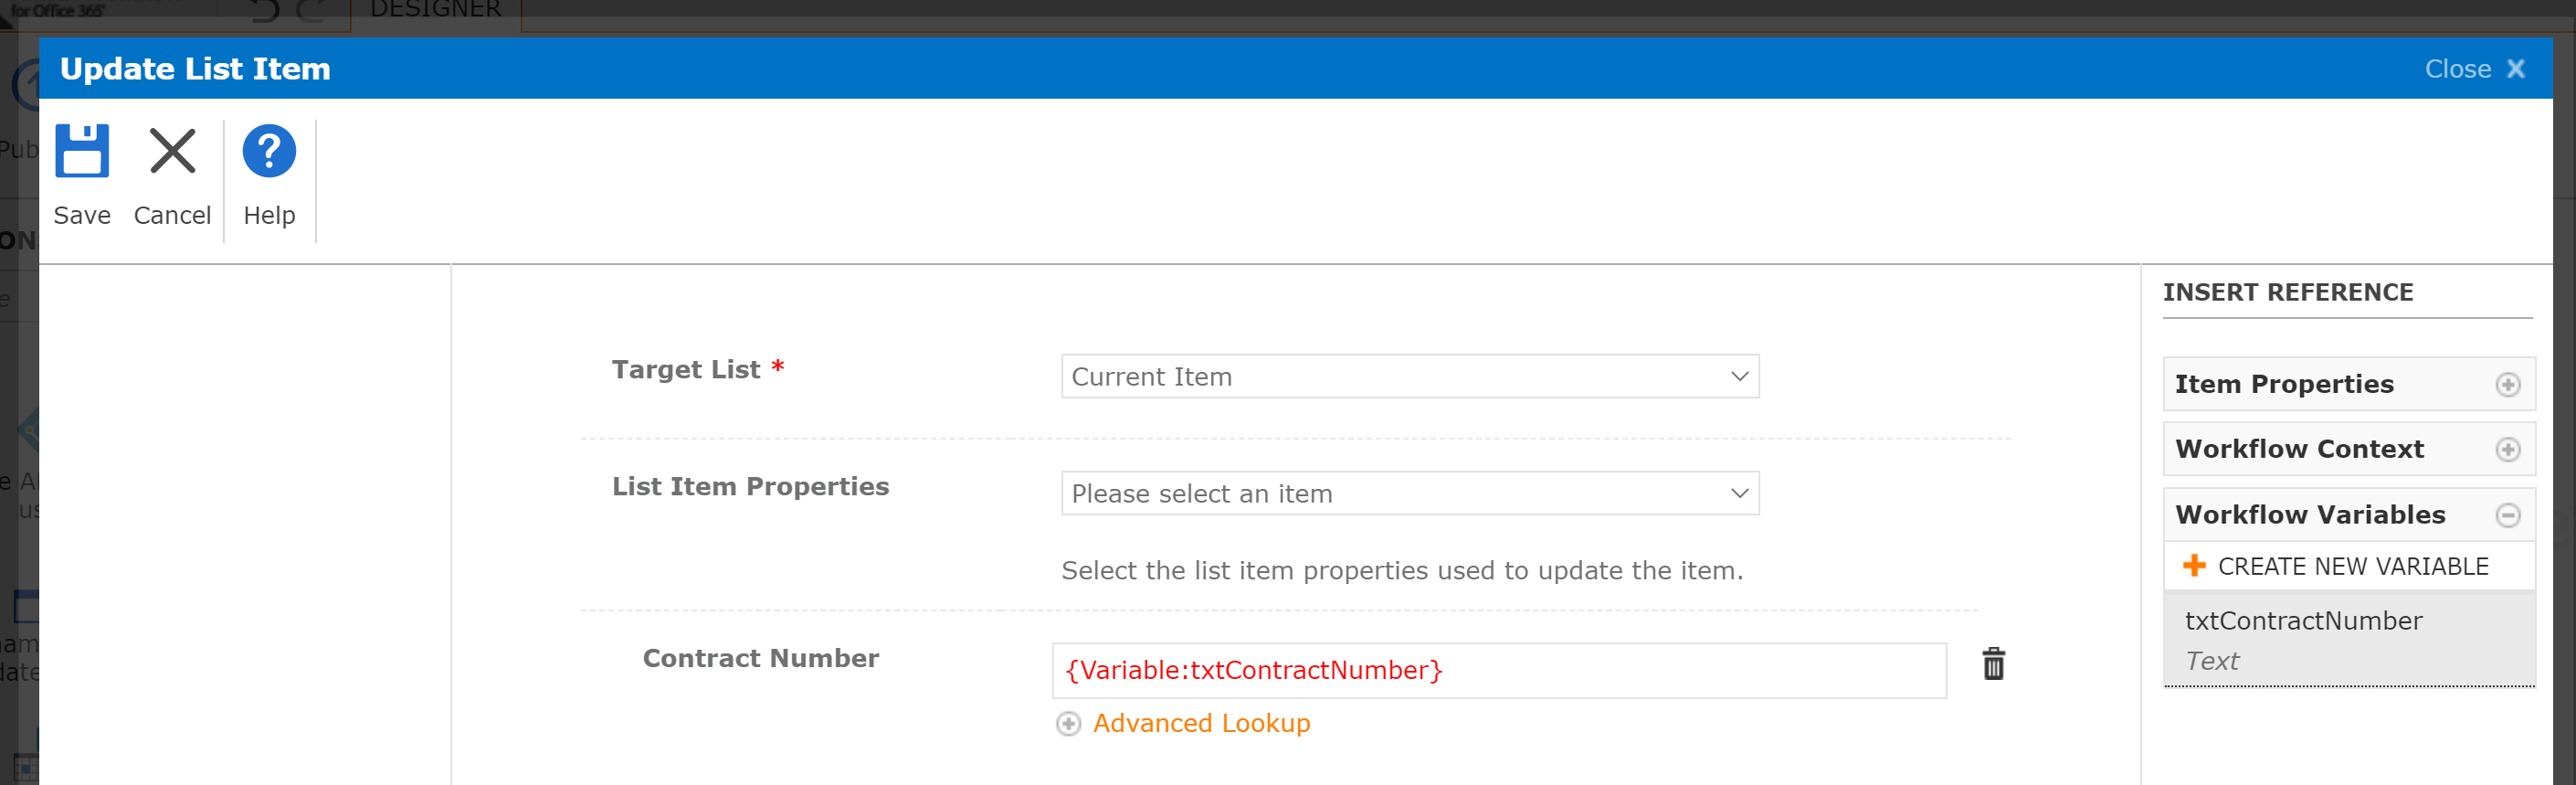
I am not sure where to begin to on Auto Incrementing in a form. I’ve done it on-prem but NWC looks so different and can’t seem to compare the two to begin building in Nintex Workflow Cloud…


Does anyone know or have steps to create an auto increment for a form ?


Please help?

icon

Best answer by bamaeric 10 February 2023, 23:24

View original

7 replies

Userlevel 5
Badge +13

Just to get clarification, what are you trying to auto increment? Repeating section lines?

Userlevel 1
Badge +9

@bamaeric,

Sorry, I did fail to mention that part… I am wanting to apply an auto increment numbering system to a form that will be auto applied when a new form is ready to be filled in SharePoint Online.

I want to apply something like below...


Userlevel 5
Badge +13

Do you need for it to show up on a new form? Or could the Contract Number be assigned after the form is submitted?

If the later works, you could have actions at the beginning of the workflow to build a string for the Contract Number and then update the Contract Number column in the list with the string built.

Userlevel 1
Badge +9

@bamaeric ,

Either or works!

I’m completely green to Nintex (forms and workflows) and trying to figure out but could you provide steps to this approach?

I really do appreciate your time!

Thanks!

Userlevel 5
Badge +13

I recommend using a workflow to do the heavy lifting of creating and update the Contract Number. Try these steps to accomplish your scenario:

1. Create a workflow on your list.
2. Configure the Settings of the workflow to run when an item is created.

  • Go to Settings in the ribbon.
  • Go to the “Start when items are created” section and change the toggle on the right to “Enabled”.
  • Save the Workflow Settings.

3. Add and configure a Build String action.

  • String = ABC-‍{Current Item:ID}‍
    - Add {Current Item:ID}‍ from Item Properties in the Insert Reference section on the right.
    - This is the list item ID when the item is created.
  • Output = txtContractNumber (this is a Text variable you create)

4., Add and configure an Update List Item action.

  • Target List = Current Item
  • List Item Properties = Add the “Contract Number” column.
  • Contract Number = {Variable: txtContractNumber}  (Add this from the Workflow Variables in the Insert Reference section on the right.

This will create a unique Contract Number that combines your state prefix and the unique item ID.


Userlevel 1
Badge +9

@bamaeric,

OMGSH, I cannot thank you enough on this!! This worked out perfectly for what I needed! This has taken taken me weeks to try and figure out but you really did help in explaining and understanding the logic to this, thanks again!

You're AMAZING!

Userlevel 5
Badge +13

Great to hear @jpacheco! Glad I could help.

Reply