

Topic
Emails can be sent & received directly from Foxtrot RPA, so there is no need to interact with a third party email client, such as Outlook or Gmail. Doing so requires certain email settings to be configured. Prior to using the Email action, Foxtrot RPA will require you to know:
- The SMTP server name
- The IMAP server name
- The connection ports
- Your email credentials (username and password) for your account
Additional Information
Configuring Default Email Settings
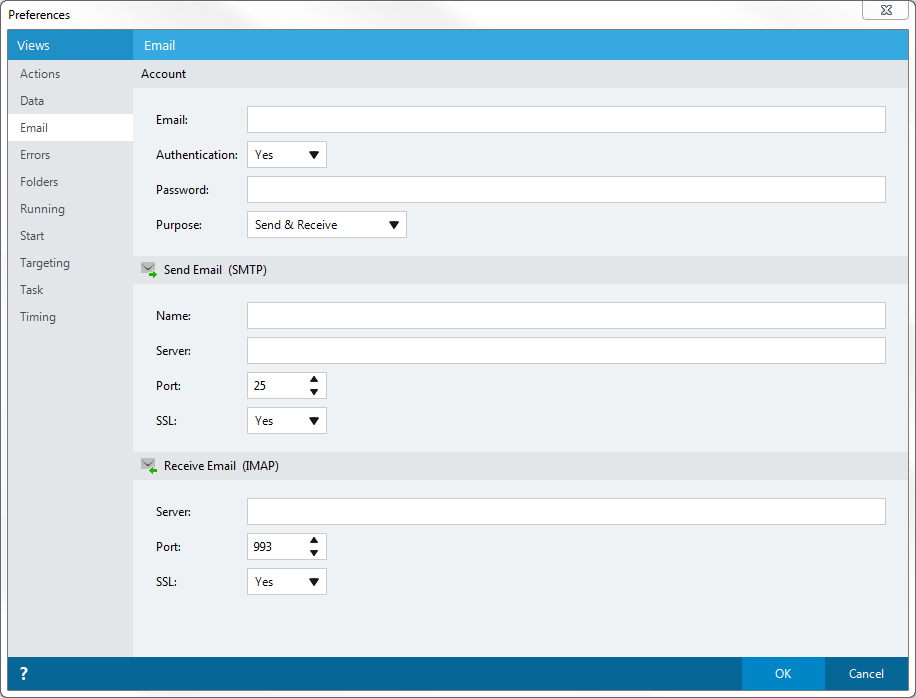
To configure your default email settings, begin by opening your Email Preferences. From the top right of Foxtrot RPA, select Account then Preferences. Configuring this will allow you to more easily set up your email connections in future projects.- Select the Email option.
- Provide your email’s login information.
- Choose the purpose: Send Only, Receive Only, Send & Receive.
- Enter a Name which is the name that will appear in the ‘From” field of an email (Optional).
- Provide the proper SMTP Server name. If you don’t know your SMTP Server name, please contact your IT department. We have a list of common SMTP servers & ports in this support article.
- Define a Port to use when connecting.
- SSL: select Yes to send emails using SSL (Secure Socket Layer).
- Provide the proper IMAP Server name. If you don’t know your IMAP server information, please contact your IT department. We have a list of common SMTP servers & ports in this support article.
- Define a Port to use when connecting.
- SSL: select Yes to send emails using SSL (Secure Socket Layer).
- Click OK to save your Email Preferences.
Adding an Email Connection to your Project
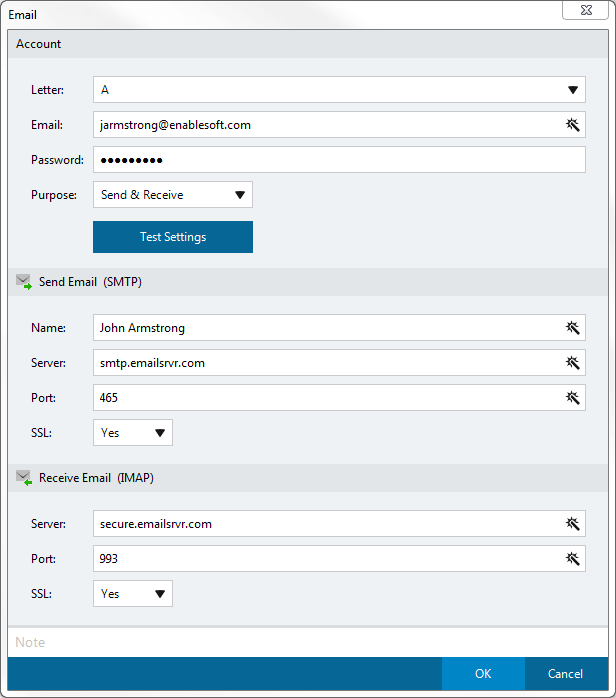
After configuring your Account Preferences, you will need to add the email Connection to your project. This will allow you to work with emails stored in your email box.- Click the big + on the right, under the ‘Account’ menu.
- Find the Email selection. If you do not see it in this list, change to Expert mode.
- If you set up your default Preferences in the previous steps, you should be all set. If not, fill in the required information.
- After filling out the information, you can click “Test Settings” to make sure everything is in line.
- Click OK to save your connection.
Sending Emails
If you have your SMTP information properly configured, Foxtrot can send emails. Begin by selecting the Send Email from the Actions list. This action is located in the Email category.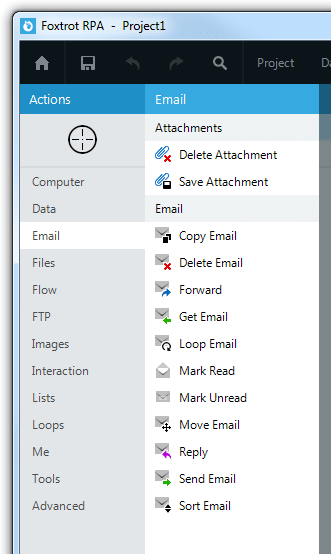
Choosing a message to send is as simple as it looks. Recipients and attachments may be separated by a comma. Clicking on More displays the following:
- A CC field
- A BCC field
- A Reply To field
- A Priority option for emails that should be flagged as High or Low priority
- A Format option — this will allow for Plain Text (default) or HTML for advanced users
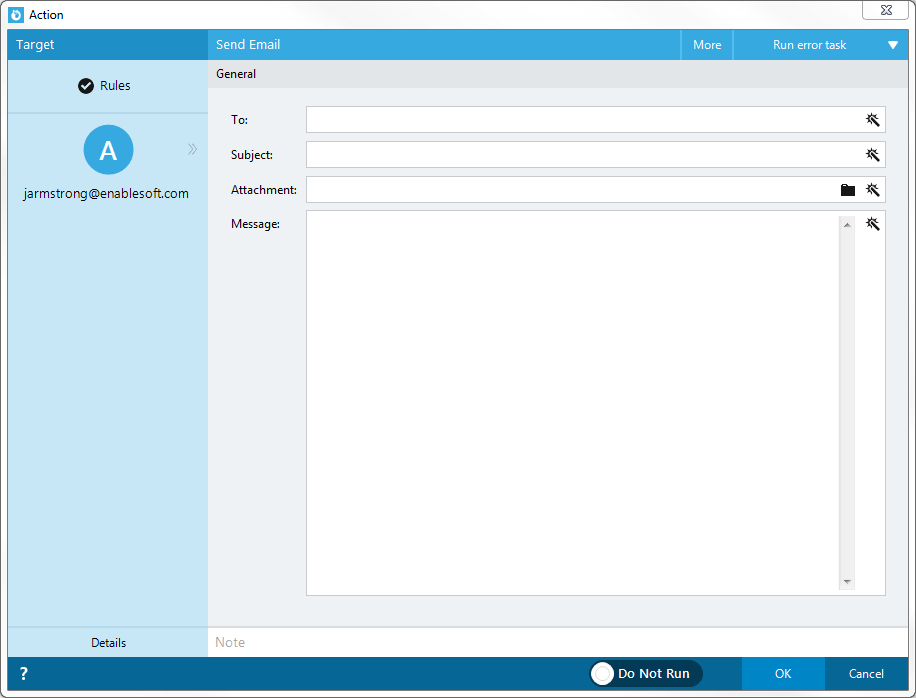
Note: Because Foxtrot uses SMTP, emails will not appear in the Sent folder of your email client. If you wish to keep a log of emails Foxtrot has sent, we recommend adding yourself to the CC or BCC field.
Receiving Emails
If you’ve got your IMAP settings properly configured, Foxtrot can receive and work with emails. Begin by selecting the Get Email from the Actions list. This action is located in the Email category.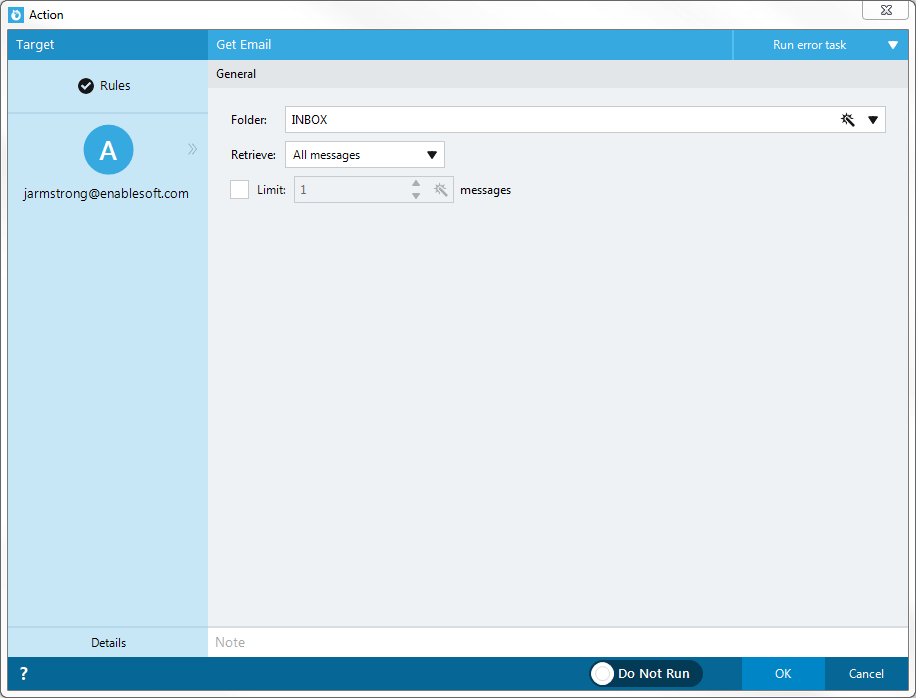
Select the Folder which you want to retrieve the emails from. You can type, use Tokens, or select the folder from the drop down. The Retrieve dropdown allows you to select All Messages, Unread Messages, Read Messages, or Custom. Selecting ‘Custom’ will allow you to configure filters to select which emails you want to retrieve. You can also Limit the number of messages you retrieve at a time. Click the checkbox and set the limit number, either by type or through a Token.
After creating the Get Email action, you will need a Loop Email action to iterate through the list of emails that was generated. Without this, any Email actions you create will apply to all emails in Foxtrot’s inbox.
This loop works almost exactly like a Files & Folders Loop does. It will cycle through each email, executing each action between the Loop Email and End Loop actions. Within this Loop you will also have access to special Tokens, again similar to a Files & Folders List Loop. There are tokens to access the email’s subject, To field, From field, CC field, date/time sent, and many more.
