How to use a Composite SmartObject created from a many to many SmartObject relationship in a Check Box List scenario.
KB001304
PRODUCTK2 smartforms 1.0 to 4.6.10
BASED ONK2 smartforms 1.0
LEGACY/ARCHIVED CONTENT
This article has been archived, and/or refers to legacy products, components or features. The content in this article is offered "as is" and will no longer be updated. Archived content is provided for reference purposes only. This content does not infer that the product, component or feature is supported, or that the product, component or feature will continue to function as described herein.
| Audience |
|
| Required Knowledge |
|
Introduction
The latest How To topics are available in the K2 Five User Guide or the K2 Cloud User Guide’s How to section.
This Knowledge Base article describes how to use a Composite SmartObject that was created from a many to many SmartObject relationship in a Check Box List scenario. We will use a List View of the main SmartObject. When double clicking the List View, an Item View will load with the relevant record’s data.Important Information about Composite SmartObjects.
When using a Composite SmartObject it is important to note that SmartForms caters for this through a many to many relationship (M:M). Only Check Box List controls can be used with these SmartObjects. When using the Check Box List in Rules, the in a batch execution type must always be used because the main item ID may or may not exist, and will be used to replace the token value when executing the Composite SmartObject methods. It is also important to note that the output mapping for the foreign key property should be set; otherwise the tokens cannot be replaced.
Example Scenario
Follow the steps below to implement the scenario as described in the introduction.
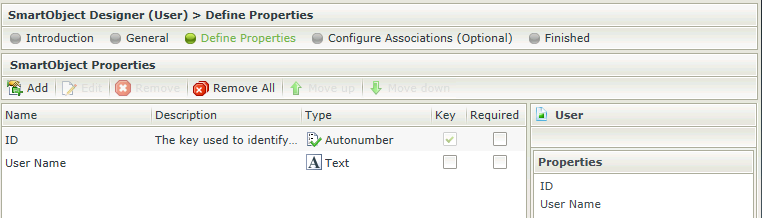
- Create the User SmartObject as shown below.
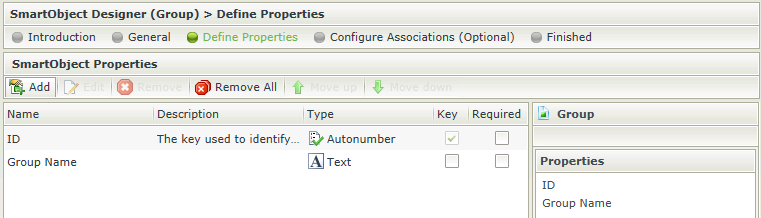
- Create the Group SmartObject as shown below.
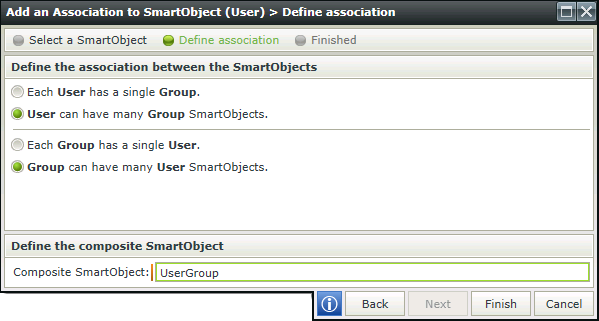
- Configure an association on the User SmartObject to create the Composite SmartObject called UserGroup as shown below. Finish the SmartObject wizard.
- Design an Item View of the User SmartObject called User View as shown below using all the SmartObject fields and methods.
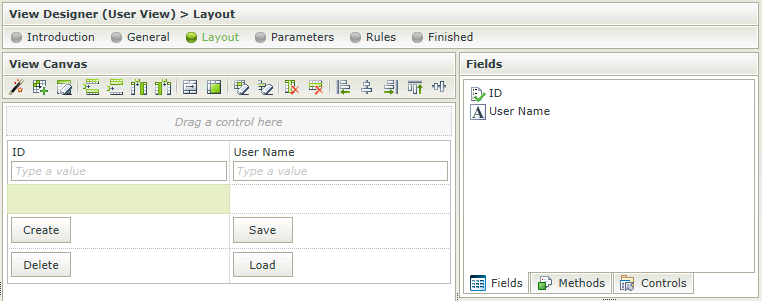
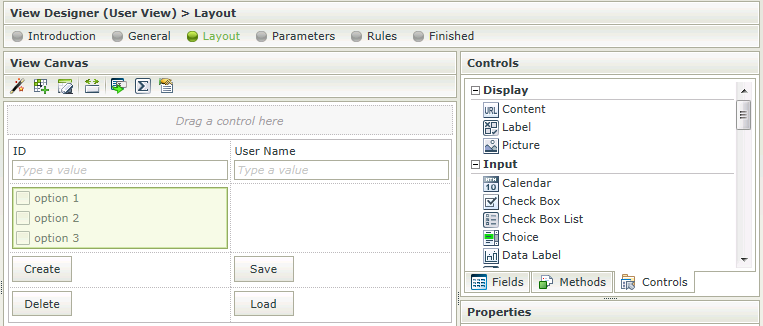
- Drag a Check Box List control on to the View which will show the available groups and toggle the groups to which the user belongs, i.e UserGroup.
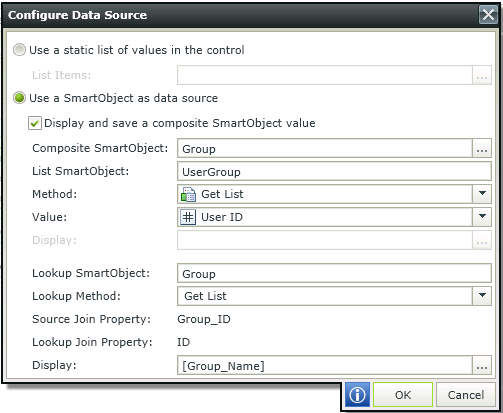
- Configure the Data Source properties as shown below by checking the Display and save a composite SmartObject value checkbox. Click on the ellipsis and select Group. The Group SmartObject is selected as the Composite SmartObject because that is the SmartObject with the many to many relationship and the UserGroup SmartObject is the SmartObject that contains the join table in SQL.
- Complete the layout step and proceed to the Rules step.
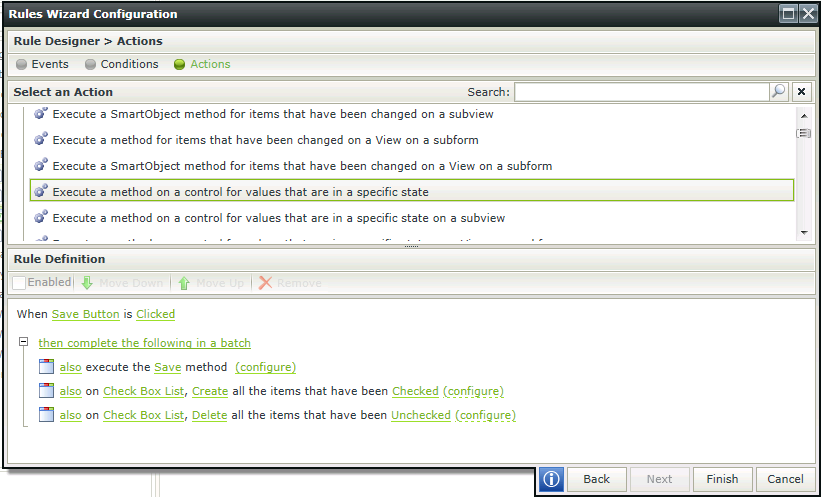
- Edit the When Save Button is Clicked Rule and add the Action namely, Execute a method on a control for values that are in a specific state twice and configure as shown in the image below. These will create and delete the Composite SmartObject (UserGroup) values as per the selection made in the Check box list control. The three Actions must be executed in a batch.
- Click on configure next to the Save method Action and map the [USER] ID field in the output mappings as shown below.

- Click Finish
- Click on configure next to the Create all the items that have been checked Action.
- On the Input Mappings screen:
- Use the User View’s ID for the User ID input mappings field.
- Use the Check Box Lists Control’s associated field called Group ID for the input mappings of the Composite SmartObject (Group ID) as shown below.
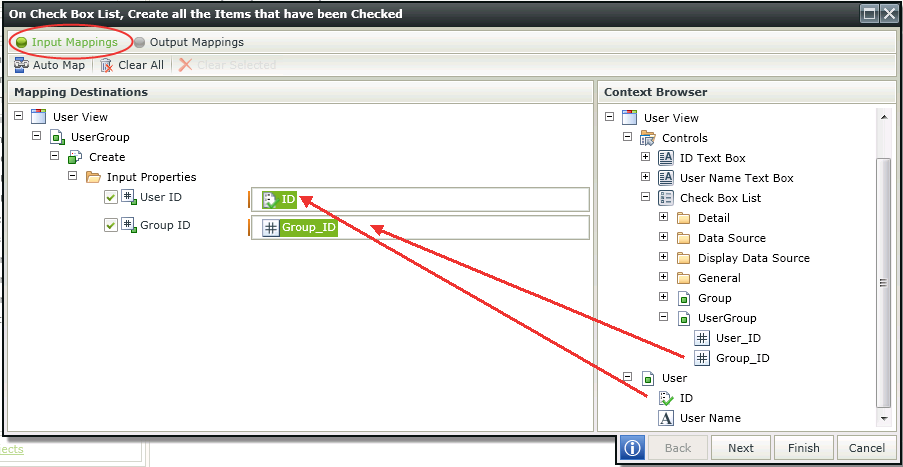
- Click Finish.
- Perform the same mappings for the Delete all the items that have been unchecked Action.
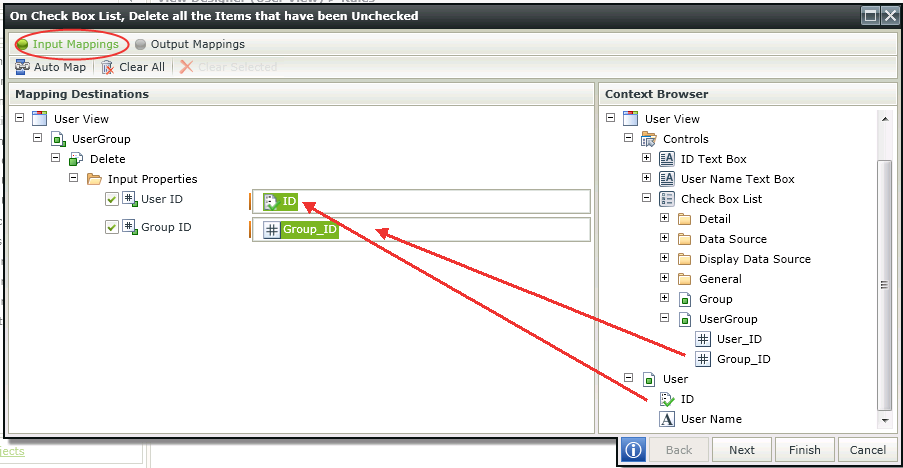
- Click Finish and Finish again to save the Rule.
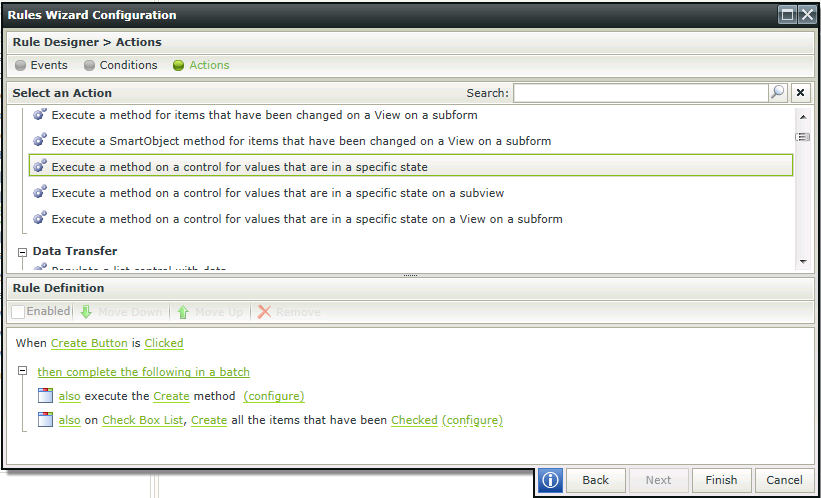
- Edit the When Create Button is Clicked Rule and add the Execute a method on a control for values that are in a specific state Action. Only the Create all items that have been Checked Action is required in this instance since no records exist at this stage and won’t need to be deleted. Make sure the in a batch execution type is selected.
- Click on configure next to the Create method Action and map the User ID field in the output mappings as shown below.

- Click Finish.
- Click on configure next to the Create all the items that have been checked Action.
- On the Input mappings screen:
- Map the SmartObject User ID to the User ID input mappings field.
- Map the Check Box Lists Control’s associated field called Group ID for the input mappings of the Composite SmartObject (Group ID).
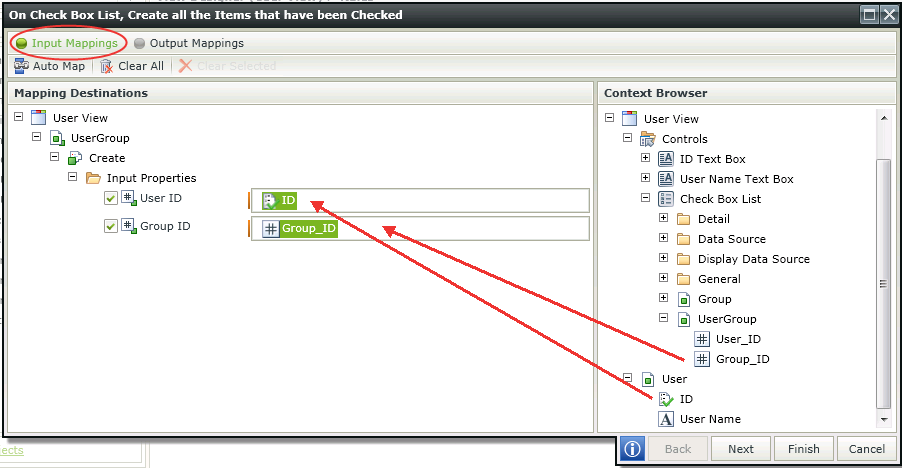
- Click Finish and Finish again to save the Rule.
- Click Finish to save the View.
- Generate a List View from the User SmartObject.
- Generate an Item View from the Group SmartObject.
- Run the Group Item View and create some records.
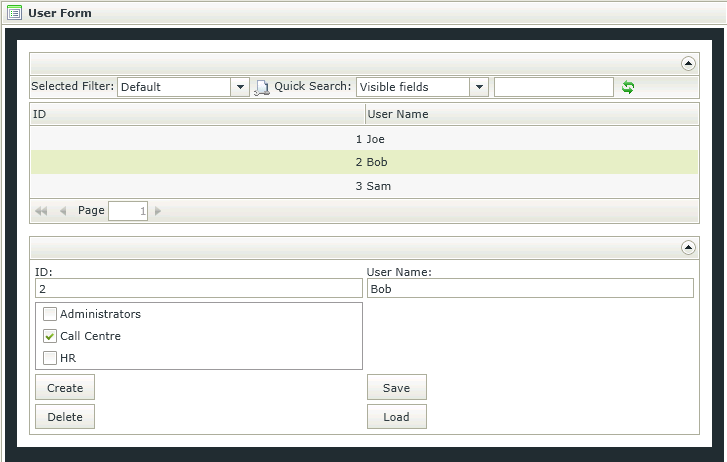
- Auto generate a Form called User Form from the User View and User List View
- Run the Form and create a few records on the Item View.
- Refresh the User List View, then click one of the records on the List View. Note how the Item View is loaded with the record’s detail