

How to use Custom Events in a Process
KB000187
PRODUCTK2 blackpearl
TAGSK2 Designer for Visual Studio
LEGACY/ARCHIVED CONTENT
This article has been archived, and/or refers to legacy products, components or features. The content in this article is offered "as is" and will no longer be updated. Archived content is provided for reference purposes only. This content does not infer that the product, component or feature is supported, or that the product, component or feature will continue to function as described herein.
Introduction | ||
| K2 blackpearl supports the use of custom events within a workflow process using the K2 Designer for Visual Studio. The custom event may be defined using .NET code or Windows Workflow Foundation (WF) objects.
|
Using a Custom Event within a Process
To incorporate a custom event within a workflow process use one of the following methods.
Creating a custom event using C# code
1. Within the K2 Designer for Visual Studio workflow project, drag a Default Server Event (Code) event wizard from the toolbox and drop it onto the design canvas
| Note: You can drop the wizard onto an existing Activity or onto the canvas to create a new Activity. Dropping the wizard creates a C# code file (.cs) to define the custom event. |
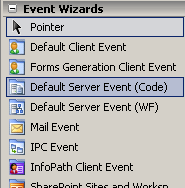
[Figure 1. The Default Server Event (Code) Wizard in the Toolbox]
2. Right-click on the Server Event and select View Code > Event Item from the drop down menu
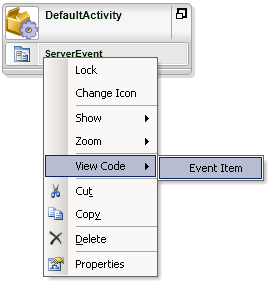
[Figure 2. Selecting the Code Event Item]
This opens the automatically created .cs file in Visual Studio, and presents the following starting point for the custom event code:
using System;
using System.ComponentModel;
using System.ComponentModel.Design;
using System.Collections;
using System.Drawing;
using SourceCode.KO;
using SourceCode.Workflow.Common.Extenders;
using hostContext = Project_e8fe3e1159b24e16b06a39f534020959.EventItemContext_fb4ffc447fb741138d2dd4669da83ed6;
namespace ExtenderProject_e8fe3e1159b24e16b06a39f534020959
{
public partial class EventItem_fb4ffc447fb741138d2dd4669da83ed6 : ICodeExtender
{
public void Main(Project_e8fe3e1159b24e16b06a39f534020959.EventItemContext_fb4ffc447fb741138d2dd4669da83ed6 K2)
{
[The custom event code goes here]
}
}
}
Within the Main method, the custom event code can be inserted. At this time, only the C# programming language is supported for custom code events in processes.
Creating a custom event using Windows Workflow Foundation (WF) objects.
1. Within the K2 Designer for Visual Studio workflow project, drag a Default Server Event (WF) event wizard from the toolbox and drop it onto the design canvas
| Note: You can drop the wizard onto an existing Activity or onto the canvas to create a new Activity. Dropping the wizard creates a Windows Workflow Foundation (WF) schedule to define the custom event. |
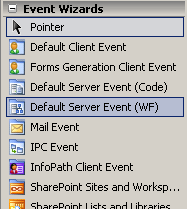
[Figure 3. Selecting the Defualt Server Event (WF)]
2. Right-click on the Server Event and select View Code > Event Item from the drop down menu (as shown in Figure 2). This opens the automatically created .xoml page in Visual Studio:
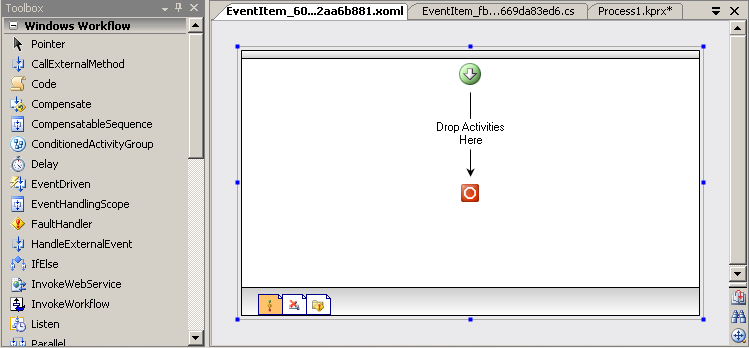
[Figure 4. The Windows Workflow Foundation Creation Page]
Within the WF schedule, you can create the necessary code objects by dragging and dropping Windows Workflow objects from the Toolbox onto the design canvas.
