

How To: Implement Custom Submit and Close Logic
KB001723
PRODUCT
Use Case
While required fields are great for fields that will always need to be filled out, sometimes you’ll want to require fields using logic instead. This will allow forms to be submitted without values until they are required. Custom submit logic creates a better user experience and can also control where the user ends up after they submit an entry. In this how to:
- Creating custom validation
- Configuring a message
- Stopping rule execution
- Closing the browser
- Navigating to another URL
This how-to uses the Item Review Accelerator as the starting point. To follow along, deploy the Accelerator and name it Incident Report. To find out more about using the Accelerators in your solution, use this link: http://help.k2.com/onlinehelp/k2appit/UserGuide/current/default.htm#App_Templates/App_Templates.htm
Creating the Incident Report Application
In the first part of this how-to, we will add fields to the Incident Report list and create a view to add in our forms. This technique easily adds information to the default accelerator and will prepare the process for the change to the submit logic.
- Navigate to the List Settings of the Incident Report. Add the following columns all with their default settings:
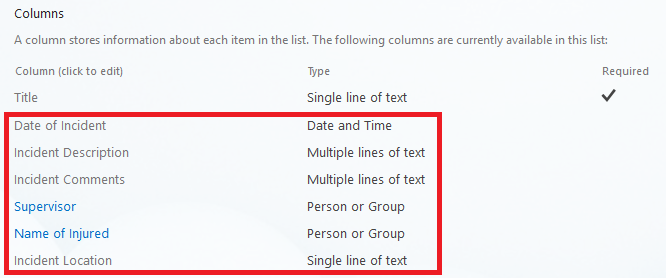
Date of Incident
Date and Time
Incident Description
Multiple Lines of Text
Incident Comments
Multiple Lines of Text
Supervisor
Person or Group
Name of Injured
Person or Group
Incident Location
Single line of text
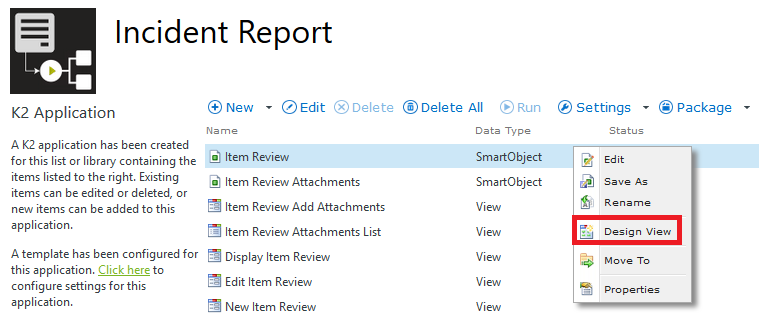
- Navigate back to the Incident Report list, and in the ribbon select the K2 Application in the List tab. Wait for the application to finish validating the SmartObjects and select Regenerate SmartObjects.
- Right click the Incident Review SmartObject and select Design View.
- In the General tab, name the View Incident Report Details with an Item View as the View Type and then select Next.
- Select Create Layout Table Only, and create a table with 2 columns and 4 rows.
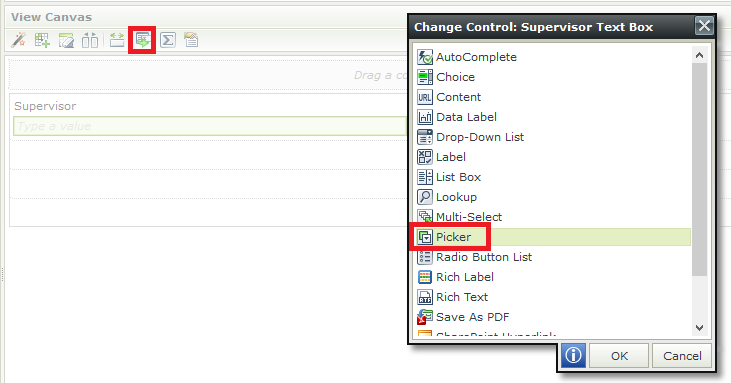
- Drag the Supervisor field onto the View in the top left cell. This control will need to be changed to the picker type.
- Select the field, and in the View Canvas ribbon, select Change Control and choose the type Picker, then select OK.
- In the Properties of the Supervisor Picker, change the display field to Supervisor (Value). Under the Data Source settings for SmartObject, select the ellipses to configure the picker.
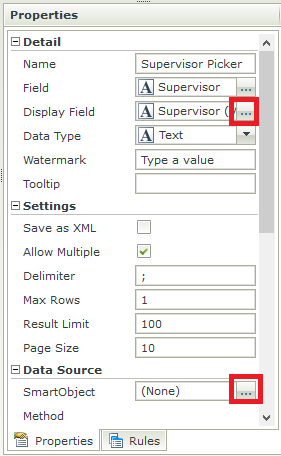
- Select the ellipses on the SmartObject to configure the data source. Expand the System folder and then the SharePoint 2013 Integration folder, and select the SharePoint Integration People Picker Source SmartObject and then select OK.
- Next to the Method for Search, select the ellipses to configure the search options.
- For SiteURL, use your site collection URL. For LabelName type AAD. For UserSelectionMode type PeopleOnly and for UserSelectionScope choose 0. Then select Finish.
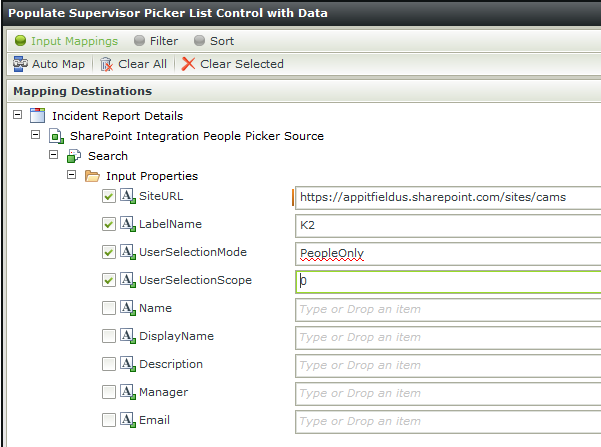
SiteURL
Friendly URL to your site collection
LabelName
AAD
UserSelectionMode
PeopleOnly
UserSelectionScope
0
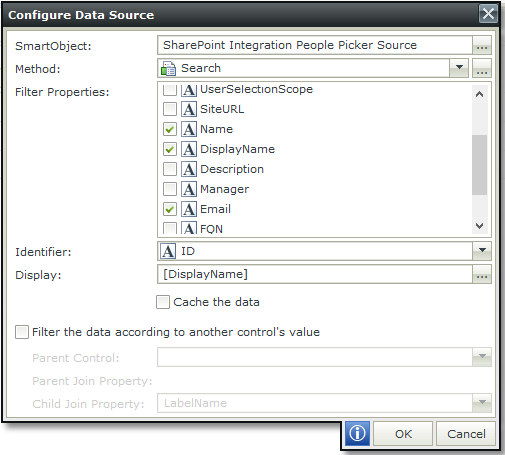
- Uncheck All for the Filter Properties. Select Name, DisplayName and Email. Change the Identifier to ID and the Display to DisplayName. Then select OK.
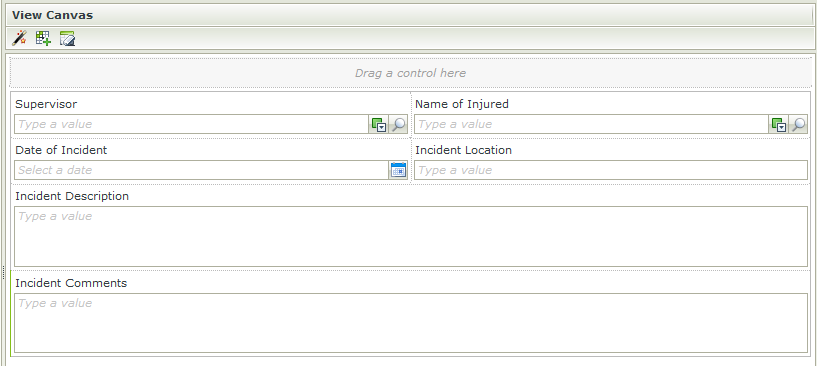
- Drag the Name of Injured field onto the canvas and repeat steps 7-12 for the Name of Injured field.
- Drag the Date of Incident and Incident Location fields onto the canvas on the second row. Merge the bottom 2 rows and drag the Incident Description and Incident Comments fields onto the canvas.
- In the Controls menu, add a Data Label to the canvas. Name the Data Label Flag Data Label. This field will be used as a flag for conditional styles on the required fields. Uncheck the Visible option for the Flag Data Label in the Properties tab.
- Select the Supervisor control. In the Properties menu select Conditional Styles and configure.
- Name the condition Red – Supervisor and add a condition for when Supervisor Picker Is Empty And Flag Data label Is Not Empty then select OK.
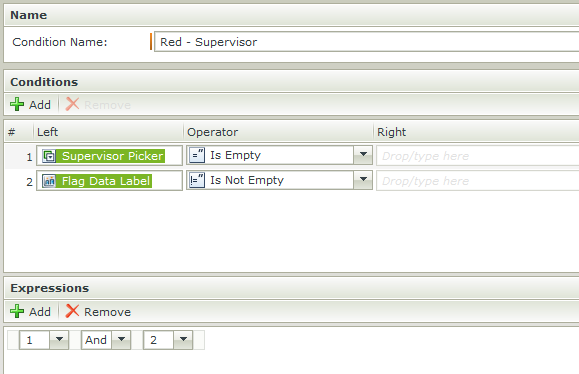
- Set the Background color to light red and then select OK.
- Repeat steps 16-18 for any required fields, switching the first condition to the current field. In our Submit logic, we will use the flag if there are values not set.
- Select Finish to save and exit.
- Check Out the New Item Review View and select Edit. The buttons will need to be hid in the view because new buttons will be configured in the New Item Review Form for the submit logic.
- Select the Save button and uncheck the Visible option.
- Select the Cancel button and uncheck the Visible option.
- Select Finish to save and navigate back to the Application elements page.
- Check Out the New Item Review Form and select Edit.
- Drag the Incident Report Details View onto the canvas between the New Item Review View and the Attachments View.
- Uncheck the Collapsible option in the Properties of the Incident Report Details View.
- From the Controls menu, add a 3 column 1 row Table under the Incident Report Details View.
- From the Controls menu, drag 2 buttons into the table in the middle and far right cells. Name the center button, Button Submit with the text Submit and the far right Button Cancel with the text Cancel. Align the cells to the right and use the Save icon to save your work.

Creating the Custom Submit Logic – Create Item Event
Before logic is added to the Submit event, the Submit button should be configured with the create item even so that the information required is saved to the list.
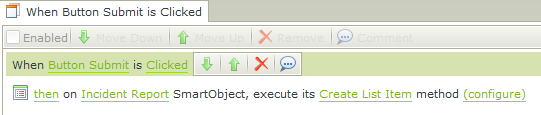
- Edit the Select the Submit button and in the Rules task pane click the Add button to add a rule.
- In the Events tab, add an event for When a control on the Form raises an event. In the options, select the Button Submit control.
- Next in the Actions tab, add the Execute a SmartObject method Action to the rules.
- Select the Incident Report SmartObject and the Create List Item method, then click configure.
- Drag the Title Text Box onto the Title property from the Controls folder of the New Item Review View.
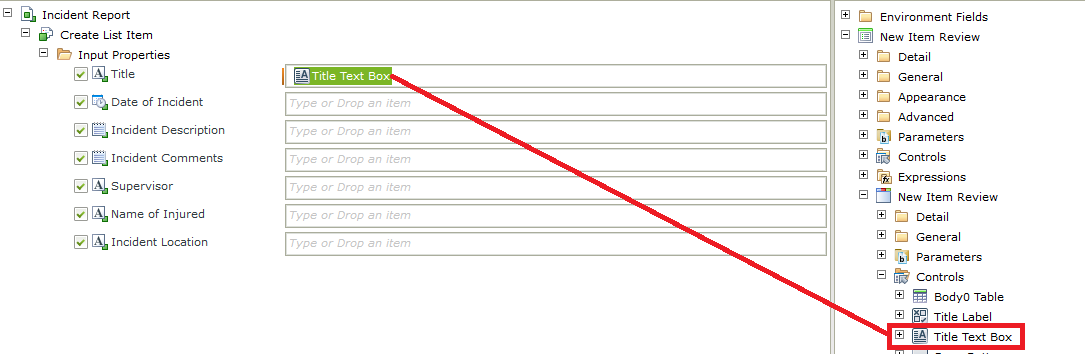
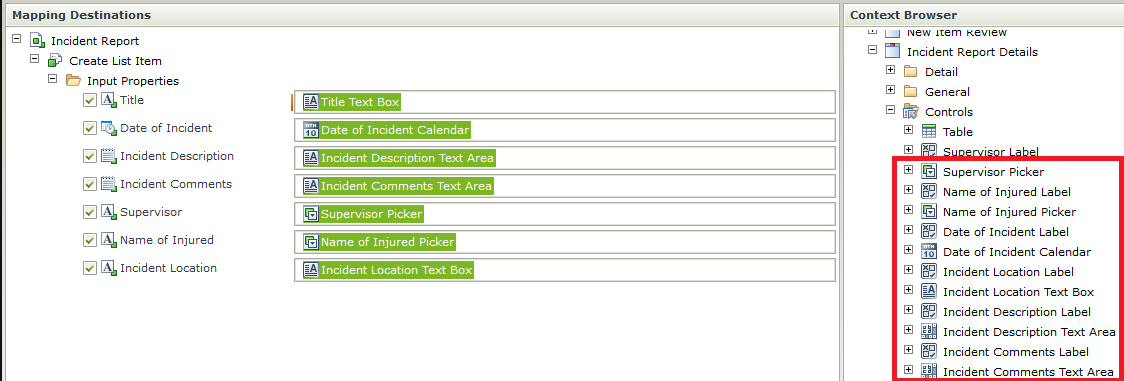
- From the Incident Report Details View, expand the Controls folder and drag the controls onto the matching properties and then click Next.
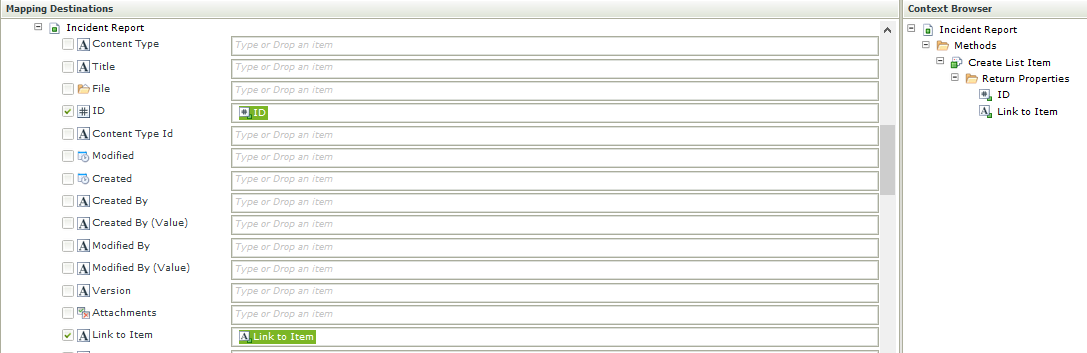
- Under the New Item Review View, expand the Incident Report SmartObect. Drag the ID and Link to Item onto the correct properties and then click Finish.
Creating the Custom Submit Logic – Validation
In your forms, there is often a requirement for information to be filled out, but it may not all be required at once, or you may want to create a notification to let the user know when they’ve missed something and provide information about what is required, and prevent any other rules from auctioning until the form is valid.
In this scenario, we will put together a series of conditions and actions in our submit rule to evaluate completed fields, rather than creating additional conditions to prevent the item from being submitted. If it is not complete, we will show a message and stop the actions that follow from firing.
- In the New Item Review Form, select the Submit button in the View. From the Rules task pane, select the When Button Submit is Clicked rule and then click Edit.
- Select the When Button Submit is clicked Event, and search for Advanced in the Conditions tab. Add the an advanced condition is true condition to the rules and move up to the top so that the Create List Item Action is removed from the condition. Rules execute in top down order, so the rules we want to evaluate first must come before the create action.
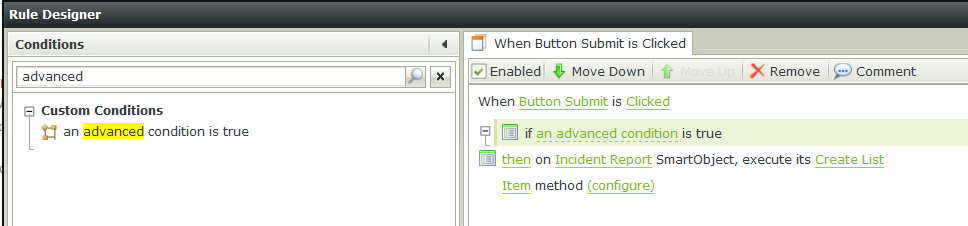
- Click on an advanced condition to configure the condition.
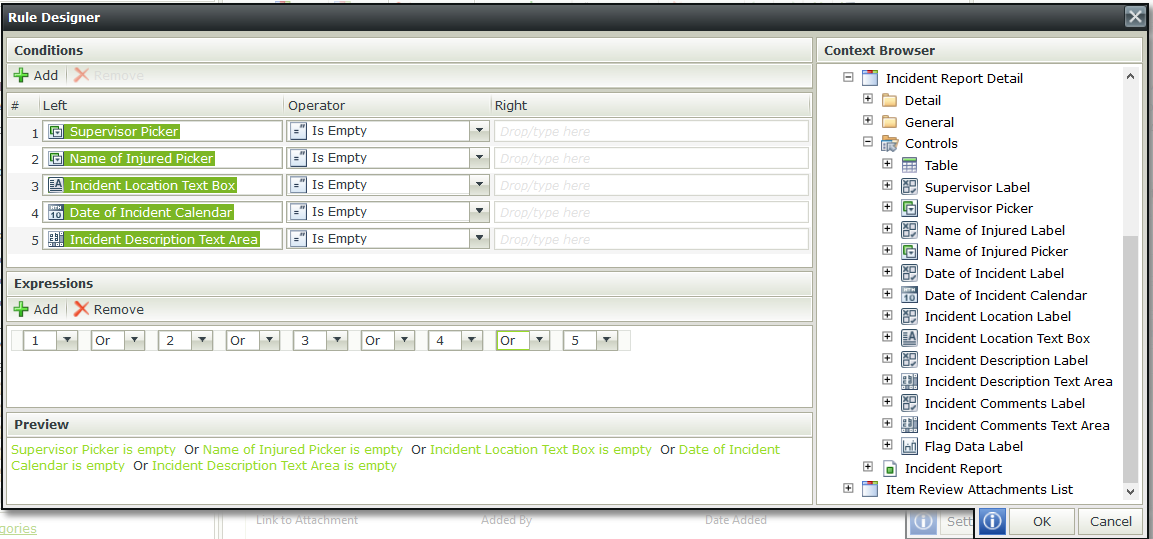
- In the Conditions pane, add a condition. All conditions will use a field from the Controls folder, with the Is Empty Operator. For multiple conditions, change the And to Or in the Expressions so that if any field is empty, the condition will apply. Here is an example:
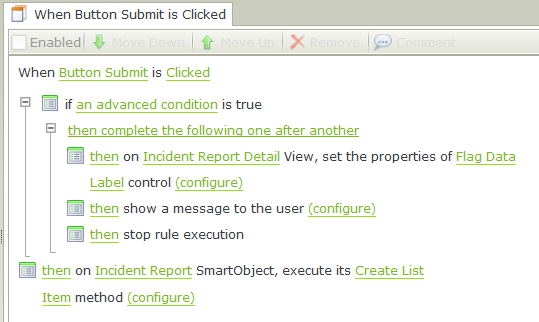
- Select the condition, and in the Actions tab, search for View control and add an action to Set a View Control’s properties.
- Select the Incident Report Details View and the Flag Data Label control. Then click configure.
- In the Text property, type flag. Then select OK. This will be used to evaluate fields that should highlight.
- Next search for message in the Actions tab, and add an action to Show a message. Then click configure.
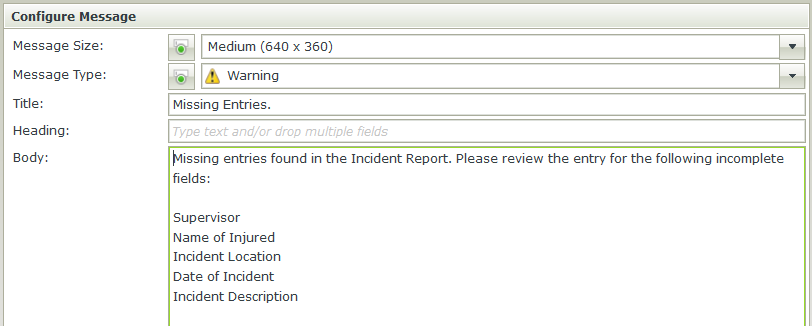
- For the Message Size choose Medium, and for the Message Type choose Warning. For the Title type Missing Entries and leave the heading blank.
- For the body type Missing entries found in the Incident Report. Please review the entry for the following incomplete fields: followed by a list of the fields required by the logic.
- Search for stop in the Actions pane. Add an action to stop rule execution and then select OK to save changes and then use the save icon to save your work.
Closing the Browser Window
For most cases you will want to have an action that lets the user know the actions have completed. In this first step, we will close the browser window of the active session.
- Select the Submit button and in the Rules task pane, edit the When Button Submit is Clicked rule.
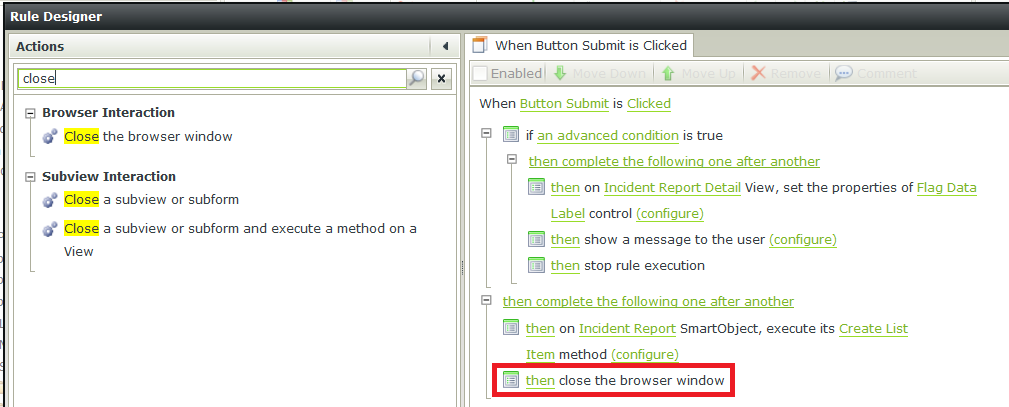
- In the Actions tab, search for close.
- Add the Close the browser window action to the end of your rules. Make sure that the close action is the last action in your rules. Any actions that follow a close event will not persist after the window closes.
- Click OK and then the save icon to save your work.
Redirecting the User to a URL
Sometimes it may be better to redirect the user. In this step, we will add a URL to redirect the user to the homepage of the site collection.
- Select the Cancel button and in the Rules task pane, select the Add button.
- Add an Event for When a control on the Form raises an event. Select the Button Cancel control.
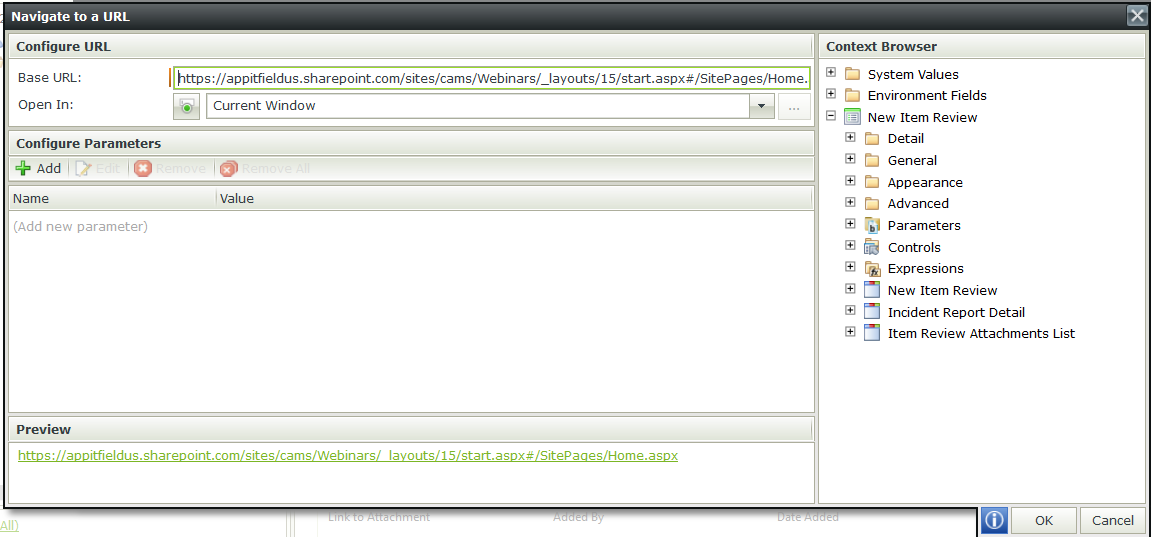
- Next in the Actions search for navigate and add an action to Navigate to a URL, then click configure.
- Add the URL to the page you wish to redirect the user to. In this case, I am using the home page of the webinars sub site. Then click OK and then Finish to close the designer.
Loading the Details View into the Edit Form
- Check out the Edit Item Review View and select Edit.
- In the Layout tab, uncheck the Visible option for the Save and Cancel buttons.
- Select Finish to save your changes and then check the View back in.
- Check out the Edit Item Review Form and then select Edit.
- Add the Incident Report Details View to the Form and uncheck the Collapsible option.
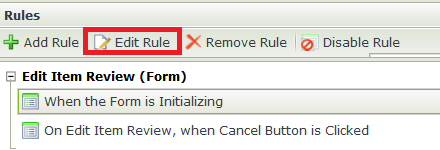
- Navigate to the Rules tab, and select the When the Form is Initializing rule and select Edit Rule.
- Search for transfer and add an action to Transfer data and click configure.
- From the Context Browser, expand the Incident Report SmartObject in the Edit Item Review View, and drag the fields onto the controls of the Incident Report Detail View and select OK.

- For any picker controls, search for view control and add an action to Execute a view control method for each picker.
- Select the Incident Report Detail View and the Name of Injured picker with the Resolve method and then click configure.
- From the Context Browser drag the Name of Injured (Value) onto the Value field from the Incident Report SmartObject in the Edit Item Review View, then select Finish.
- Repeat steps 9-10 for the Supervisor Picker.
