
Introduction
This is a follow-up to the post where I describe how we configure and complete asynchronous server events. I showed you how one can complete the server event using a REST call, but sometimes a REST call is not needed or possible. In this post I will extend the mechanism to make use of SmartObjects on a SmartForm.
Use Case
For this scenario, I am a technician, repairing customer machines on-site and I may not always have all the replacement parts on hand. When that happens, I can submit an order to the supplier which will deliver the part directly at the installation site. But, as we all know, deliveries are unpredictable and I won’t always be able to determine the actual delivery date and time.
To handle the variability, K2 will start a process when I submit the order, generate a QR code as part of the weigh bill and then wait for the next step. When the part is delivered, the receiving department will scan the QR code, which in turn will proceed to the next step where I will schedule the installation date with the customer.
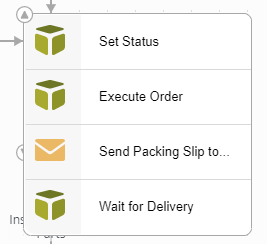
The actual process will be more involved as one would typically wat to have the request approved if the part is over the budgeted amount, if special tools are needed for the installation, etc. but for this post I will focus on the asynchronous implementation. Here is what the flow looks like:
Pre-preparation
As I will need to access the K2 Workflow REST endpoint in a SmartForm, the REST endpoint needs to be wrapped in a SmartObject. To do this:
- Enable the REST API if it’s not enabled yet.
- Copy the swagger URL value and create a new REST Service instance using the swagger. I would recommend using a service/static account for this use case, you may opt for OAuth if you are planning on using real user identities.
- Create a new complex SmartObject, I called mine Server Event Management, from the UpdateFieldsRequest object in the service instance.
You can use the Generate SmartObjects from the Service Instance option: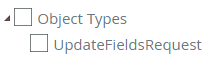
Or manually create one by dragging the following object onto the design canvas in K2 Designer: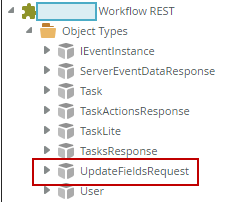
This SmartObject can now be used to interact with Server Events.
Implementation
- I will not go into detail on the SmartObjects and forms created for this use case, just the key components needed for the asynchronous processing to happen. Here is the form used to submit a new Order:

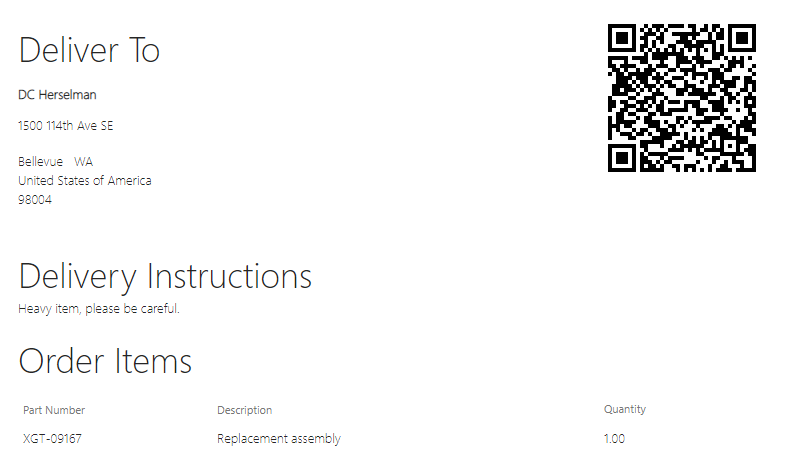
- I also created a form that will be included in the order details as an attachment, the expectation being that the supplier will print this form out and include it as part of the delivery documentation. It is a simple form that expects two parameters:
- Order Id – Needed in order to pull some of the submitted information and display it on the form
- Serial Number – This value will be used when the order is received to instruct the K2 process to continue, as explained in the first post.
Here is what this form looks like:
- Generating the QR code is actually very simple. I use a free service you can read more about here:
http://goqr.me/
It provides an API that you can call with several options, in this example it’s a basic call where I provide the size and the data for the QR code. Here is a simplified version of the call:
https://api.qrserver.com/v1/create-qr-code/?size=150x150&data=https://[smartformurl]?sn=[Serial_No]
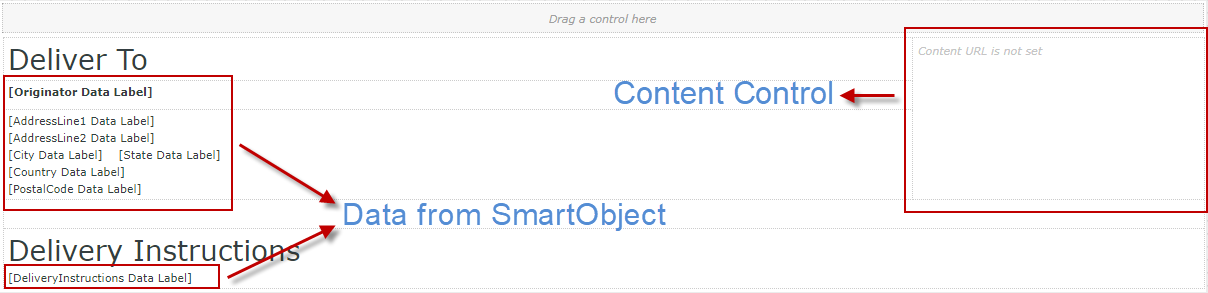
So all that is required from the K2 Smartform is to add a Content Control and build up the URL using the parameters passed in.
Here’s what the view for the form looks like in Designer:
- In order to get the form in PDF format, use the PDF Converter SmartObject and remember to use the Serial Number property of the Step object in the Workflow Context as documented in the first post. This can then be printed out and send as part of the order or emailed. I use the email option to make it simpler to demo.
- The process itself doesn’t have to be complex, to prove the point, I send an email with the PDF of the packing slip and then use the SmartObject call that waits for the delivery:
In Wait for Delivery, I just map the order to the PDF form, but key is to check that Wait for external system box: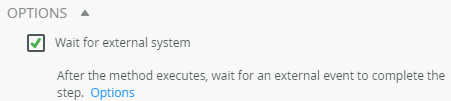
- Once the order is delivered, the person opening the package can scan the QR code with their phone or table which will navigate to the processing form and tell the process to proceed. As you can guess by the url parameter in step 3, this processing form expects the Serial Number.
- Create a rule on the form or view that checks if this parameter is available and then completes the server event. Here is what that configuration looks like:

- The Serialized methods has no inputs, it just creates an empty payload since I do not need to pass variables back to K2. If you need to, you can do that here.
- The FinishServerEvent method takes the following two fields:
- userDefinedFields – Value generated in step a.
- serialNumber – value from the parameter.
- I also store the HttpResponseCode for the call in a hidden data label called hidden Response Code Data Label.
- Finally, I just do some checking and display a success or failure message depending on this code.
And that’s it. By configuring the process to wait as detail in the first post, one can wait for real world events (and electronic ones too of course) to complete, use an everyday device to interact with and complete the process and then proceed to the next step.
As the full application has a few more moving parts like approval and installation steps, I didn’t add those in the article and focus purely on the Async and Complete pieces of the workflow. Feel free to ping me if you have specific questions on the other parts.

