

Applies to: Nintex Workflow and Nintex Forms for SharePoint 2016, 2013, and 2010
Note: The Nintex external platform includes the following external services: Nintex Live (connector actions), external forms (live forms), Document Generation, and External Start.
Overview
If you are running a previous version of Nintex Workflow for SharePoint, and are not yet ready to upgrade your installation to the latest product version, you can install the latest SSL certificates for the Nintex external platform using one of the following methods:
- Method 1: Automatically install the new certificates by running a script on the Central Administration server.
- Method 2: Manually download the certificates from the Digicert website, then upload and install each certificate in Central Administration.
This article describes both methods.
Prerequisites
- Ensure that you have a version of Nintex Workflow or Nintex Forms for SharePoint installed older than:
Nintex for SharePoint 2016, version 4.3.3.0
Nintex Workflow for SharePoint 2013, version 3.3.1.0
Nintex Forms for SharePoint 2013, version 2.11.4.0
Nintex Workflow for SharePoint 2010, version 2.5.7.0
Nintex Forms for SharePoint 2010, version 1.12.2.30
To find your product version, see the Nintex Licensing page.
- If you have any of the following external services, verify that they are enabled.
- Nintex Live (connector actions)
- External forms (live forms)
- Document Generation
- External Start
- To confirm if external services are enabled, see the following topic:
Important! If you choose to manually install these certificates, you are also required to run the upgrade script for reliability updates provided with the latest version of the installer. To run the upgrade script, see the Nintex Connector Workflow Queue Service upgrade process.
Automatically install the new SSL certificates by running a script
- From the Central Administration server, click the following link to download the script.
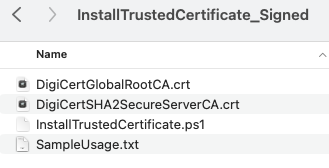
http://nintexdownload.com/sl/supportfiles/InstallTrustedCertificate_Signed.zip - Locate the InstallTrustedCertificate script and SampleUsage document as shown.
- Open a PowerShell command prompt as the administrator and follow these steps:
- To install the DigiCertSHA2SecureServerCA.crt trusted certificate, run:
.InstallTrustedCertificate.ps1 -certFileName "DigiCertSHA2SecureServerCA.crt" - To install the DigiCertGlobalRootCA.crt trusted certificate, run:
.InstallTrustedCertificate.ps1 -certFileName "DigiCertGlobalRootCA.crt"
- To install the DigiCertSHA2SecureServerCA.crt trusted certificate, run:
- In Central Administration, navigate to Security, General Security, Manage Trust and view the following certificates:
DigiCertGlobalRootCA
DigiCertSHA2SecureServerCA - Test the live connection as follows.
- 2013 and 2010: In Central Administration, navigate to Nintex Live Management, Health Checks.

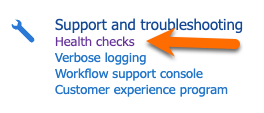
2016: In Central Administration, navigate to Nintex Administration, Support and Troubleshooting, Health Checks.
-
- 2013 and 2010: In Central Administration, navigate to Nintex Live Management, Health Checks.
Download the SSL certificates from Digicert, then upload and install each certificate in Central Administration
- Go to https://www.digicert.com/digicert-root-certificates.htm.
- Download the following certificates to a local directory on the Central Administration server:
- Under Root Certificates, download DigiCert Global Root CA.
- Under Intermediate Certificates, download DigiCert SHA2 Secure Server CA.
- In Central Administration, navigate to Security, General Security, Manage Trust.
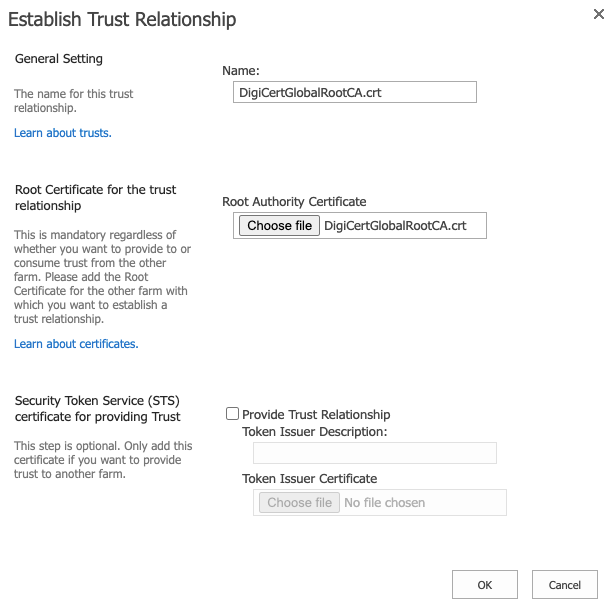
- Establish a trust relationship. Upload each certificate by clicking New and filling in the required details as shown. When complete, click OK. The new certificates are installed.
- Test the live connection as follows:
- 2013 and 2010: In Central Administration, navigate to Nintex Live Management, Health Checks.
- 2016: In Central Administration, navigate to Nintex Administration, Support and Troubleshooting, Health Checks.
- Run the upgrade script to get the reliability updates provided with the latest version of the installer. To run the script, see the Nintex Connector Workflow Queue Service upgrade process.
