
Hi everyone,
I am back again, with a Part 2 continuation from my previous blog post:
Promapp is your BEST Friend: https://community.nintex.com/t5/Community-Blogs/Promapp-is-your-BEST-friend/ba-p/91497
Today will start to move beyond the Process Management phase, and into Process Automation.
What is Nintex Process Automation: Being able to utilize advanced workflow, document generation, e-signature, and digital forms to quickly streamline and automate processes across teams and systems of record.
History:
In my previous post, we covered Process Management, by mapping out the Employee Onboarding process in Promapp.
The Employee On-boarding process, still ranks as one of the most manual business processes. Some people would like to think that the Employee On-boarding process starts when the new employee begins on the first day. That is partially correct; however, a huge part of the process that begins way before this stage. This is known as "Recruiting", and it all starts with a person in a management role with direct reports, filling out an Employee Requisition form, for a new position or to back fill a position.
Perhaps you need some help in creating this form, guess what, I've got you covered :)
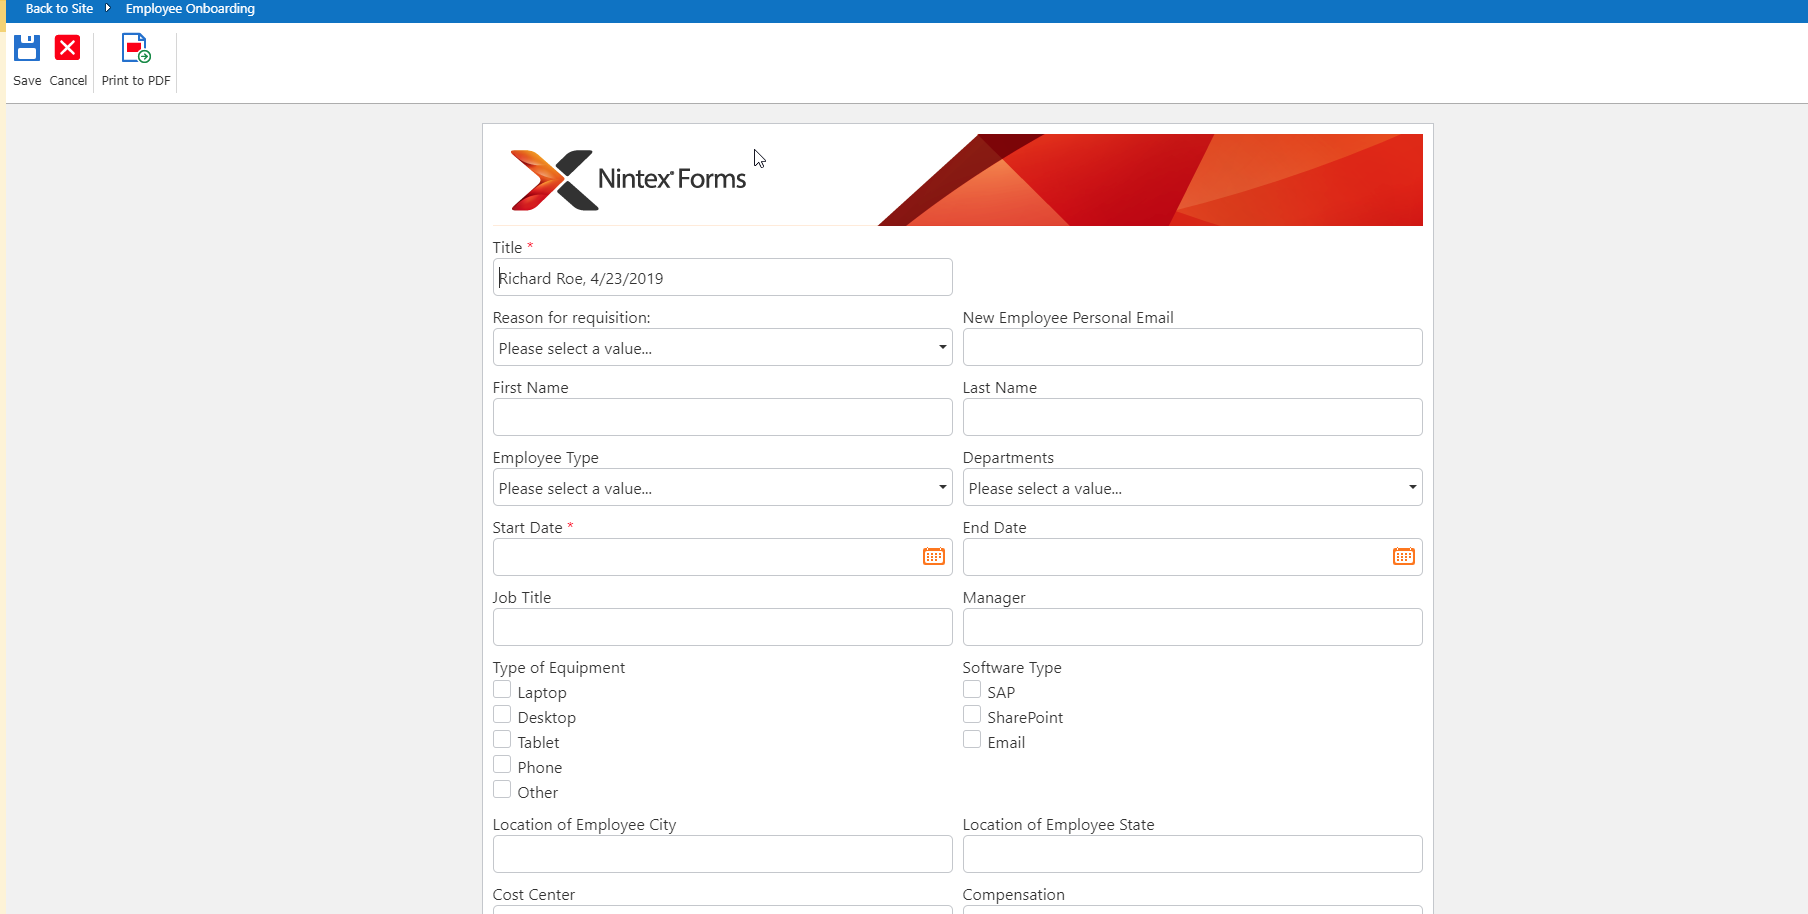
Employee Requisition Form: Designed using a SharePoint Custom List and Nintex Forms in Office 365.
* Create a Custom List, called Employee On-boarding
* Create the following list columns:

NOTE: Departments column is pulling from a list look up I created with the following Titles: I.T., HR, Finance, Safety, Sales and Procurement
Because it's my birthday month and I'm feeling quite generous, Feel free to reach out to me, and ill be happy to send you this stp list template. This will save you some time :)
* When your list and columns are created, then it is time to begin the design aspect of the Employee Requisition form. Click on Nintex Forms.
Note: You will need to have Nintex Forms and Nintex Workflow installed for Office 365. For further instructions on how to achieve this, please visit these blogs:
* Once you click on Nintex Forms, you should notice that you are now in the Nintex Forms designer. How cool is that right, going from a basic custom list, into a form that will transform your organization completely!
Choose the form designer:
* Classic: The original designer that has been around with Nintex since its inception in 2006. This designer allows for pixel perfect, and customer java script/ css.
* Responsive: Modern Forms designer, new to Nintex as of October 2017. Forms will render accordingly, no matter the type of device, you use (Desktop, Tablet, Smart Phone).
We are using Responsive for this form :)
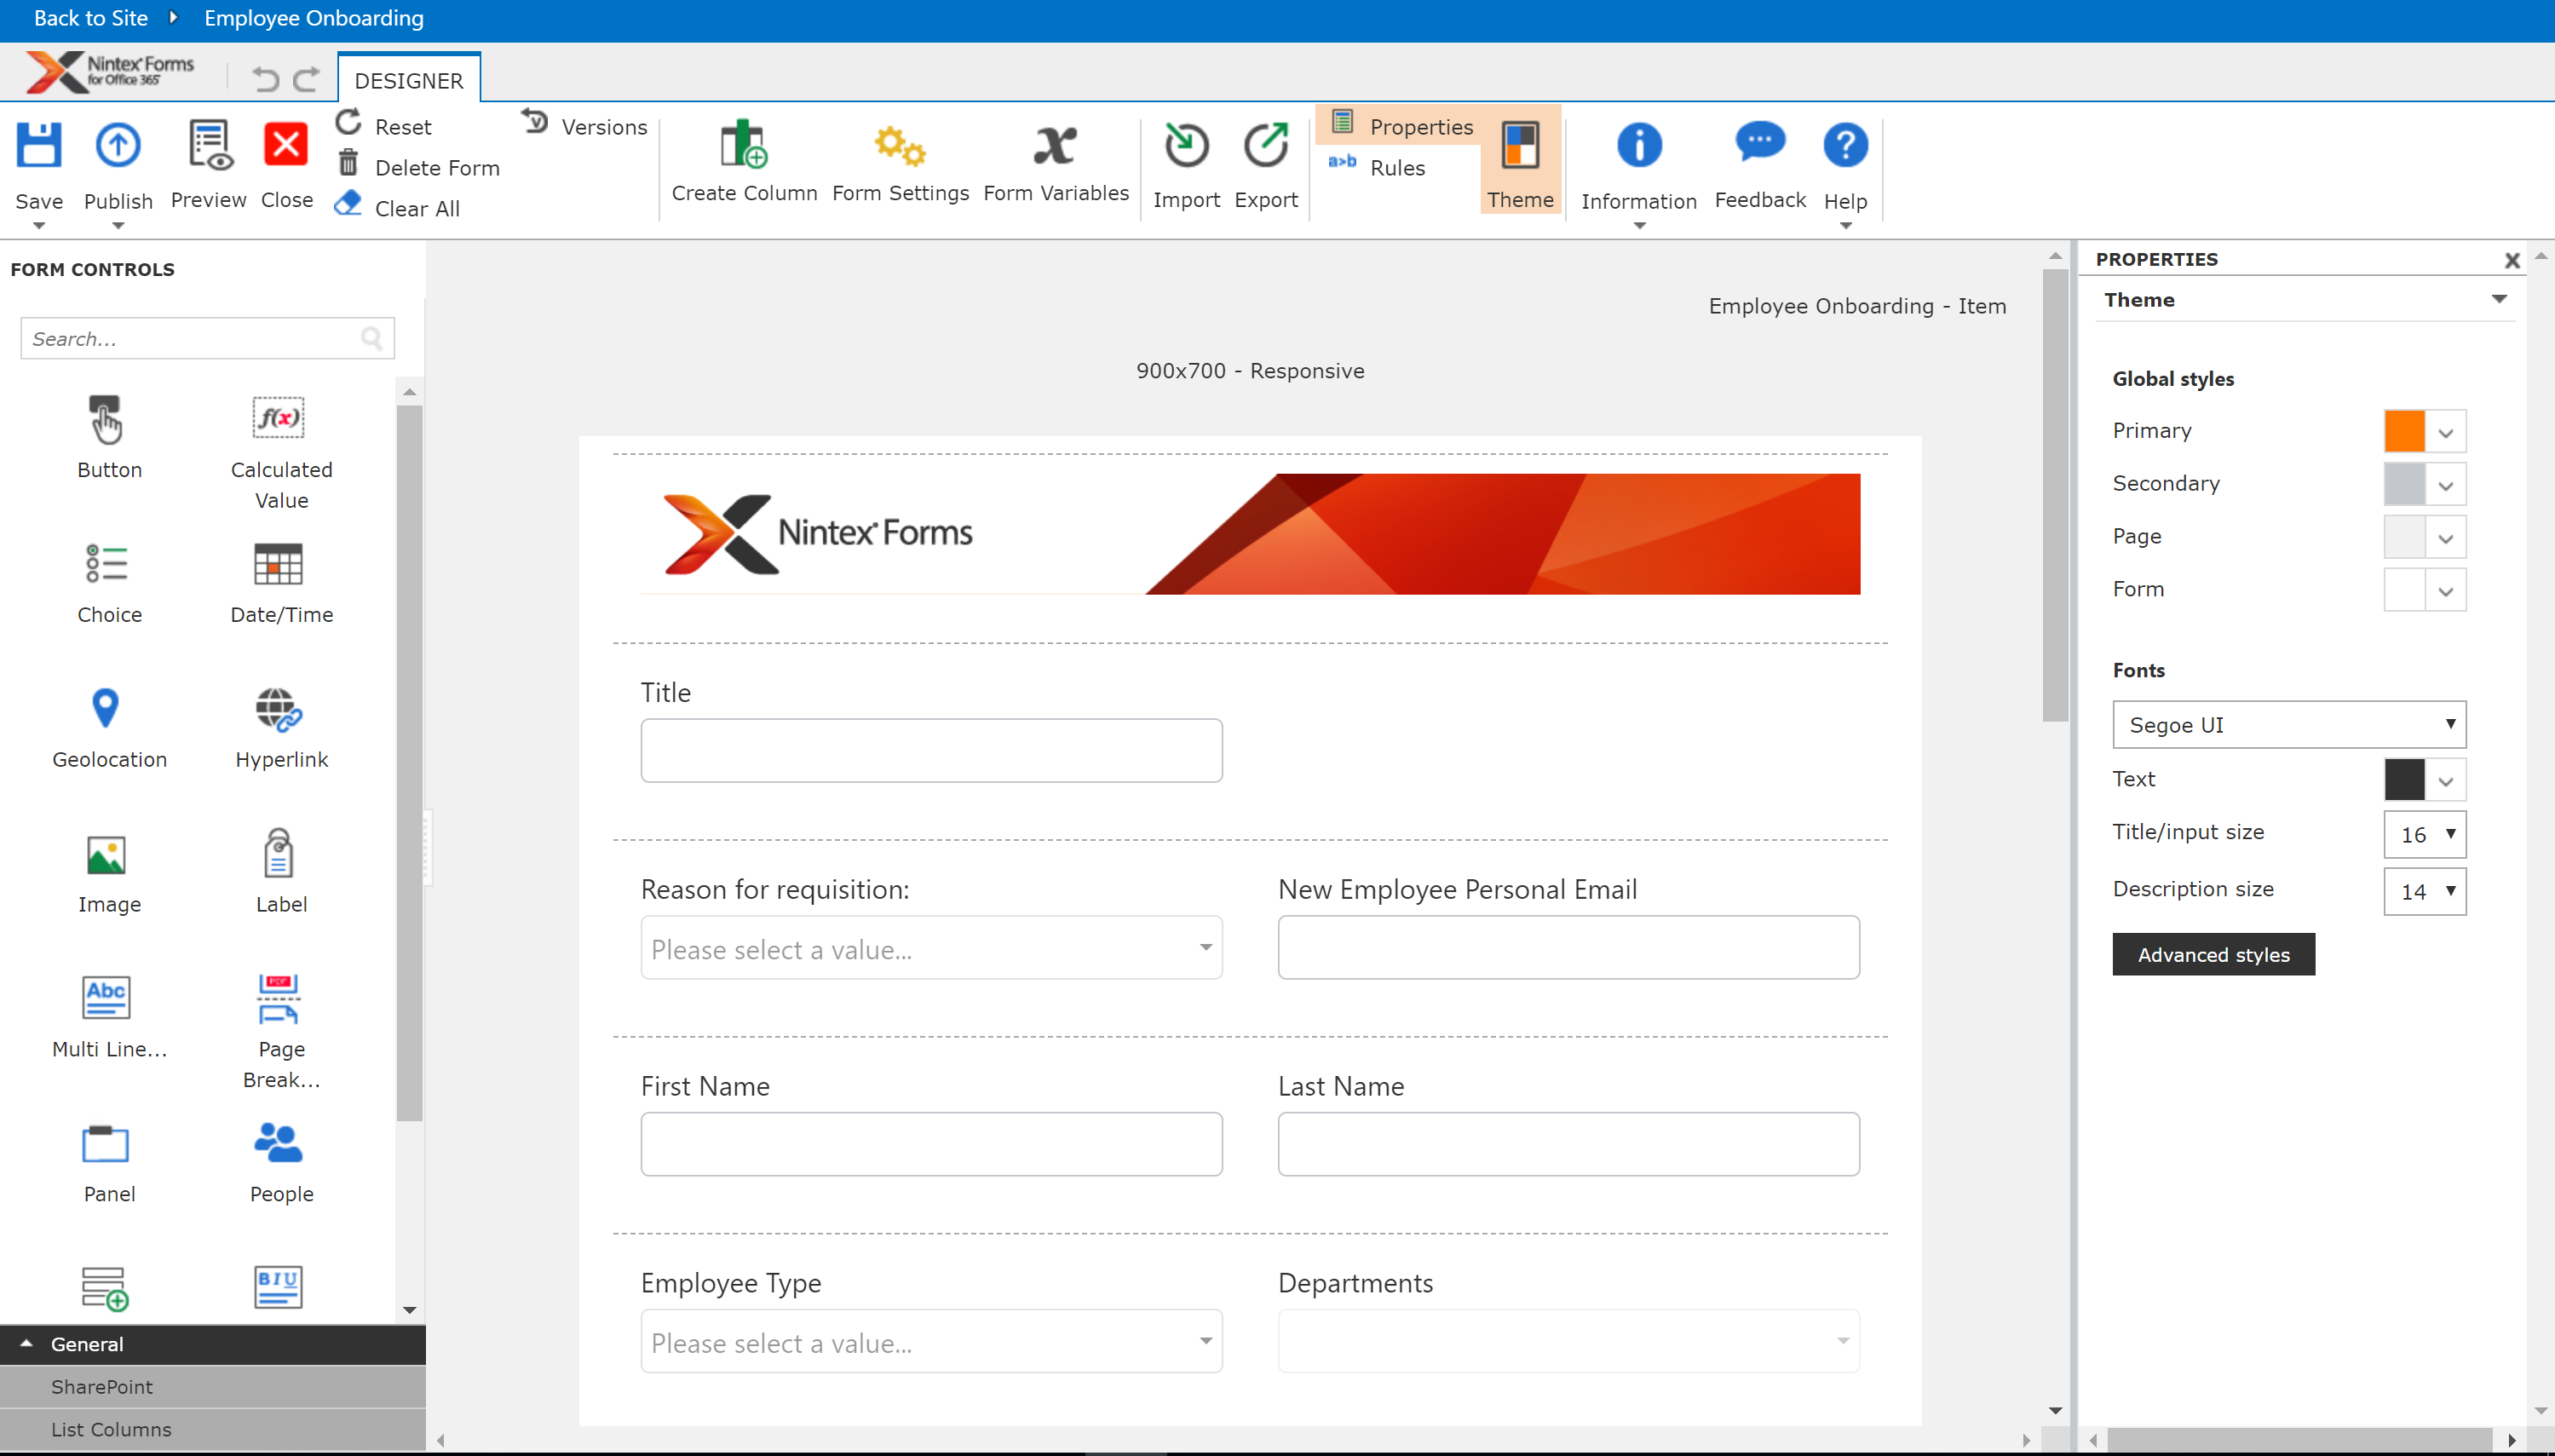
Ribbon Control (Important ones to make mention of):
* Save: Saves the form in draft mode
* Publish: Publishes the form back to the SharePoint list
* Preview: Will allow you to the preview the form that you are designing in all the available formats.
* Versions: Allows you restore back to a previous form version, no matter if it has been Saved or Published
* Create Column: Allows you create a SharePoint column, in case there is one you missed when creating them in the beginning.
* Form Variables: Allows you create a from variable that can be used to reference data in the form and also in the workflow.
* Import: You can import your Nintex Form (nfp), and Nintex Workflow (nwp) files into any environment, from Dev, UAT, Prod
* Export: You can export your Nintex Form (nfp), and Nintex Workflow (nwp) files from any environment, from Dev, UAT, Prod. Not to mention to share with fellow Process Automation guru's working on Intelligent forms, but need some help getting started :)
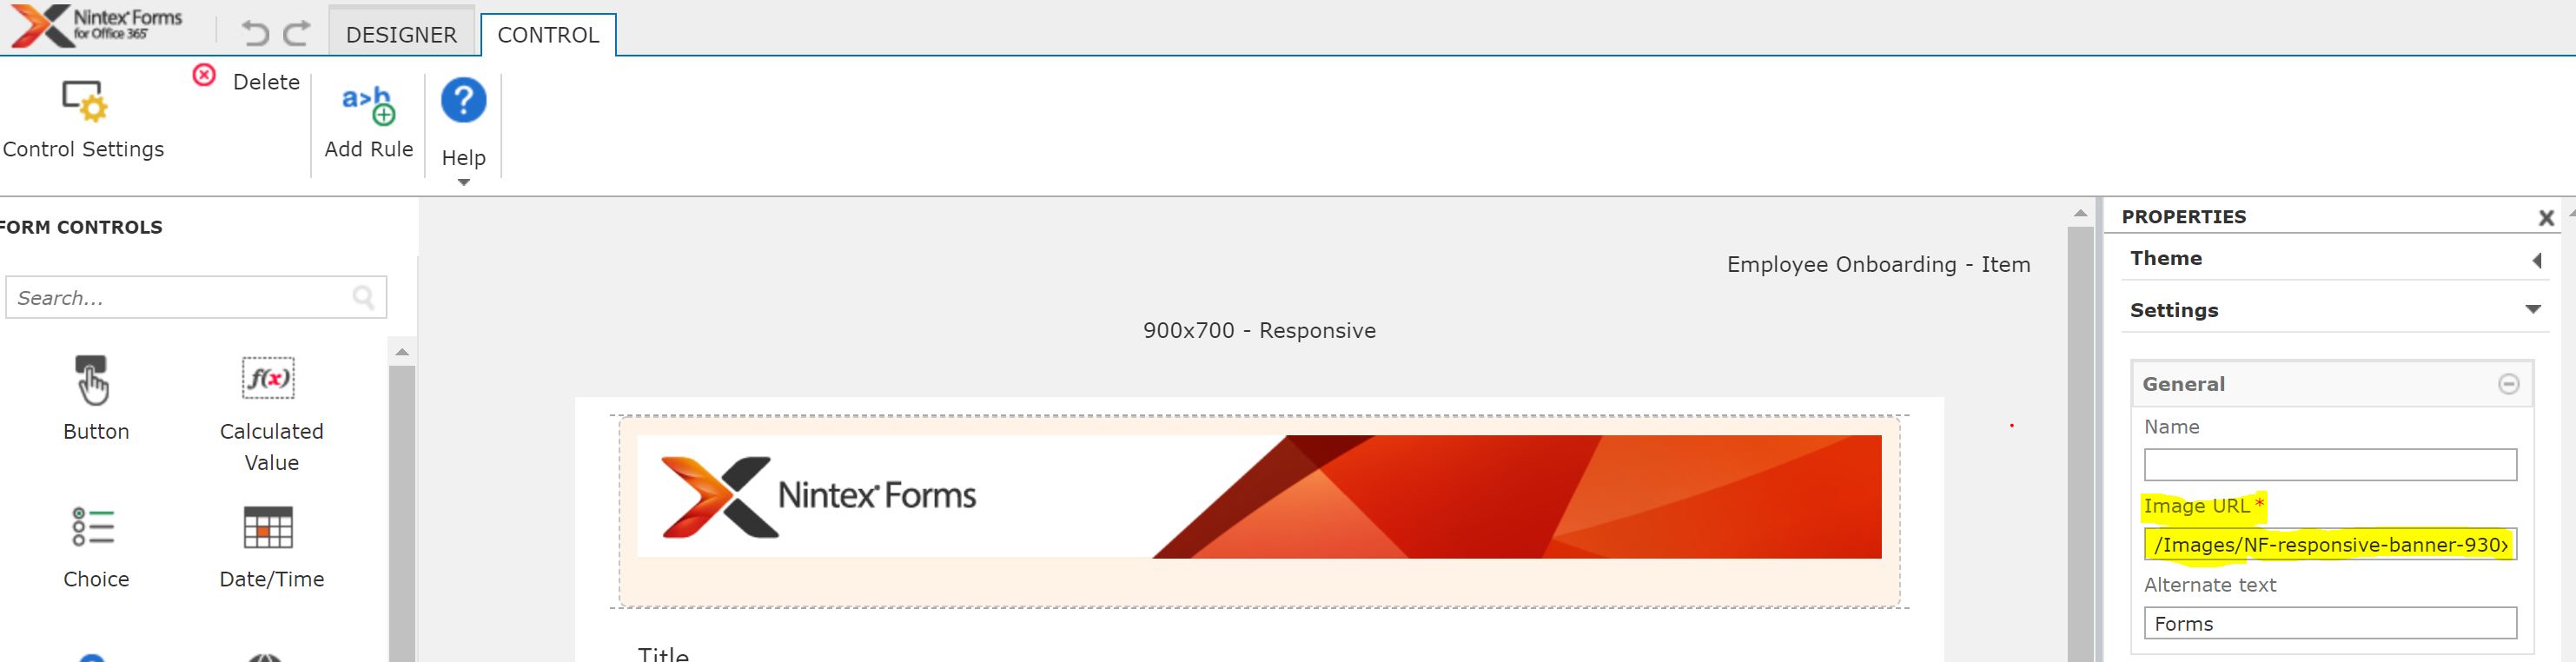
* Next, Click on the Nintex Forms image control. Let's swap this out your own logo. This is one of the first steps needed to give your form some extra finesse :)
Simply, click on the control, the you will see on the right navigation an option to swap out the image url:
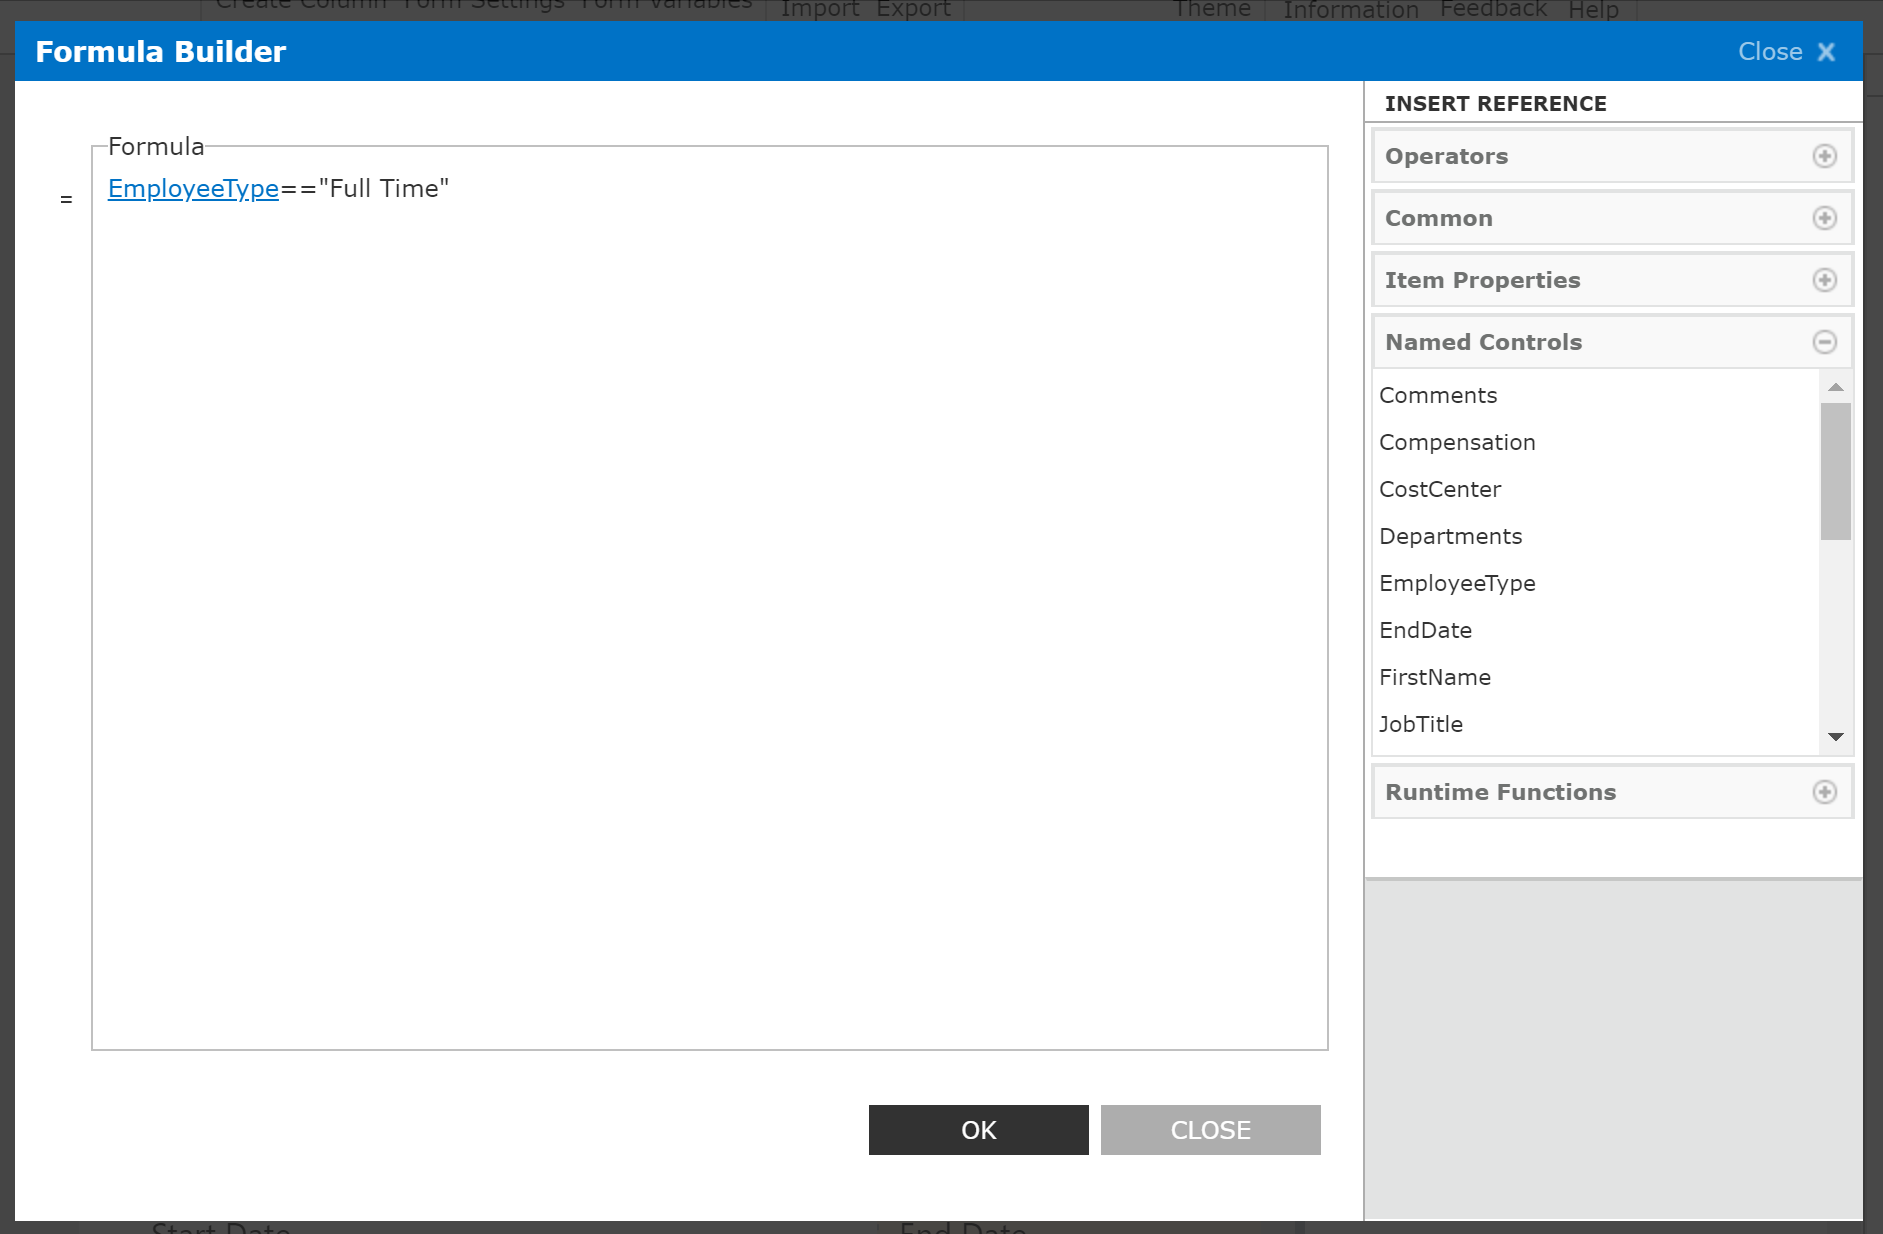
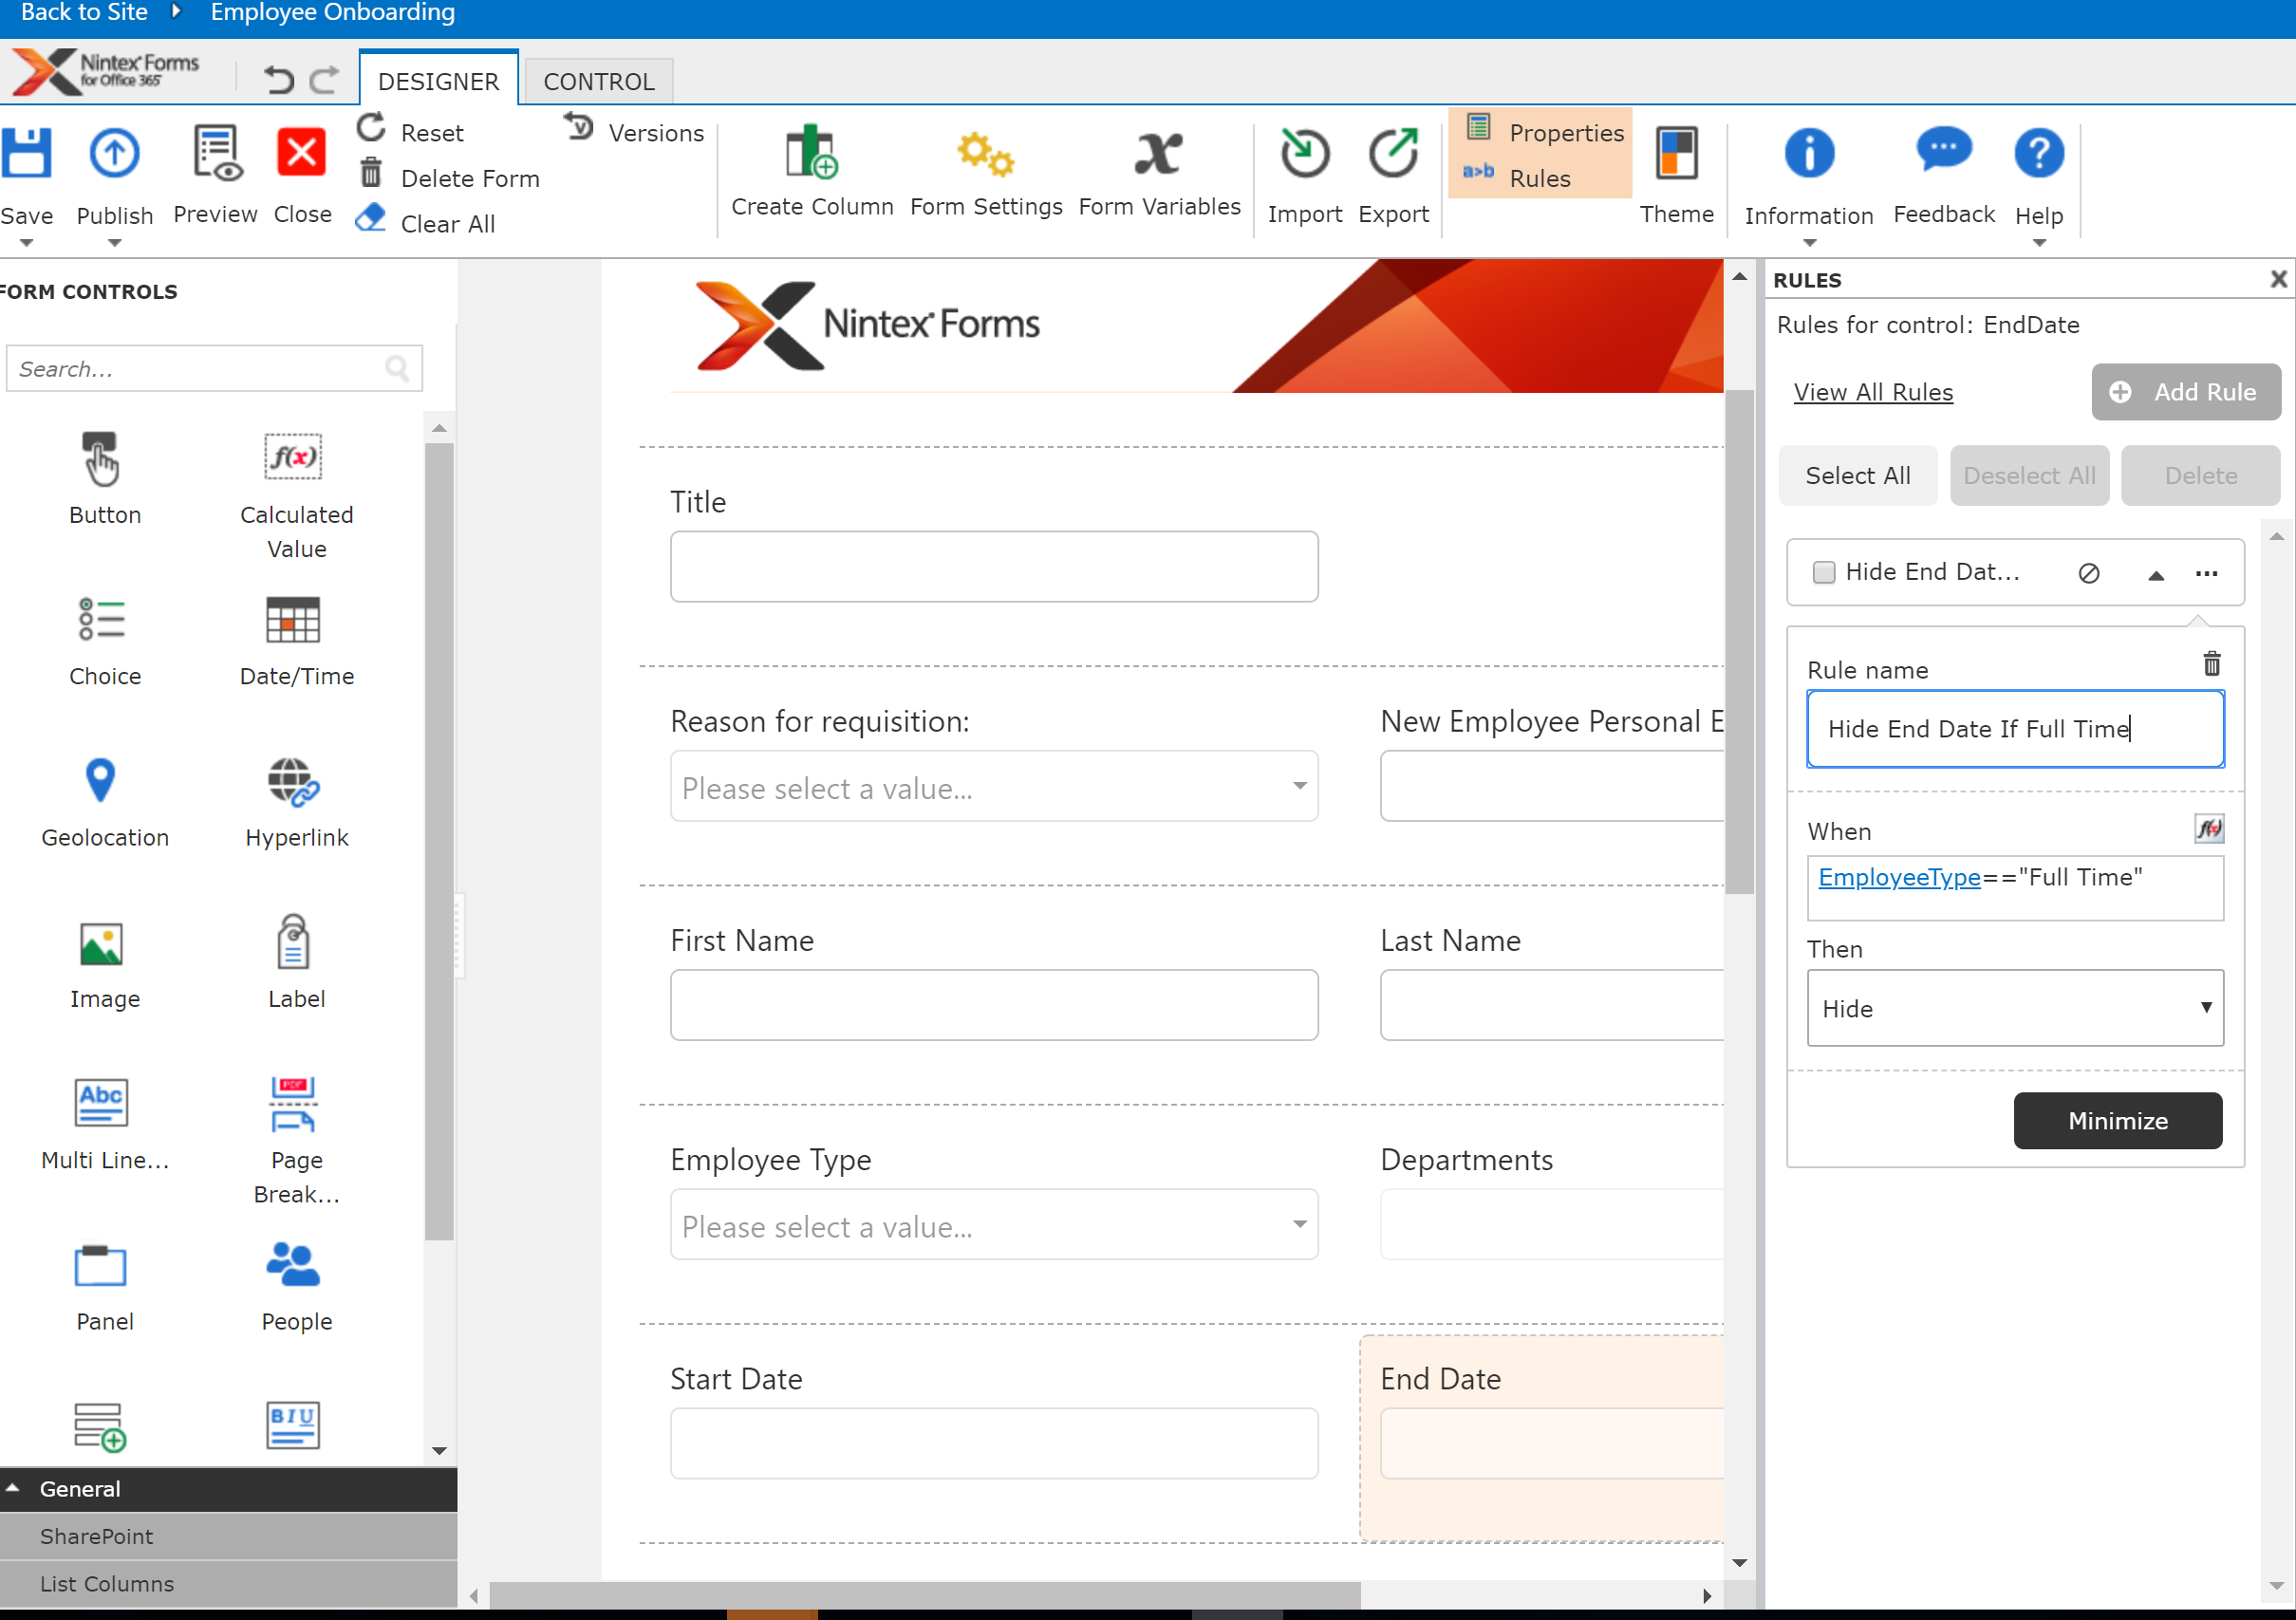
* One last thing to do before we can publish this form and link it into Promapp. Click on the form control "End Date", select Add Rule. Give your Rule the Name "Hide End Date if Full Time", then click on the "fn" to add the following Rule: (Names Control) EmployeeType=="Full Time". We want to hide End Date, if Named Control Employee Type is equal to Full Time. Remember, no one thinks about their end when they start a new full time job :)
* Now, that we are done, hit the Publish radio button. Your form should have been published successfully at the to the Employee On-boarding List.
* Hit the new radio button, and your form should appear:

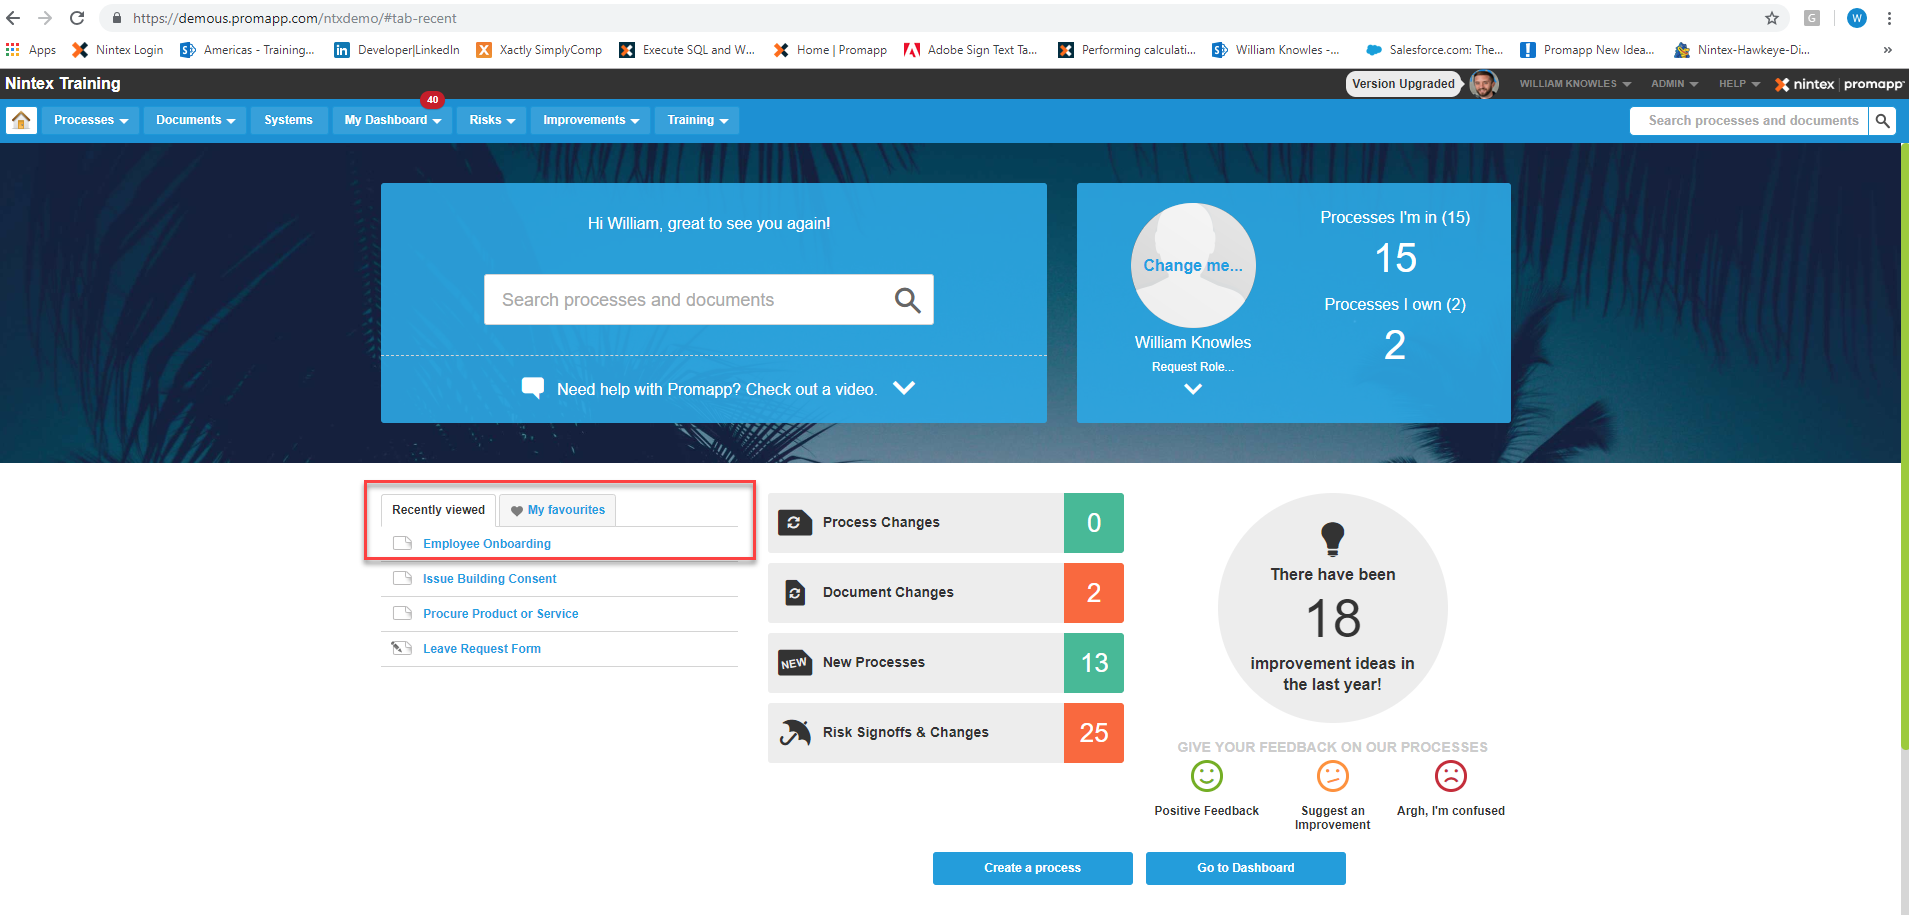
Let add the form to our Employee Onboarding process map in Promapp:
* Locate the Employee On-boarding process on the home Promapp home screen:
* Click on the Edit radio button so that we can modify the process map:
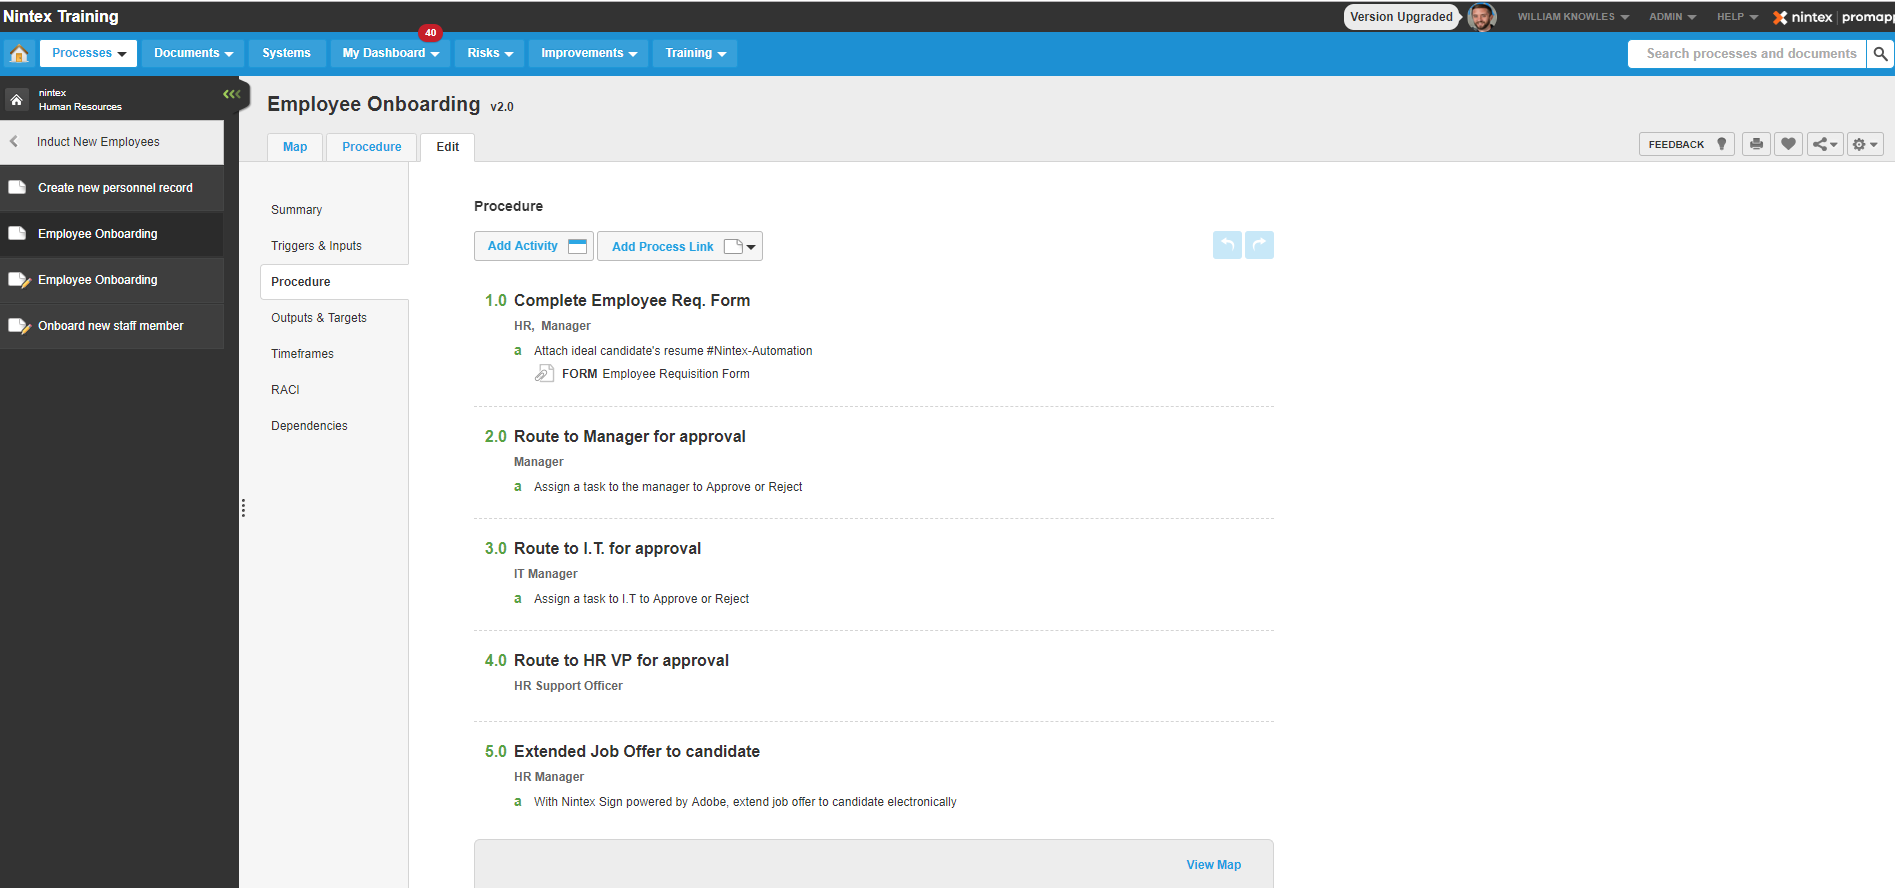
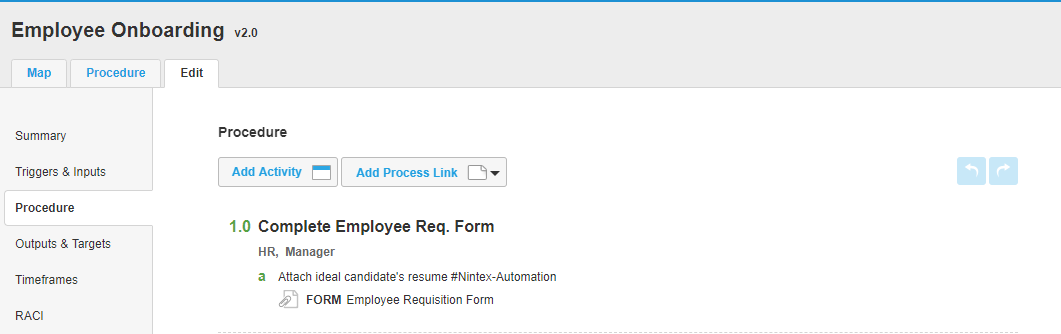
* For Activity 1.0, we will link in the Employee Requisition Form, by clicking on the "Add Document radio button and select Form:
* Select Link Document, Display Name will be Employee Requisition Form, and link to external/ internal file where the form is located. When finished, hit Link:
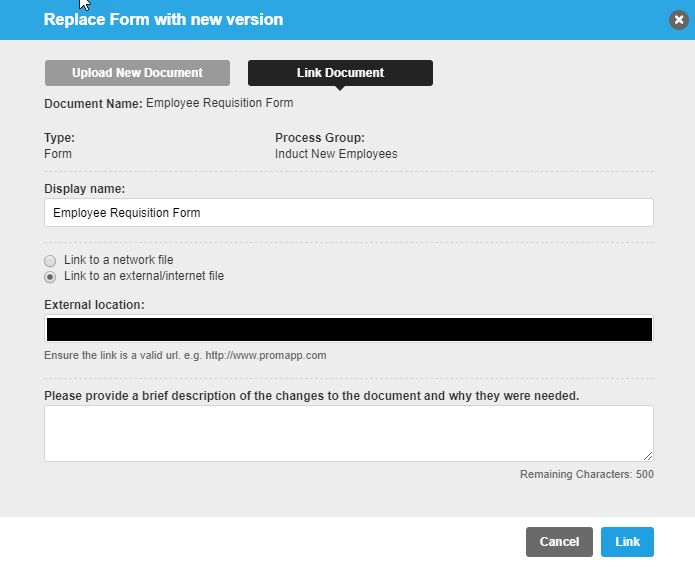
* Form has been linked successfully to Activity 1.0:
This is just the beginning of moving beyond Process Management, into Process Automation.
Stay tuned for Next Month, where we will cover Part3 of Process Automation, which will include the workflow component of this process.
I hope you enjoyed this blog, and found it helpful as you are embarking on your Nintex Experience.
Feel free to connect with me via:
Twitter: Wknowles22
LinkedIn: https://www.linkedin.com/in/willknow/
Email: william.knowles@nintex.com
See you in May :)
