

Intro & Links
This blog post will continue a small series that I have planned, focusing on how Foxtrot RPA and Nintex Workflow Cloud are better together. The intention is to provide ways to integrate the tools until we get the built in functionality that is coming. I will focus on ways to do this using each tool’s built in functionality, rather than any extensibility capability, to emphasize the “no code” philosophy that Nintex aims for. I will update each post with links to the other posts in the series.
- Starting a Botflow from a Workflow (with Document Generation)
- Workflow Waiting for a Botflow to Finish
Just like last time, I’ve got a workflow running and there is a need to interact with a legacy system, or a system without a compatible API for the workflow to hook into. Last time I talked about using Nintex Workflow Cloud’s Generate Document action to trigger the appropriate botflow. This time I will be covering how to utilize a simple email instead.
Nintex Workflow Cloud setup
Someone familiar with NWC will have likely used an Email action before. It is straight forward to setup, similar to sending an email in popular email clients (Outlook, Gmail, etc.). Just drag the Send an Email action onto the workspace to insert it where the botflow needs to pick up the work. Then click on it to access the configuration.
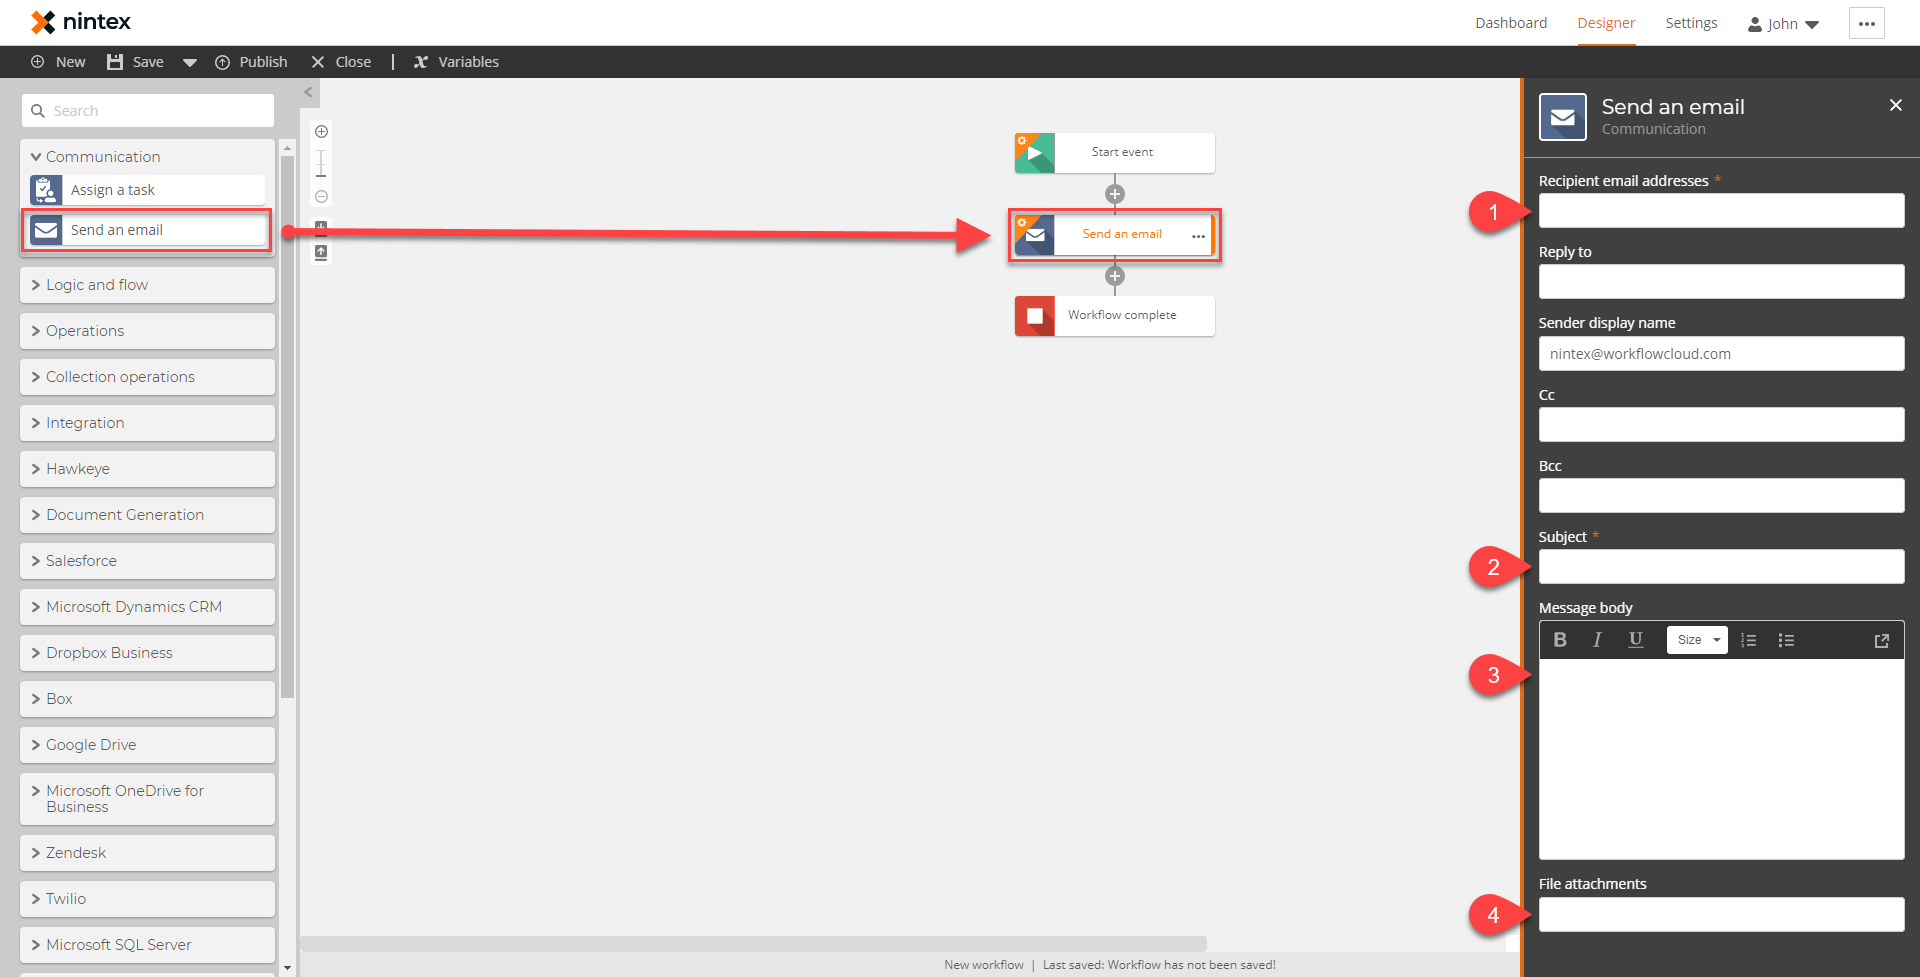
- Recipient email addresses
- Input the email address that this “trigger” will send to. In an ideal world, this would be to an inbox that is dedicate solely to Foxtrot, or even more specifically to this process. But even if that isn’t the case, there won’t be any issues. For troubleshooting and testing purposes, it may be useful to add the workflow creator’s email address to this field as well.
- Subject
- The subject is very important. Within the botflow itself, which will be configured later, a filter will be setup to look for emails with this subject. Keeping it simple, the Workflow Name variable can be used here. The Workflow Instance ID variable can also be added to the subject to provide a unique email chain each time the workflow and botflow are run.
- Message Body
- The body of the email should contain any data that needs to be handed off to the botflow. It is usually best to insert variables between two ‘known’ values, like so:
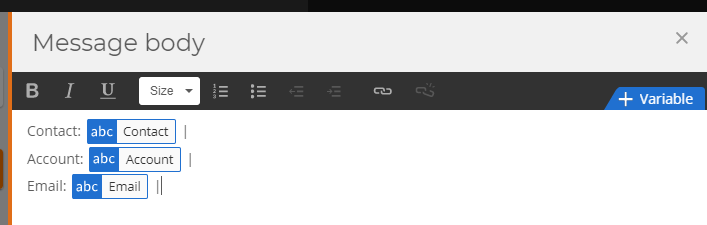
Each variable is between a label and a pipe character. This will make things easier when using Foxtrot’s formulas to extract these data points in the botflow.
- The body of the email should contain any data that needs to be handed off to the botflow. It is usually best to insert variables between two ‘known’ values, like so:
- Attachments (optional)
- If there are any attachments needed for the botflow, this is where the file variable would be placed.
Once everything is setup, it would be a good idea to have the workflow send a test email. This will come in handy later when configuring the botflow, to get an idea of how the email will be structured while building the formulas to pick it apart.
Foxtrot RPA Email Connection
With the test email sent, it is time to configure Foxtrot RPA to receive the email. The first thing to add is the Credential. This will be the username and password that Foxtrot uses to log into the email account. Click the large plus (+) sign to add an item to the botflow, then choose Credential from the list.
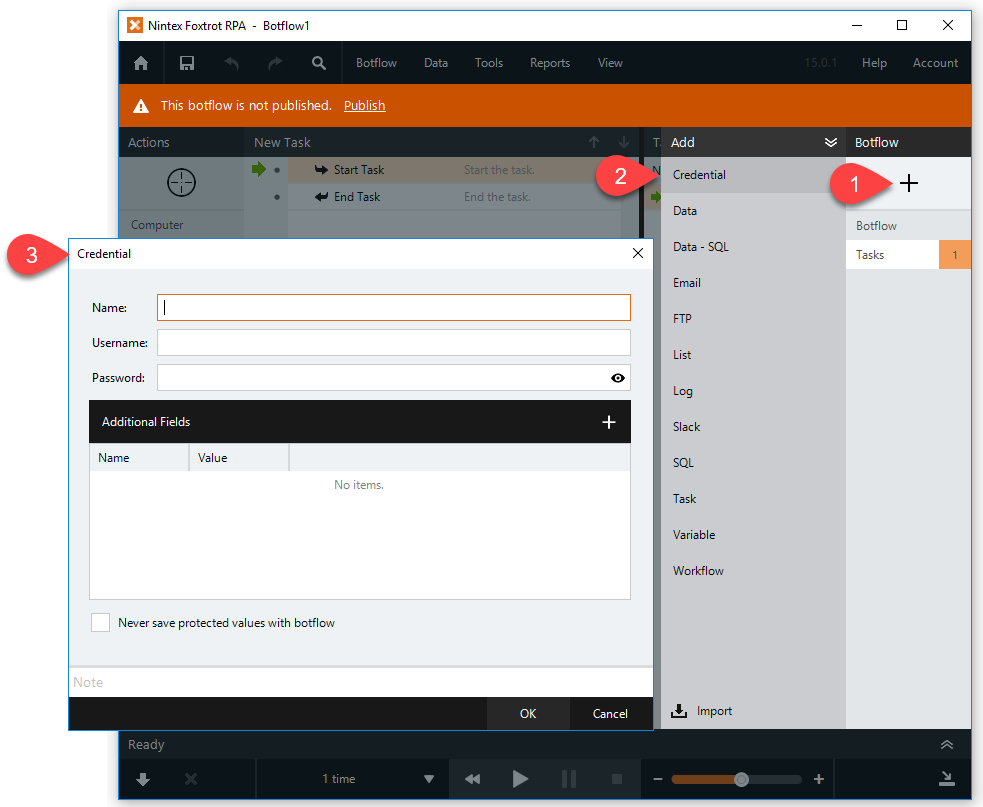
Give the Credential a Name, this is just to easily identify it later on. The Username will likely be the email address that you sent the email to in the previous section.
After the Credential has been added, it is time to add the Email Connection. Again, click the large plus (+) sign to add an item to the botflow, then choose Email from the list.
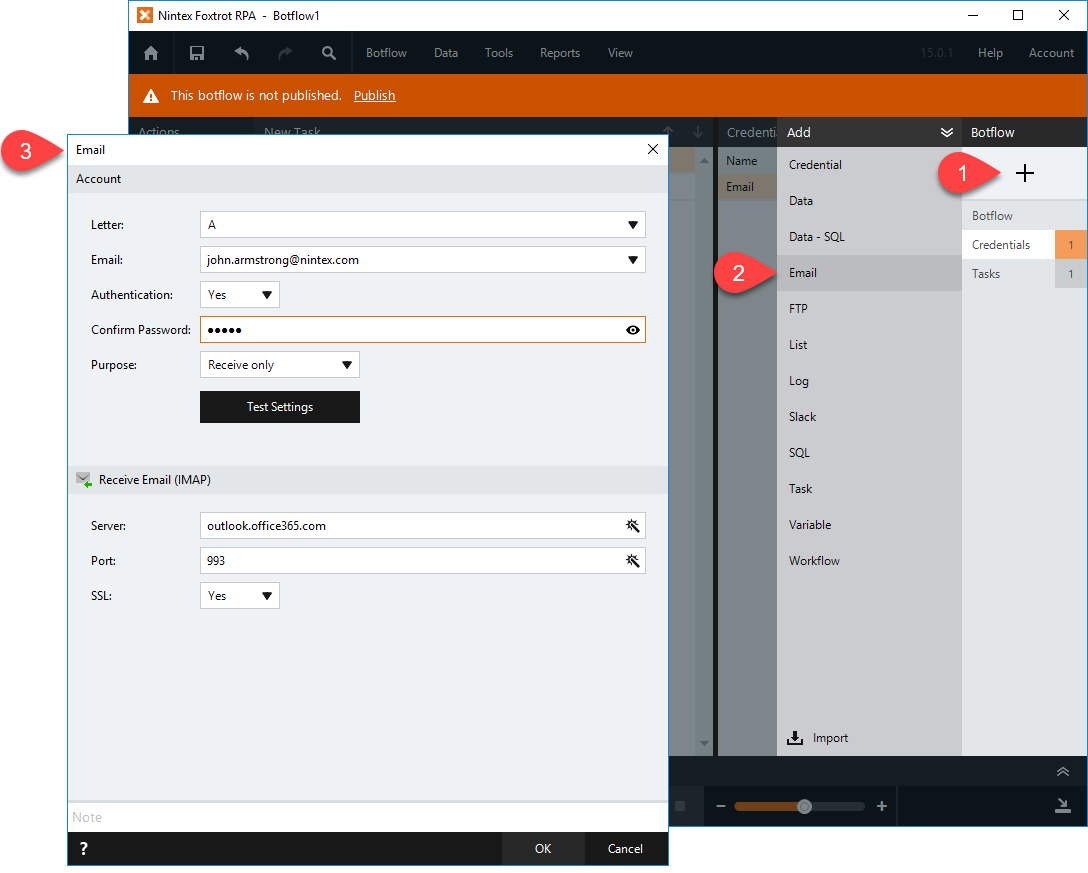
The Letter will be automatically assigned, and the Email should automatically default to the Credential that was just added. If the email account requires Authentication (most do), this setting should be set to Yes. Confirm the password stored in the Credential, and set the Purpose to Receive Only in this case.
For the next section on this screen, the email account’s IMAP information is needed. For popular email services like Gmail or Office 365, a simple Google search can turn up this information but otherwise it may require contacting IT staff to provide this.
Working with Emails in Foxtrot RPA
With the IMAP Connection added, the next step will be to begin creating the steps within the botflow to work with it. The first thing to be added will be a Get Email action. This is found in the action list on the left, under the Email category.
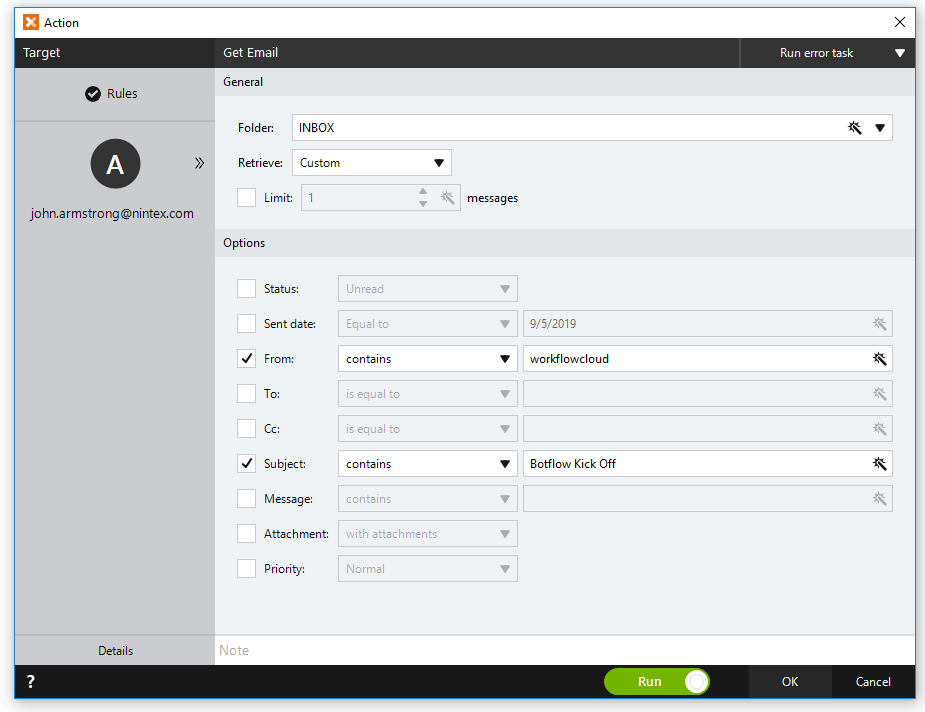
To keep things quick and simple, set the Retrieve field to Custom and set the appropriate filters based on the incoming email from NWC. In my example above, I have filtered based on the From field and Subject field. These filters will depend on how the email was set up in the workflow and should vary with what mine is setup for.
With the Get Email created, let it run to pull in any emails it can based on the filters. This will test if the action works and will make things easier later on when building out the formulas. The action after Get Email will be Loop Email. This is found in the same place as the Get Email action was. There is nothing to be configured here, so just click OK to create it.
Pulling Data from the Email Body
With the Loop Email created, Foxtrot RPA will now preform each action between the Loop Email and End Loop on each email that is pulled in with the Get Email action. The first thing to do will be to grab all the relevant data from the email before continuing with the rest of the process. There are two options to get this done:
- Regular Expression – Foxtrot RPA features a Regular Expression action, found under the Advanced category (in Expert user level only). I personal am not familiar with Regular Expression, so this article won’t cover how to use that. Some users are fluent with using this though, and may have an easier time than using Foxtrot RPA’s built in…
- Formulas – Foxtrot RPA has a large number of Formulas that can be used to manipulate text.
How the data is extracted from the email body will be different depending on how it was setup in the NWC workflow, but I will cover some Formulas that are likely going to be used to do this. Before starting, though, it will be universal to use a Clean and Trim formula on the “Current Email Body Text” token.
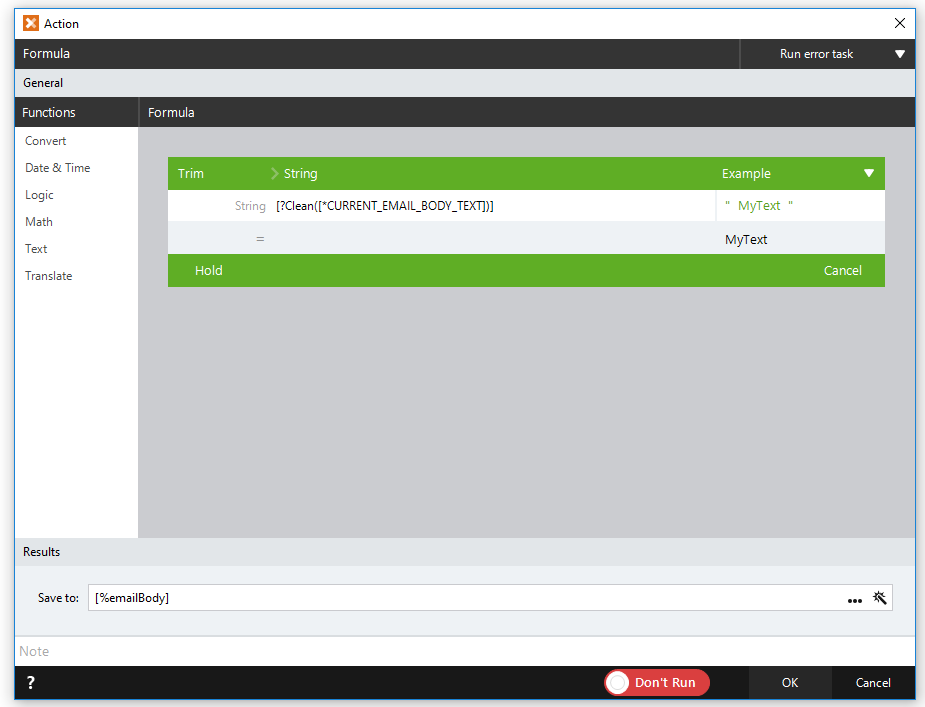
Start by finding the Clean formula under the Text category of the Formula action. In the Item A field, Click the magic wand to open the Expression Builder and navigate to the Loop category to find the “Current Email Body Text” token. Click OK to insert this token and then click Hold on the Clean formula.
Find the Trim formula under the Text category of the Formula action now, and with the cursor in the String field, click the On Hold pop out and select the Clean formula that was just stored there. This is called Nesting Formulas and is a popular technique when manipulating text in Foxtrot RPA. Save this result to a variable then click OK to save and run the action. In the remaining formulas to be created to parse the email body, this output variable should be used as the original input.
The Clean formula removes any stray characters or null values, such as line breaks. Then Trim removes all beginning and ending spaces. The end result is just the data without any “junk”. There are a few other formulas that will be useful when parsing this email body out:
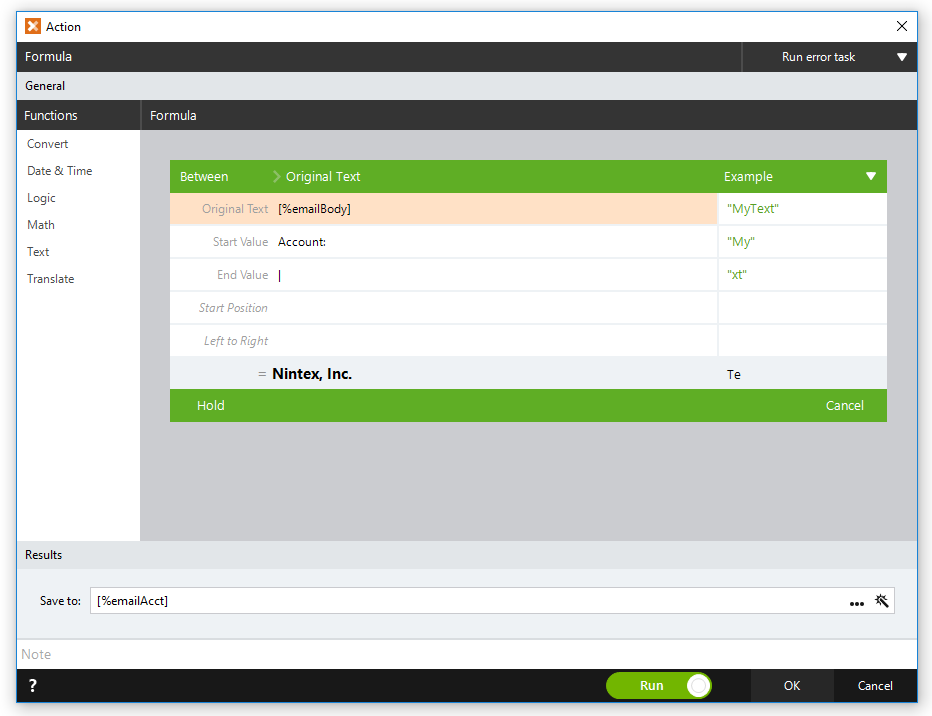
- Between – Provide the Original Text and two values as a start and ending point. This formula will output the string between those two values.
- Left & Right – Pull a specified number of characters from the Left or Right of a certain string.
- LeftOf & RightOf – Designate the original string and an ending value, and this formula will output the string found to the Left of or Right of that ending value.
These five formulas will be the most common for something like this. There are a lot more, and I could encourage experimenting to find what works best.
In my case, I placed known values to the left and right of the variables from my workflow (a field label and a pipe). Because of this, I will be able to use all Between formulas, like so:
With all the Formula actions set up to pull out the data, make sure to save the botflow. The rest of the process that is to be automated by RPA should be added after these Formula actions, but before the End Loop action.
The last action before the End Loop should be either a Move Email action or Delete Email action. This will prevent the same email from being processed multiple times by mistake (thanks to @mbalslow for pointing this out). I would opt for a Move Email action to store this email in another folder for archiving.

Scheduling in FoxHub
With the botflow setup, everything is done in Foxtrot RPA. The next steps will take place in FoxHub. Three things need to be setup in FoxHub: the Bot, the Job, and the Schedule.
By default, the machine that FoxHub is running on will be added as a Bot. If the botflow is intended to run on the same machine as FoxHub, then no further action needs to be taken. If it is intended to run on a machine separate from the FoxHub machine, then the Bot will need to be added. To do this, just right click in the blank space and select Add from the menu. Provide the name of the machine in the ‘Bot’ field, and if needed a specific user to run as can be named.
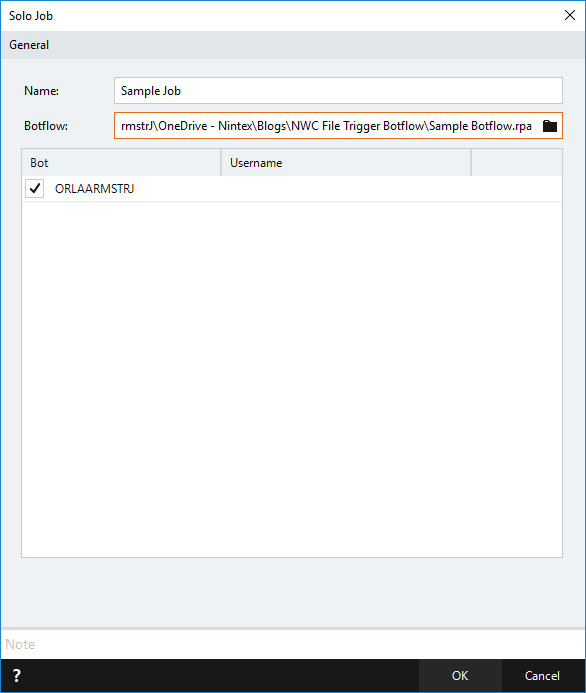
Once the Bot is added, a Job will need to be created. A Job is essentially telling FoxHub what botflow to run on which machines. Again, right click in the blank space and choose Add from the menu. In this case, choose a Solo Job. Provide an identifying name for the Job, then navigate to the directory your botflow was saved in. Select which Bot that the botflow should run on, and click OK to save the Job.
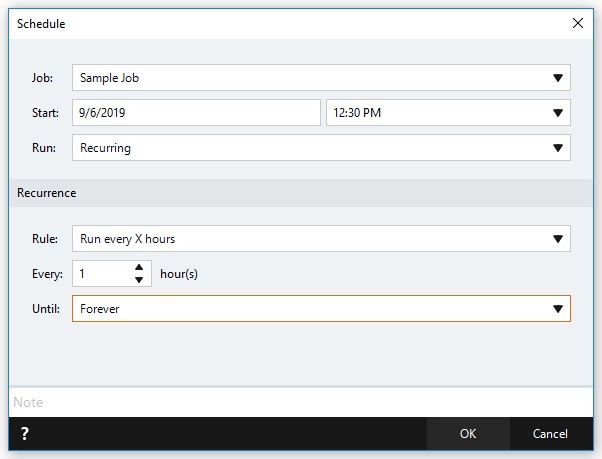
Now that the Job is defined, a Schedule can be setup. Find the Schedule tab on the left-hand side. In the upper right-hand corner, click the plus sign. Choose the Job that was just created and pick a Start date and time. The Run option should be Recurring, with the frequency depending on how often this process should run. In my case, I want it to check every hour until the end of time.
Now with everything setup in Nintex Workflow Cloud, Foxtrot RPA and FoxHub the process is fully automated! The botflow will start running automatically based on the schedule that was setup. In the case where there isn’t an email to process, the botflow will not actually do anything other than check the inbox.
Glad to answer any questions, and would love to hear any feedback in the comments ? Thanks for reading.
- John
Note: This blog was written using version 15 of the Foxtrot Suite. Readers in the future may have a different experience than outlined in the blog post above.
