

Topic
Customers upgrading their IBM java emulator to version 1.1.8.2 or greater will need to follow these instructions to ensure they're able to connect their Nintex RPA instance correctly.
Instructions
1. Make sure you have Nintex RPA/Foxtrot v14.6 or later version
2. Ensure the emulator meets or exceeds version 1.1.8.2 (build 9170) as displayed in the About Box.
3. If a supported version of the emulator is not installed, you may download a supported version here: https://www-01.ibm.com/support/docview.wss?uid=isg3T1026805
Once downloaded, unzip the file into a designated folder. Place the folder on your desktop for convenience.
If you don't have one, there are links on that page to request one, or see if you have one and reset the password. If you take the link to download the Base Package you will get the latest update for the Java based client including the 5250 emulator in the "IBMiAccess_v1r1.zip" file.
The latest EHLLAPI bridge is listed and downloaded as the file "acshllapi.exe" Both of these are the same file name as the previous version(s) so be careful keeping those clear.
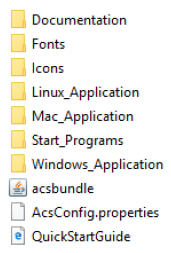
4. Unzipping the file downloaded in Step 3 will reveal the following folders and files:
Place the files into the same directory. You should now see the acslaunch_win-32.exe file in the following directory: [Desktop] IBMiAccess_v1r1Start_ProgramsWindows_i386-32
5. Ensure the IBM iAccess Client Solutions EHLLAPI Bridge 8.9.112 is installed. It should appear in the list of installed applications in Windows. If it is already installed, go down to Continue here if you have the EHLLAPI Bridge

6. To install the EHLLAPI Bridge, run the file included in the earlier download:
[Desktop] IBMiAccess_v1r1acshllapi.exe
When the installer window appears, walk thru each step to install the EHLLAPI Bridge.
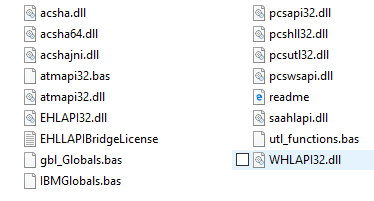
7. Navigate to the EHLLAPI Bridge install directory (C:Program Files (x86)IBMEHLLAPI) and copy the following files into the EmulatorDirectory:
([Desktop] IBMiAccess_v1r1Start_ProgramsWindows_i386-32):
8. Launch the IBM Session Manager by running this executable:
[Desktop] IBMiAccess_v1r1Start_ProgramsWindows_i386-32/ acslaunch_win-32.exe
9. When the IBM iAccess Client Solutions window appears, click the 5250 Session Manager link.
[Desktop] IBMiAccess_v1r1Start_ProgramsWindows_i386-32/ acslaunch_win-32.exe
9. When the IBM iAccess Client Solutions window appears, click the 5250 Session Manager link.
10. When the Session Manager window appears, click the New Display Session button.
11. When the 5250 Display window appears, set the Session Name value to “Nintex RPA”. Enter the Destination Address with the user’s Host IP Address (this can be obtained by looking at the settings of an existing session)
12. Next, select the Start Options view and set the Session ID to A. Click the OK button at the bottom of the window to launch the Session.
13. Wait for the Emulator Session to come up and connect to the host. Confirm the titlebar reads A – Nintex RPA
14. On the menu, click “File -> Save As” and save the Session File to the desktop and name the file NintexRPA.hod
15. On the View menu, UNCHECK the Toolbar and Status Bar options.
16. The Emulator window should now appear with no Toolbar or Status Bar:
17. Warning: This step must be performed AFTER the Toolbar and Status Bar are turned off. On the View menu, UNCHECK the Menu option.
18. The Emulator window should now appear with no Menu
19. Reduce the window width until just before the screen text snaps to a smaller size.
(There should be no “black dead space” on the left or right side of the display. This step is important and allows Nintex RPA to box in coordinates properly.)
20. Reduce the window height until just before the screen text snaps to a smaller size.
(There should be no “black dead space” above or below the display. This step is important and allows Nintex RPA to box in coordinates properly.)
21. Close the emulator window by clicking the CLOSE button on the right side of the title bar. The window should close without prompting to save changes. Note: Changes made to the window size save automatically.
22. Return to the Session Manager window. If you see the Nintex RPA session (depicted here), go down to Continue here if you see the Nintex RPA session in the Session Manager

23. If the Nintex RPA session is NOT displayed in the Session Manager, it is because the Session Manager is not pointed to the directory containing the NintexRPA.hod file you created. On the File menu, click Change Directory. Navigate to the desktop directory, select the Nintex RPA.hod file then click Open.
The Nintex RPA session should now appear in the Session Manager window (as depicted in Step
Continue here if you see the Nintex RPA session in the Session Manager
24. In the Session Manager, double-click the Nintex RPA
25. Launch Nintex RPA and start writing your script
